Selecting an appropriate ANI threshold for de-replication depends on the specific goals of your analysis. ANI measures the similarity between genomes, but the threshold for considering genomes “the same” varies by application. Two key parameters influence this decision:
Minimum secondary ANI: The lowest ANI value at which genomes are considered identical.
Minimum aligned fraction: The minimum genome overlap required to trust the ANI calculation.
These parameters are determined by the secondary clustering algorithm used in tools like dRep ( Galaxy version 3.6.2+galaxy1)
Common Use Cases and Thresholds
Species-Level De-Replication
For generating Species-Level Representative Genomes (SRGs), a 95% ANI threshold is widely accepted. This threshold was used in studies like Almeida et al. 2019 to create a comprehensive set of high-quality reference genomes for human gut microbes. While there is debate about whether bacterial species exist as discrete units or a continuum, 95% ANI remains a practical standard for species-level comparisons. For context, see Olm et al. 2017.
Avoiding Read Mis-Mapping
If the goal is to prevent mis-mapping of short metagenomic reads (typically (( \sim )) 150 bp), a stricter 98% ANI threshold is recommended. At this level, reads are less likely to map equally well to multiple genomes, ensuring clearer distinctions between closely related strains.
Default and Practical Considerations
Default ANI threshold in dRep:95% (suitable for most species-level applications).
Upper limit for detection: Thresholds up to 99.9% are generally reliable, but higher values (e.g., 100%) are impractical due to algorithmic limitations (e.g., genomic repeats). Self-comparisons typically yield (( \sim )) 99.99% ANI due to these constraints.
For strain-level comparisons, consider using InStrain ( Galaxy version 1.5.3+galaxy0) (Olm et al. 2021), which provides detailed strain-resolution analyses.
Important Notes
De-replication collapses closely related but non-identical strains/genomes. This is inherent to the process.
To explore strain-level diversity after de-replication, map original reads back to the dereplicated genomes and visualize the strain cloud using tools like InStrain (Bendall et al. 2016).
After sequencing with MinKNOW software, we get many fastq files, do these files need to be combined into one file before uploading or is it possible to upload them all at once?
After sequencing with MinKNOW software, it is a good approach to combine the files from the same run before processing them. You could create a collection per run with all fastq files and then use the collection operation to concatenate all files in a collection.
AnnData Import/ AnnData Manipulate not working?
This is a known issue, please do not use version 0.7.4 of the tool, and use version 0.6.2 instead. The Inspect AnnData tool should work fine however.
Are Barcodes always on R1 and Sequence data on R2?
No, it really depends on the protocol. In some protocols this convention is swapped, in others the barcodes can be distributed across both reads.
Are these data free to use and download?
Yes, the metadata, aligned reads, and other SARS-CoV-2 data that is mentioned in this training are free to download and have no associated egress charges.
Automatically trim adapters (without providing custom sequences)
There are many tools for this: Trimmomatic, Trim Galore, and a few others (search: “Trim”). In some of these there are options to automatically trim adaptors, but they are not so specific to the sequence you are working on necessarily.
Average Nucleotide Identity (ANI): A Measure of Genomic Similarity
Average Nucleotide Identity (ANI) is a computational metric used to quantify the genomic similarity between two microbial genomes. It measures the mean sequence identity across all orthologous regions—regions of the genome that are shared and aligned between the two organisms. ANI is widely used in microbial genomics and metagenomics to:
Compare the similarity of bacterial or archaeal genomes.
Define species boundaries (e.g., a threshold of 95–96% ANI is commonly used to delineate bacterial species).
Identify redundant genomes in datasets, such as Metagenome-Assembled Genomes (MAGs), for de-replication.
How ANI Is Calculated
Genome Alignment: The genomes of two organisms are compared using whole-genome alignment tools (e.g., BLAST, MUMmer, or FastANI). These tools identify regions of the genomes that are homologous (shared due to common ancestry).
Identity Calculation: For each aligned region, the percentage of identical nucleotides is calculated. ANI is then computed as the mean identity across all aligned regions that meet a specified length threshold (e.g., regions \( \geq \) 1,000 base pairs).
Normalization: ANI accounts for unaligned regions (e.g., due to genomic rearrangements or horizontal gene transfer) by focusing only on the aligned portions of the genomes. This ensures the metric reflects conserved genomic similarity rather than absolute sequence coverage.
Interpreting ANI Values ANI values range from 0% to 100%, where:
ANI \( \approx \) 100%: The genomes are nearly identical, likely representing strains of the same species or clones.
ANI \( \geq \) 95–96%: The genomes likely belong to the same species (a widely accepted threshold for bacterial species delineation).
ANI \( \approx \) 80–95%: The genomes belong to closely related species within the same genus.
ANI \( < \) 80%: The genomes are distantly related and likely belong to different genera or higher taxonomic ranks.
Applications of ANI
Species Delineation: ANI is a gold standard for defining microbial species, replacing or complementing traditional methods like DNA-DNA hybridization (DDH). For example, an ANI \(\geq \) 95% is often used to confirm that two genomes belong to the same species.
De-Replication of MAGs: In metagenomics, ANI is used to identify and remove redundant MAGs from datasets. MAGs with ANI values above a threshold (e.g., 99%) are considered redundant, and only the highest-quality representative is retained for downstream analysis.
Strain-Level Comparisons: ANI can distinguish between closely related strains of the same species, helping researchers study microbial diversity at fine taxonomic resolutions.
Taxonomic Classification: ANI is used to assign unknown genomes to known taxonomic groups by comparing them to reference genomes in databases.
Tools for Calculating ANI
Several bioinformatics tools are available to compute ANI, including:
FastANI ( Galaxy version 1.3) (Jain et al. 2018): A fast, alignment-free tool for estimating ANI between genomes.
PyANI: A Python-based tool that supports multiple ANI calculation methods (e.g., BLAST, MUMmer).
Limitations of ANI
While ANI is a powerful metric, it has some limitations:
Dependence on Alignment: ANI requires sufficiently aligned regions to be accurate. Highly divergent or rearranged genomes may yield unreliable ANI values.
Threshold Variability: The ANI threshold for species delineation (e.g., 95%) may vary depending on the microbial group or study context.
Computational Requirements: Calculating ANI for large datasets (e.g., thousands of MAGs) can be computationally intensive.
Average Nucleotide Identity (ANI) is a fundamental metric in microbial genomics, providing a robust way to compare genomes, define species, and refine metagenomic datasets. By leveraging ANI, researchers can ensure the accuracy and reliability of their genomic analyses, from species classification to de-replication of MAGs.
Can EncyclopeDIA be run on a DIA-MS dataset without a spectral library?
Yes. In this GTN, the workflow presented is the Standard EncyclopeDIA workflow; however, there is a variation upon the Standard EncyclopeDIA workflow, named the WALNUT EncyclopeDIA workflow in which a spectral library is not required. Simply, the WALNUT variation of the workflow omits the DLIB spectral/PROSIT library input, hence requiring just the GPF DIA dataset collection, Experimental DIA dataset collection, and the FASTA Protein Database file. Therefore, the Chromatogram Library is generated using the GPF DIA dataset collection and the FASTA Protein Database alone. This method does generate fewer searches than if a spectral library is used. The Galaxy-P team tested the efficacy of the WALNUT workflow compared to the Standard EncyclopeDIA workflow, and more information on that comparison and those results can be found at this link.
Can I use alternative tools for the Quantification step?
There are some alternatives to Salmon for reference transcriptome-based RNA quantification. Kallisto and Sailfish use a similar approach, known as pseudoalignment.
Can I use these workflows on datasets generated from our laboratory?
Yes, the workflows can be used on other datasets as well. However, you will need to consider data acquisition and sample preparation methods so that the tool parameters can be adjusted accordingly.
Can this ASaiM workflow be used for single-end data?
Yes, the inputs have to be changed to a single-end file rather than a paired-end.
Can we also use this workflow on Illumina raw reads?
Yes, some tools would need to be changed or removed:
For the Preprocessing workflow, plotting with Nanoplot shall be removed and keep only FastQC, MultiQC and Fastp.
For the mapping in the SNP based pathogen detection workflow, instead of Minimap2, Bowtie can be used.
Can we polish the assembly with long reads too?
Yes. In this tutorial, we only polish the assembly with the short reads. This may be enough for bacterial genomes. However, for an even better polish (usually), a common approach is to also polish the assembly with the long reads. A typical workflow for this would assemble with long reads, then polish with long reads (x 4 rounds, with Racon), polish with long reads again (x 1 round, with Medaka), then polish with short reads (x2 rounds with Pilon).
Can we use snippy pipeline instead for the phylogenetic analysis?
On principle yes. We did not try yet. Snippy is available in Galaxy
Can we use the ASaiM-MT workflow on multiple input files at the same time?
Currently, that is one of its limitations. However, Galaxy offers a workflow within workflow feature which can help process multiple files at the same time and this output can be combined into one using the MT2MQ tool.
Changing the heatmap colours
You can change the heatmap color, by expanding the Show advanced options section. There are many options here, including setting the colors.
CheckM2 vs CheckM
CheckM2 (Chklovski et al. 2023) is the successor of CheckM, but CheckM is still widely used, since its marker-based logic can be more interpretable in a biological sense. E.g., to date (2025-11-21), NCBI still allows submitting MAGs to GenBank if either checkM or checkM2 has a completeness of > 90% (see the NCBI WGS/MAG submission guidelines).
Key differences compared to CheckM:
CheckM relies primarily on lineage-specific single-copy marker genes to estimate completeness and contamination of microbial genomes.
CheckM2 uses a machine-learning (gradient boost / ML) approach trained on simulated and experimental genomes, and does not strictly require a well-represented lineage in its marker database.
CheckM2 is reported to be more accurate and faster for both bacterial and archaeal lineages, especially when dealing with novel or very reduced-genome lineages (e.g., candidate phyla, CPR/DPANN) where classical marker-gene methods may struggle.
The database of CheckM2 can be updated more rapidly with new high-quality reference genomes, which supports scalability and improved performance over time.
If you’re working with MAGs from underrepresented taxa (novel lineages) or very small genomes (streamlined bacteria/archaea), CheckM2 tends to give more reliable estimates of completeness/contamination. For more “standard” microbial genomes from well-studied taxa, CheckM may still work well, but you may benefit from the improved performance with CheckM2.
Could I use a different p-adj value for filtering differentially expressed genes?
Yes, you can modify this value, to perform a more rigorous analysis, or extend the range of genes selected. A higher p-value will significantly increase the number of genes selected, at the expense of including possible false positives.
Defining a Learning Pathway
Learning Pathways are sets of tutorials curated by community experts to form a coherent set of lessons around a topic, building up knowledge step by step.
To define a learning pathway, create a file in the learning-pathways/ folder. An example file is also given in this folder (pathway-example.md). It should look something like this:
---
layout: learning-pathway

title: Title of your pathway
description: |
  Description of the pathway. What will be covered, what are the learning objectives, etc?
  Make this as thorough as possible, 1-2 paragraphs. This appears on the index page that
  lists all the learning paths, and at the top of the pathway page
tags: [some, keywords, here ]

cover-image: path/to/image.png # optional cover image, defaults to GTN logo
cover-image-alt: alt text for this image

pathway:
  - section: "Module 1: Title"
    description: |
      description of the module. What will be covered, what should learners expect, etc.
    tutorials:
      - name: galaxy-intro-short
        topic: introduction
      - name: galaxy-intro-101
        topic: introduction

  - section: "Module 2: Title"
    description: |
      description of the tutorial
      will be shown under the section title
    tutorials:
      - name: quality-control
        topic: sequence-analysis
      - name: mapping
        topic: sequence-analysis
      - name: general-introduction
        topic: assembly
      - name: chloroplast-assembly
        topic: assembly
      - name: "My non-GTN session"
        external: true
        link: "https://example.com"
        type: hands_on  # or 'slides'

# you can make as many sections as you want, with as many tutorials as you want

---

You can put some extra information here. Markdown syntax can be used. This is shown after the description on the pathway page, but not on the cards on the index page.
And that’s it!
We are happy to receive contributions of learning pathways! Did you teach a workshop around a topic using GTN materials? Capture the program as a learning pathways for others to reuse!
Do I have to run the tools in the order of the tutorial?
The tools are presented in the order that a typical analysis would use. If you want to run some tools in parallel (to save time) you can do so. This workflow illustrates the analysis done in the tutorial and shows that there are multiple “paths” leading to outputs that have some steps that could be run at the same time: MultiQC, Kraken2, JBrowse and TB Variant Report.
Do the pipelines work with both isolates and direct from raw meat? or only isolate?
The workflow can work with both isolates and raw meat. The workflow is designed to remove hosts before detecting any pathogen, so both isolates and raw meat samples are pre-processed equaliy before the analysis starts.
Do you have resources to help me get started working in the cloud?
Yes, we have a number of documents and videos to help you start working with SRA data in the cloud:
Downloading the files from the NCBI server fails or takes too long.
Download the data from Zenodo instead (see overview box at top of tutorial). This method uses Galaxy’s generic data import functionality, and is more reliable and faster than the download from NCBI.
First job I submitted remains grey or running for a long time - is it broken?
Check with top or your system monitor - if Conda is running, things are working but it’s slow the first time a dependency is installed.
The first run generally takes a while to install all the needed dependencies.
Subsequent runs should start immediately with all dependencies already in place.
Installing new Conda dependencies just takes time so tools that have new Conda packages will take longer to run the first time if they must be installed.
In general, a planemo_test job usually takes around a minute - planemo has to build and tear down a new Galaxy for generating test results and then again for testing properly. Longer if the tool has Conda dependencies.
The very first test in a fresh appliance may take 6 minutes so be patient.
For preprocessing part with host removal: Where do you find the abbreviations for each host species available (e.g. bos is cow, homo is human..)?
The abbreviation (i.e. the genus) is the first word in the list of possible hosts. The names are the scientific names for species, which would be shown on the taxonomy tree if you would look up the common name (i.e. bovine) on Wikipedia.
From where can I import other genomes?
In this tutorial, we used kalamari DB with the full list of possible host sequences that can be removed. Reads are either tagged to map one of those species or are left unassigned. If the task at hand in the real world cannot be covered by those, you can also try another DB for Kraken2 that includes your species (or maybe retain unmapped reads from a read aligner such as Bowtie2, Minimap2…).
How can I add my SIG meetings to the Galaxy Community Activities calendar?
Add the following guest to all of your Google Calendar meeting events: 8a762890fbe724e9d29b67915aa0197a352642f94b22ec64a85430daaf1abb5e@group.calendar.google.com
Then it will show up in the Galaxy Community Activities calendar!
How can I plan meetings across timezones?
Go to a timezone website to see equivalent times across the globe.
Select multiple times that capture at least 2/3 of the globe (we recommend three timezones)
Alternate meetings across those timezones to enable global participation.
Share your meeting time by going to this timezone website and inputting your timezone and meeting time. This will give you a URL you can link to any communications that will automatically convert that time to the local time of anyone opening the URL. You can also include your meeting notes link there for ease.
Time-saving tip: If you meet every 2 months, you can set up 3 recurring calendar events for each time chosen to recur every 6 months. It’s automatic, it’s inclusive, and it’s less effort!
How do I add a news feed to a Matrix channel?
You must be an Admin in the channel. Find this out by going to the channel and selecting Room info –> People, or clicking on the little circle images of people in a channel. Admins can make other admins.
Go to Room info –> Extensions –> Add extension –> Feeds
Under Subscribe to a feed, add a URL from this GTN feeds listing. Make sure that it ends in .xml. For example, https://training.galaxyproject.org/training-material/topics/community/feed.xml would provide updates on any community-tagged GTN materials into the Matrix channel.
Under Template, change the existing text to the following: $LINK: $SUMMARY
Provide a reasonable name, and then hit Subscribe!
Details from Matrix are here: https://ems-docs.element.io/books/element-cloud-documentation/page/migrate-to-the-new-github-and-feeds-bots
Click on Add file in the drop-down menu at the top
Select Create a new file
Fill in the Name of your file field with: name of your community + metadata/categories
This will create a new folder for your community and add a categories file to this folder.
How do I find the Community Home pages?
The Community Home shows statistics for the topic (e.g. number of tutorials, slides, events, contributors, etc), as well as annual “Year in review” sections listing all new additions to the topic/community for each year.
You can find your Community Home by
Opening the GTN Topic page of your choice
Scrolling down to the Community Resources section (below the list of tutorials)
The Maintainer Home pages shows the state of the topic and its materials in terms of which available GTN features are being used, adherence to best practices, and when tutorials have last been updated, and which tutorials are the most used, etc. This can help inform where to focus your efforts.
You can find your Maintainer Home by
Opening the GTN Topic page of your choice
Scrolling down to the Community Resources section (below the list of tutorials)
How do I know what protocol my data was sequenced with?
If you have 10x data, then you just need to count the length of the R1 reads to guess the Chromium version (see this tutorial). For other types of data, you must know the protocol in advance, and even then you must also know the multiplexing strategy and the list of expected (whitelisted) barcodes. The whitelist may vary from sequencing lab to sequencing lab, so always ask the wetlab people how the FASTQ data was generated.
How does one compare metaproteomics measurements from two experimental conditions?
For comparing taxonomy composition or functional content of two conditions in metaproteomics or metatranscriptomics studies, users are recommended to use metaQuantome. GTN tutorials for metaQuantome are available in the proteomics topic.
How does one convert RAW files to MGF peak lists within Galaxy?
Galaxy has implemented msconvert tool so that RAW files from Thermo instruments can be converted into MGF or mzML formats.
How many search engines can you use in SearchGUI?
SearchGUI has options to use upto 9 search algorithms. However, running all at the same time can be time consuming. According to our initial test, upto 4 search engines can give you good results.
How to enable the Activity Bar
This FAQ demonstrates how to enable the activity bar within the Galaxy interface
If you do not see the Activity Bar it can be enabled as follows:
Click on the “User” link at the top of the Galaxy interface
Select “Preferences”
Scroll down and click on “Manage Activity Bar”
Toggle the “Enable Activity Bar” switch and voila!
I cannot run client tests because yarn is not installed.
Make sure you have executed scripts/common_startup.sh and have activated the virtual environment (. .venv/vin/activate) in your current terminal session.
I have FASTQ files from metagenomics or metatranscriptomics datasets? How can I convert them into a protein FASTA file for metaproteomics searches?
Galaxy has a tool named Sixgill that can be used to convert the nucleic acid sequences to ‘metapeptide’ sequences. There are other options available within Galaxy such as the GalaxyGraph approach and Metagenome Binning, Assembly and Annotation Workflow. Please contact us, if you need assistance.
I have a really large search database, what search strategies do you recommend for searching my mass spectrometry dataset?
Readers are encouraged to use the database sectioning approach described by Praveen Kumar et al and available within Galaxy. Readers are also encouraged to consider other approaches such as MetaNovo (not yet available in Galaxy). In absence of any database or taxonomic information about the microbiome dataset, other methods such as COMPIL 2.0 and De novo search methods can also be considered.
I want to use a collection for outputs but it always passes the test even when the script fails. Why?
Collections are tricky for generating tests.
The contents appear only after the tool has been run and even then may vary with settings.
A manual test override is currently the only way to test collections properly.
Automation is hard. If you can help, pull requests are welcomed.
Until it’s automated, please take a look at the plotter sample.
It is recommended that you modify the test over-ride that appears in that sample form. Substitute one or more of the file names you expect to see after the collection is filled by your new tool for the <element.../> used in the plotter sample’s tool test.
In bowtie 2 parameters, in place of 1000 for other experiments, should we mention the median fragment length observed in our library?
Not the median fragment length but the maximum fragment length you expect. However, you will see that in illumina sequencers, the longer the fragments are the less efficiently they are sequenced so long fragment length pairs are not very numerous.
In the MVP platform, is it possible to view the genomic location of all the peptides?
Not really, you can only view the genomic localization of the peptides that were present in the genomic mapping file (output from the first workflow).
Is it possible to replace the existing alignment tools such as HISAT and Freebayes with other tools?
The tools in this workflow are customizable, however, the user has to ensure that the inputs are in the correct format, while using the same reference genome database.
Is it possible to subsample some samples if you have more reads?
Yes, we would recommend to process all reads and just before the peak calling. You can use toolSamtools view to sample the BAM file.
Is it possible to use alternative tools to those proposed in the tutorial?
Yes! There are many tools whose functionality are similar (e.g. Illumina reads can be mapped by using HISAT2 instead of Bowtie2).
Is the ToolFactory a complete replacement for manual tool building?
No, except where all the requirements for the package or script can be satisfied by the limited automated functions of the code generator, or where there is a script with all the complex logic that might otherwise go into XML
Many advanced XML features are not available such as output filters.
Adding DIY output filters, XML macros and some other advanced features is possible if anyone is sufficiently enthusiastic - some features in the galaxyxml package would be relatively straightforward to add.
Is there a way to filter on the Kalimari database?
To filter the Kalamari database, e.g. leaving out milk bacteria only to detect spoilers or contaminants, but the Kalimera list contains a lot more than that, you can:
Look at a publication etc. to find a list of bacteria to remove.
Change the regex ^.*Gallus|Homo|Bos.*$ to ^.*Gallus|Homo|Bos|Bacterium1|Bacterium2...|BacteriumN.*$
Milk pathogens are somewhat known, Salmonella, Escherichia… It might be easier to retain reads only mapping to pathogens instead
Isn't it awkward to find so many humans sequences there, since we filter for them before?
We see a lot that Kraken tends to assign many reads to human, despite they do not map to human genome. Due to resemblance between organisms and the limited species coverage of Kraken databases sometimes does happen that reads corresponding to higher organisms get mapped to humans. It was a very severe problem for the standard databases, because yeast genes were mis-assigned to human.
It says I already have an account when registering for ecology.usegalaxy.eu
The ecology.usegalaxy.eu (and any other Galaxy server ending in usegalaxy.eu) is the SAME server as the regular usegalaxy.eu server, just modified for Ecology analyses.
You can use the SAME credentials you used to register on usegalaxy.eu to log into the ecology server.
If you do not have an account on Galaxy EU yet, will need to create one.
JBrowse is taking a long time to complete?
Normally this should be done in around 3 minutes. However, it might be busy on the servers, so please be patient and come back to it later.
Maximum MAG contamination percentage
Contamination in Metagenome-Assembled Genomes (MAGs) refers to the presence of sequences from organisms other than the target organism. During de-replication, setting a maximum contamination threshold ensures that only high-quality, representative genomes are retained for downstream analyses.
Why Set a Maximum Contamination Threshold?
Data Quality:
High contamination can distort taxonomic classification, functional annotation, and comparative genomics. A contamination threshold ensures that only high-purity MAGs are included.
Accurate De-Replication:
Contaminated MAGs may cluster incorrectly, leading to misrepresentation of microbial diversity. A contamination threshold helps ensure that only genuinely similar genomes are grouped together.
Functional and Ecological Insights: Low-contamination MAGs provide more reliable insights into microbial functions and ecological roles.
Default and Common Contamination Thresholds
The default contamination threshold in dRep is 25%, which balances inclusivity and quality for general metagenomic studies. However, the choice of threshold depends on the specific goals of your analysis:
Threshold
Use Case
< 5%
Ideal for high-confidence analyses, such as reference genomes or species-level comparisons.
< 10%
Suitable for most metagenomic studies, balancing purity and genome diversity.
< 25%
Default in dRep, allowing for broader genome inclusion while maintaining reasonable purity.
< 5% Contamination: Used for high-quality MAGs intended for reference databases or detailed functional analyses.
< 10% Contamination: A widely adopted threshold for general metagenomic studies, balancing purity and genome retention.
< 25% Contamination: The default in dRep, this threshold is more permissive, allowing for a broader range of MAGs while still maintaining reasonable quality.
How to Choose the Right Threshold
Study Goals: For high-quality reference databases, use a < 5% threshold. For general analyses, < 10% is recommended. The default 25% in dRep is suitable for exploratory studies.
Tool Recommendations: Tools like dRep and CheckM provide contamination estimates and allow you to set thresholds based on your needs.
Trade-Offs: Stricter thresholds (e.g., < 5%) will exclude more MAGs, potentially reducing dataset diversity. More permissive thresholds (e.g., < 25%) will retain more MAGs but may include lower-quality genomes.
Setting a maximum contamination threshold is essential for ensuring the quality of de-replicated MAGs. The default threshold in dRep is 25%, but you can adjust it based on your study goals and the trade-offs between purity and genome retention. By carefully selecting this threshold, you can optimize your MAG dataset for accurate downstream analyses.
Minimum MAG completeness percentage
Choosing a minimum genome completeness threshold is a critical but complex decision in de-replication and bin refinement. There is a trade-off between computational efficiency and genome quality:
Lower completeness thresholds allow more genomes to be included but reduce the accuracy of similarity comparisons.
Higher completeness thresholds improve accuracy but may exclude valuable genomes.
Impact of Genome Completeness on Aligned Fractions
When genomes are incomplete, the aligned fraction—the proportion of the genome that can be compared—decreases. For example, if you randomly sample 20% of a genome twice, the aligned fraction between these subsets will be low, even if they originate from the same genome.
This effect is illustrated below, where lower completeness thresholds result in a wider range of aligned fractions, reducing the reliability of similarity metrics like ANI.
Effect on Mash ANI
Incomplete genomes also artificially lower Mash ANI values, even for identical genomes. As completeness decreases, the reported Mash ANI drops, even when comparing identical genomes.
This is problematic because Mash is used for primary clustering in tools like dRep. If identical genomes are split into different primary clusters due to low Mash ANI, they will never be compared by the secondary algorithm and thus won’t be de-replicated.
Practical Implications for De-Replication
Primary Clustering Thresholds:
If you set a minimum completeness of 50%, identical genomes subset to 50% may only achieve a Mash ANI of \( \approx \) 96%. To ensure these genomes are grouped in the same primary cluster, the primary clustering threshold must be \( \leq \) 96%. Otherwise, they may be incorrectly separated.
Computational Trade-Offs:
Lower primary thresholds increase the size of primary clusters, leading to more secondary comparisons and longer runtimes. Higher thresholds improve speed but risk missing true matches.
Unknown Completeness:
In practice, the true completeness of genomes is often unknown. Tools like CheckM estimate completeness using single-copy gene inventories, but these estimates are not perfect in particular for phages and plasmids, explaining why they are not supported in dRep. In general though, checkM is pretty good at accessing genome completeness:
Guidelines for Setting Completeness Thresholds
Avoid thresholds below 50% completeness: Genomes below this threshold are often too fragmented for reliable comparisons, and secondary algorithms may fail.
Adjust Mash ANI thresholds accordingly: If you lower the secondary ANI threshold, also lower the Mash ANI threshold to ensure incomplete but similar genomes are grouped together.
Balancing genome completeness and computational efficiency is key to effective de-replication. While lower completeness thresholds include more genomes, they reduce alignment accuracy and increase runtime. Aim for a minimum completeness of \( \geq \)50% and adjust clustering thresholds to avoid splitting identical genomes.
Minimum MAG length
In dRep, the set of Metagenome-Assembled Genomes (MAGs) undergoes quality filtering before any comparisons are performed. This critical step ensures that only high-quality genomes are retained for downstream analysis, improving both accuracy and computational efficiency.
One of the first steps in quality filtering is length-based filtering. Genomes that do not meet the minimum length threshold are filtered out upfront. This avoids unnecessary CheckM computations and ensures that only sufficiently large genomes are processed.
Important Note: All genomes must contain at least one predicted Open Reading Frame (ORF). Without an ORF, CheckM may stall during processing. To prevent this, a minimum genome length of 10,000 base pairs (bp) is recommended.
The default minimum length threshold in dRep is 50,000 bp. This threshold strikes a balance between computational efficiency and genome quality, ensuring that only meaningful and sufficiently complete genomes are included in the de-replication process.
Most tools seem to have options for assembly using long and short reads, what are the pros and cons of the different tools?
In our experience, when both long and short reads are allowed as input, the difference comes down to the order in which set is assembled first. For example, Unicycler assembles the short reads first (which can be good, because they are more accurate), and then scaffolds these into larger contigs using long reads. Other tools (or workflows) often assemble long reads first (which can also be good because these can span repeat regions), then correct this assembly with information from the more accurate short reads. There may also be other variations on long/short read assembly, and/or iterations of these types of steps (assemble, correct). My preference is to assemble long reads first, but that’s because I’m really interested in covering repeat regions. If accuracy was the aim, rather than contig length, the short-reads-first approach may be better. For even more complexity … I think some tools now allow input of “trusted contigs” - i.e. contigs assembled from other tools. Ryan Wick has a new tool called Trycyler that can take in multiple assemblies to make a consensus (bacterial genomes).
MultiQC error for your FastQC reports?
Please double-check that:
You selected FastQC tool as the source of the log files in MultiQC.
And you provided the Raw Data of FastQC and not the HTML reports.
My Rscript tool generates a strange R error on STDOUT about an invalid operation on a closure called 'args' ?
Did your code declare the args vector with something like args = commandArgs(trailingOnly=TRUE) before it tried to access args[1] ? See the plotter tool for a sample
My Scanpy FindMarkers step is giving me an empty table
Try selecting: “Use programme defaults: Yes” and see if that fixes it.
My snippy is running for a very long time. Is this normal?
As this tutorial uses real world data some of the tools can run for quite a while. During a course we can expected longer run times as the Galaxy servers are heavily used. Typically expected runtimes are approximately:
Tool name
Runtime
FastQC
2 minutes
MultiQC
5 minutes
Trimmomatic
5 minutes
kraken2
5 - 12 minutes
snippy
15 - 25 minutes
TB Variant Filter
2 minutes
TB-Profiler
5 minutes
Text transformation
Less than 1 minute
TB Variant Report
1 minute
JBrowse
5 minutes
Samtools stats (optional)
1 minute
BAM Coverage plotter (optional)
1 minute
On Scanpy PlotEmbed, the tool is failing
Try selecting “Use raw attributes if present: NO”
On the Scanpy PlotEmbed step, my object doesn’t have Il2ra or Cd8b1 or Cd8a etc.
Check your Anndata object - it should be 7874 x 14832, i.e. 7874 cells x 14832 genes. Is it actually 2000 genes only (i.e. and therefore missing the above markers)? You may have selected to remove genes at the Scanpy FindVariableGenes step (last toggle, ‘Remove genes not marked as highly variable’ < Select NO.) (Most likely you did this correctly the first time, but later in investigating how many got marked as highly variable, may have run this tool again and removed the nonvariable ones. We’ve updated the text to more clearly prevent this, but you may have gotten caught out!)
Only one Planemo test runs at a time. Why doesn't the server allow more than one at once?
When a new dependency is being installed in the Planemo Conda repository, there is no locking to prevent a second process from overwriting or otherwise interfering with it’s own independent repository update.
The result is not pretty.
Allowing two tests to run at once has proven to be unstable so the Appliance is currently limited to one.
Preparing materials for asynchronous learning: CYOA
If you are running a remote training, and expect your users to follow a specific path, be certain to include the URL parameter to select the pathway to avoid student confusion. Please note that all tutorials using a CYOA should be tagged which will give you a heads up as a trainer.
Preparing materials for asynchronous learning: FAQs
When you are running a remote, asynchronous lesson, you’ll want to be sure you collect all student questions and add them back to your tutorial afterwards, as FAQs. This will help other learners as they progress through the materials, and can give you a very easy URL to point your learners to if they get stuck on a particular task.
Preparing materials for asynchronous learning: Self-Study
In the context of remote trainings, where a teacher isn’t synchronously available, ensuring that you have questions throughout your materials for students to check their understanding is incredibly key.
Additionally ensuring that solutions are provided, and are correct and up-to-date (or use a snippet explaining data variability along with with ways to check the results) is mandatory. Students will then use these questions to self-check their understanding against what you expected them to learn.
Preparing materials for asynchronous learning: Tips
The use of snippets is extremely important for asynchronous, remote learning. In this situation as students do not have a teacher immediately on hand, and likely do not have friends or colleagues sitting working with them, they will rely on these boxes to refresh their knowledge and know what to do.
Please ensure you test your learning materials with a learner or colleague not familiar the material, and if possible, (silently) watch them go through your lesson. You’ll easily identify which portions need more explanations and details.
Running more than one round of Pilon polishing
Include the most recent polished assembly as input to the next round. You will also need to make a new bam file (here, we have round1.bam and round2.bam).
Round 1
assembly.fasta + illumina reads => BWA MEM => round1.bam
How to know when enough polishing iterations have run?
There is no single answer, but a common way is to see when pilon stops making many polishing changes between rounds. So if round1 made 100 changes, and round2 made only 3, this seems like there would not be much more polishing to do.
How can I see how many changes Pilon has made?
There are two ways that I know of to see how many changes that Pilon made:
The first is to look at the tool standard output (stdout) from Pilon (instructions).
Somewhere near the top of this log file will be a line that says how many corrections (changes) were made.
The second way is to count the number of lines in the changes file. To do this, use the tool called Line/Word/Character counttool, and select the line count option.
TB Variant Report crashes (with an error about KeyError: 'protein')
This is a bug present in TB Variant Report (aka tbvcfreport) version 0.1.8 and earlier. In this case it is triggered by the presence of variants in Rv3798. You only see this bug, however, if you forget to run tb_variant_filter (TB Variant Filter). Rv3798 is a suspected transposase and any variants in this gene region would be filtered out by tb_variant_filter, so if you see this crash, make sure you have run the filter step before the TB Variant Report step.
The Build tissue-specific expression dataset tool (step one) exits with an error code.
For the HPS source files version select HPA normal tissue 23/10/2018 rather than the version from 01/04/2020.
The UMAP Plots errors out sometimes?
Try a different colour palette. For upstream code reasons, the default color palette sometimes causes the tool to error out.
Under Plot attributes, do
“Colour map to use for continuous variables”: viridis
“Colors to use for plotting categorical annotation groups”: plasma
The folder `recipes/belerophon/` and the file `meta.yaml` already exist in bioconda?
The recipe has already been added previously. If you want to create the recipe from scratch you may just do this in another directory below recipes/.
The input for a tool is not listed in the dropdown
This tutorial uses collections, some tools will require collections as input (e.g. Taxonomy-to-Krona). To select a collection as in put to a file, click on the param-collectionDataset collection button in front of the input parameter you want to supply the collection to.
UCSC import: what should my file look like?
~2020 lines, with the following header line:
bin name chrom strand txStart txEnd cdsStart cdsEnd exonCount exonStarts exonEnds score name2 cdsStartStat cdsEndStat exonFrames
Where:
txStart: Transcript start site
cdsStart: CodingSequence start site
Note: UCSC is updated frequently, you might get a slightly different number of lines. If you only get one row in this file, make sure you requested the entire chr22, not just one position.
What advantages does a Chromatogram Library have over a DDA-generated library or predicted spectral library?
While generating a Chromatogram Library is the most time consuming step of the EncyclopeDIA workflow, it is beneficial to DIA data analysis. DIA is a novel technique and methods for DIA data analysis are still being developed. One method commonly used includes searching DIA data against DDA-generated libraries. However, there are limitations in this method. Firstly, DDA-generated libraries are not always an accurate representation of DIA data: differences in the methods of data collection play an important role in the efficacy of the library. Secondly, DDA-generated libraries often require labs to run completely separate DDA experiments to simply generate a library with which to analyze their DIA data. Chromatogram Libraries mitigate some of the previous shortcomings mentioned. DIA data is incorporated into the generation of the Chromatogram Library and therefore provides context to the DIA data being analyzed. Secondly, the ELIB format of the Chromatogram Library allows for extra data to be included in the analysis of the DIA data, including intensity, m/z ratio, and retention time compared to the use of a DDA-generated DLIB library. Lastly, a Chromatogram Library can be generated without the use of a spectral library (as mentioned in the last question). Therefore, it is possible to forgo DDA data collection as the DLIB DDA-generated library is not strictly needed for Chromatogram Library generation and to run the EncyclopeDIA workflow (saving time and resources).
What does `^.*Gallus|Homo|Bos.*$` mean?
^.*Gallus|Homo|Bos.*$ is a regular expression that matches a string containing the words Gallus OR Homo OR Bos.
What file/data formats are defined for I/O in Galaxy?
[galaxy-root]/config/datatypes_conf.xml is read at startup so new datatypes can be defined.
What is Gene Ontology (GO)?
A very commonly used way of specifying these sets is to gather genes/proteins that share the same Gene Ontology (GO) term, as specified by the Gene Ontology Consortium.
The GO project provides an ontology that describes gene products and their relations in three non-overlapping domains of molecular biology, namely “Molecular Function”, “Biological Process”, and “Cellular Component”. Genes/proteins are annotated by one or several GO terms, each composed of a label, a definition and a unique identifier. GO terms are organized within a classification scheme that supports relationships, and formalized by a hierarchical structure that forms a directed acyclic graph (DAG). In such a graph is used the notions of child and parent, where a child inherits from one or multiple parents, child class having a more specific annotation than parent class (e.g. “glucose metabolic process” inherits from “hexose metabolic” parent term which itself inherits from “monosaccharide metabolic process” etc.). In this graph, each node corresponds to a GO term composed of genes/proteins sharing the same annotation, while directed edges between nodes represents their relation (e.g. ‘is a’, ‘part of’) and their roles in the hierarchy (i.e. parent and child).
The Galaxy Communities Dock or Galaxy CoDex is a centralized repository that ensures the versioning and documentation of the community components (Batut et al., 2024; NASR et al., 2025). The codex is composed of
The Community lab, a centralised webpage that enables communities to rapidly aggregate, curate, integrate, display, and launch relevant tools, workflows, and training on different Galaxy servers. This user-friendly interface, built on the Galaxy framework, provides community members with data analysis capacity without requiring programming expertise. Users can run individual tools or create complex workflows, with full provenance tracking to ensure reproducibility, designed specifically for the community research (NASR et al., 2025). For example, the microgalaxy lab (Europe).
What is a SNP?
SNP (pronounced “snip”) stands for Single Nucleotide Polymorphism. This means a single nucleotide change as compared to the reference genome.
Enrichment analysis approach (also called over-representation analysis (ORA)) was introduced to test whether pre-specified sets of proteins (e.g. those acting together in a given biological process), change in abundance more systematically than as expected by chance. This type of analysis investigates hypotheses that are more directly relevant to the biological function, and can also help highlight a process over-represented within a subset of proteins.
What other methods are available to study the functional state of the microbiome within Galaxy?
Other software such as EggNOG Mapper, MEGAN5, MetaGOmics, MetaProteomeAnalyzer (MPA) and ProPHAnE also generate functional outputs.
What should I do special if on usegalaxy.be?
Note for anyone trying to follow the tutorial on usegalaxy.be:
In step 3 of the hands-on section of setting up the sars-cov-2 analysis bot, when suggested to run
planemo run vcf2lineage.ga vcf2lineage-job.yml --profile planemo-tutorial --history_name "vcf2lineage test"
please use directly the workflow ID 814dd8d1c056bc54 instead of vcf2lineage.ga. This ID points to a public workflow that’s using the version of the pangolin tool installed on usegalaxy.be`.
What software tools are available to determine taxonomic composition from mass spectrometry data?
Within the Galaxy framework we recommend the use of Unipept software that uses NCBI taxonomy and UniProt databases to detect unique peptides for taxonomy. Other software tools such as MetaTryp 2.0 (PMID: 32897080) can also be used to determine the taxonomic composition of the metaproteomics datasets.
What's the Galaxy Community Board?
The Galaxy Community Board provides a supportive virtual forum for the exchange of ideas, and a governance body to represent Special Interest Groups (SIGs) in Galaxy.
The goals of the GCB are to:
share resources, tips & best practices to make running SIGs easier;
discuss scientist (user) feedback to help guide Galaxy platform development;
communicate scientist (user) needs to the Galaxy Governance structure; and
develop proposals to advance scientist (user) goals in the Galaxy community.
When I get a warning for base per sequence content, what should I do?
So far it does not mean that your data is bad. Your protocol or your data might have a bias that you normally expect. Check first the following things:
Adapter content (maybe some adapters are still in your data)
Kmer content/Over represented sequences (this would indicate a contamination or a protocol/sequence bias)
Per base quality plot. If the overall quality is not good, then probably the sequencing was poorly performed.
Read about your protocol, e.g., ChIP-Seq and ATAC-Seq typically have a nucleotide bias. For example this article about ATAC-Seq.
When I try to run a Selenium test, I get an error
If you get the following error:
selenium.common.exceptions.SessionNotCreatedException (...This version of ChromeDriver only supports Chrome version...)
Make sure that (a) the version of your ChromeDriver is the same as the version of Chrome:
move the chromedriver file into the appropriate location.
On Linux, that could be /usr/bin, $HOME/.local/bin, etc.
Use the which command to check the location: $ which chromedriver
Make sure the permissions are correct (755).
When will aligned read objects be available for other data types?
We hope to have these constructed for long read SARS-CoV-2 data in the near future. If there is strong community interest we may expand this offering to other organisms or data types such as metagenome submissions. If you would like this format for other datasets, write to the SRA helpdesk (sra@ncbi.nlm.nih) and let us know!
Where can I find example queries for use in the cloud and elsewhere?
We have examples on our website for Athena (link) and BigQuery (link) which can be easily adapted to other environments.
Where can I find the full listing and description of the columns in each metadata table?
Plese see the installation section. Essentially you can pip install planemo. If you don’t have pip, you need to install this first.
On windows you’ll need WSL2 and then you can apt-get install python3-pip, same for ubuntu. For OSX users it is probably present.
Where can I read more about Quality Control of data?
I really like QCFAIL, It has some nice user stories of quality control issues encountered in real data and experiments
Which icons are available to use in my tutorial?
To use icons in your tutorial, take the name of the icon, ‘details’ in this example, and write something like this in your tutorial:
{% icon details %}
Some icons have multiple aliases, any may be used, but we’d suggest trying to choose the most semantically appropriate one in case Galaxy later decides to change the icon.
New icons can be added in _config.yaml, and you can search for the corresponding icons at FontAwesome
Which search algorithms are recommended for searching the metaproteomics data?
SearchGUI supports search using nine search algorithms (X! Tandem. MS-GF+. OMSSA, Comet, Tide, MyriMatch, MS_Amanda, DirecTag and Novor). For this tutorial, we have used the first two search algorithms in the list. In our hands, the first four search algorithms have given us the most optimal results.
Which version of SearchGUI and PeptideShaker shall I use for this tutorial?
We highly recommend the usage of SearchGUI Galaxy version 3.3.10.1 and PeptideShaker version Galaxy Version 1.16.36.3. The newer versions of SearchGUI and PeptideShaker have not yet been tested for this workflow.
Why do I need that big (~5GB!) complicated Docker thing - can I just install the ToolFactory into our local galaxy server from the toolshed?
You can but it can’t really be very useful. The ToolFactory is a Galaxy tool, but it installs newly generated tools automatically into the local Galaxy server. This is not normally possible because a tool cannot escape Galaxy’s job execution environment isolation. The ToolFactory needs to write to the normally forbidden server’s configuration so the new tool appears in the tool menu and is installed in the TFtools directory which is a subdirectory of the Galaxy tools directory. The Appliance is configured so the ToolFactory and the Planemo test tool use remote procedure calls (RPC using rpyc) to do what tools cannot normally do. The rpyc server runs in a separate container. Without it, tool installation and testing are difficult to do inside Galaxy tools. Known good tools can be uploaded to a local toolshed from your private appliance for installation to that server of yours. Debugging tools on a production server is not secure SOP. You just never know what might break. That’s why a desktop disposable appliance is a better choice.
Why do we change the chromosome names in the Ensembl GTF to match the UCSC genome reference?
UCSC chromosome names begin with the prefix chr, but Ensembl chromosome names do not. For example, chromosome 19 would be denoted as chr19 in UCSC, and as 19 in Ensemble. Most tools would view those as different when looking for matches/overlaps. Therefore it is always a good idea to make sure these match before you perform any downstream analysis.
Why do we do dimension reduction and then clustering? Why not just cluster on the actual data?
Within the Galaxy framework we recommend the use of Unipept software that uses UniProt databases and annotation to detect proteins (EC terms) and functional groups such as GO Ontology and InterPro terms. Other software tools such as EggNOG Mapper are also available within the Galaxy platform. Other software such as MEGAN5, MetaGOmics, MetaProteomeAnalyzer (MPA), ProPHAnE also generate functional outputs.
Why do we have a variant mapping file when it is not being used in the workflow?
We are working on updating the existing annotation tool to include the variant mapping file. Once that is done, the variant mapping file will also be an input for those tools.
Why do we use FASTQ interlacer and not the FASTQ joiner?
The reason ASaiM-MT uses FASTQ-interlacer than FASTQ-joiner for combining forward and reverse reads is because the joiner tool combines the forward and reverse read sequence together while the interlacer puts the forward and reverse read sequences in the same file while retaining the entity of each read along with an additional file with unpaired sequences and it maintains the integrity of the reads while helping us distinguish between the forward and reverse reads.
Why does my assembly graph in Bandage look different to the one pictured in the tutorial?
The assembly process in Flye is heuristic, and the resulting assembly will not necessarily be exactly the same each time. This may happen even if running the same data with the same version of Flye. It can also happen with a different version of Flye.
To make things more complicated (stop reading now if you would like!)… the chloroplast genome has a structure that includes repeats (the inverted repeats), and, the small-single-copy region of the chloroplast exists in two orientations between these repeats. So, sometimes the assembly will be a perfect circle, sometimes the inverted repeats will be collapsed into one piece, and sometimes the small-single-copy region will be attached ambiguously. To make things even more complicated…the chloroplast genome may even be a dynamic structure, due to flip flop recombination.
Why does the query `SRR11772204 OR SRR11597145 OR SRR11667145` in the Run Selector not return any results?
The query for sars-cov-2 in SRA Entrez returns over 250K results, but only the first 20k are sent to the Run Selector. Enter the above query in Entrez directly to find the three runs used for the tutorial and send them to the Run Selector to send to Galaxy.
Why don't the aligned read files have quality scores?
Quality scores take up the majority of space in our compressed sequence files, so removing them makes the files much smaller (~80% or more). In addition, many uses don’t require per-base quality scores to successfully complete their work (some pipelines even require fastq format but don’t actually use the quality scores), so these files represent a faster route to completing many analyses. The full quality scores are still available in the original SRA Runs for anyone that requires them, using the SRA Tools available in Galaxy.
Why don't we perform the V-Search dereplication step of ASaiM for metatrascriptomic data?
In the metatranscriptomics data, duplicated reads are expected. And to keep the integrity of the sample, we would like to retain the reverse reads.
Why is Alevin is not working?
Check your tool version, you need to use 1.3.0+galaxy2
`docker-compose up` fails with error `/usr/bin/start.sh: line 133: /galaxy/.venv/bin/uwsgi: No such file or directory`
This is why it’s useful to watch the boot process without detaching
This can happen if a container has become corrupt on disk after being interrupted
cured by a complete cleanup.
Make sure no docker galaxy-server related processes are running - use docker ps to check and stop them manually
delete the ..compose/export directory with sudo rm -rf export/* to clean out any corrupted files
run docker system prune to clear out any old corrupted containers, images or networks. Then run docker volume prune in the same way to remove the shared volumes.
run docker-compose pull again to ensure the images are correct
run docker-compose up to completely rebuild the appliance from scratch. Please be patient.
Not strictly, but unique enough. The distribution of UMIs should ideally be uniform so that the chance of any two same UMIs capturing the same transcript (via different amplicons) is small. As barcodes have increased in size, the number of UMIs has also increased allowing for UMIs to reach more or less the same numbers of transcripts.
Can RNA-seq techniques be applied to scRNA-seq?
The short answer is ‘no, but yes’. At the beginning this was impossible due to the over-prevalence of dropout events (“zeroes”) in the data complicating the normalisation techniques, but this is not so much of a problem any more with newer methods.
Notebook-based tutorials can give different outputs
The nature of coding pulls the most recent tools to perform tasks. This can - and often does - change the outputs of an analysis. Be prepared, as you are unlikely to get outputs identical to a tutorial if you are running it in a programming environment like a Jupyter Notebook or R-Studio. That’s ok! The outputs should still be pretty close.
Why do we do dimension reduction and then clustering? Why not just cluster on the actual data?
The actual data has tens of thousands of genes, and so tens of thousands of variables to consider. Even after selecting for the most variable genes and the most high quality genes, we can still be left with > 1000 genes. Performing clustering on a dataset with 1000s of variables is possible, but computationally expensive. It is therefore better to perform dimension reduction to reduce the number of variables to a latent representation of these variables. These latent variables are ideally more than 10 but less than 50 to capture the variability in the data to perform clustering upon.
Why do we only consider highly variable genes?
The non-variable genes are likely housekeeping genes, which are expressed everywhere and are not so useful for distinguishing one cell type from another. However background genes are important to the analysis and are used to generate a background baseline model for measuring the variability of the other genes.
Why is amplification more of an issue in scRNA-seq than RNA-seq?
Due to the extremely small amount of starting material, the initial amplification is likely to be uneven due to the first cycle of amplified products being overrepresented in the second cycle of amplification leading to further bias. In Bulk RNA-seq, the larger selection of RNA molecules to amplify, evens out the odds that any one transcript will be amplified more than others.
Why is my tool erroring as 'Above error raised while reading key '/layers' of type from /.'
Are you getting the following error, or similar?
Traceback (most recent call last):
File "/usr/local/lib/python3.9/site-packages/anndata/_io/utils.py", line 177, in func_wrapper
return func(elem, *args, **kwargs)
File "/usr/local/lib/python3.9/site-packages/anndata/_io/h5ad.py", line 527, in read_group
EncodingVersions[encoding_type].check(
File "/usr/local/lib/python3.9/enum.py", line 432, in __getitem__
return cls._member_map_[name]
KeyError: 'dict'

During handling of the above exception, another exception occurred:

Traceback (most recent call last):
File "/usr/local/bin/scanpy-cli", line 10, in <module>
sys.exit(cli())
File "/usr/local/lib/python3.9/site-packages/click/core.py", line 829, in __call__
return self.main(*args, **kwargs)
File "/usr/local/lib/python3.9/site-packages/click/core.py", line 782, in main
rv = self.invoke(ctx)
File "/usr/local/lib/python3.9/site-packages/click/core.py", line 1259, in invoke
return _process_result(sub_ctx.command.invoke(sub_ctx))
File "/usr/local/lib/python3.9/site-packages/click/core.py", line 1259, in invoke
return _process_result(sub_ctx.command.invoke(sub_ctx))
File "/usr/local/lib/python3.9/site-packages/click/core.py", line 1066, in invoke
return ctx.invoke(self.callback, **ctx.params)
File "/usr/local/lib/python3.9/site-packages/click/core.py", line 610, in invoke
return callback(*args, **kwargs)
File "/usr/local/lib/python3.9/site-packages/scanpy_scripts/cmd_utils.py", line 45, in cmd
adata = _read_obj(input_obj, input_format=input_format)
File "/usr/local/lib/python3.9/site-packages/scanpy_scripts/cmd_utils.py", line 87, in _read_obj
adata = sc.read(input_obj, **kwargs)
File "/usr/local/lib/python3.9/site-packages/scanpy/readwrite.py", line 112, in read
return _read(
File "/usr/local/lib/python3.9/site-packages/scanpy/readwrite.py", line 713, in _read
return read_h5ad(filename, backed=backed)
File "/usr/local/lib/python3.9/site-packages/anndata/_io/h5ad.py", line 421, in read_h5ad
d[k] = read_attribute(f[k])
File "/usr/local/lib/python3.9/functools.py", line 877, in wrapper
return dispatch(args[0].__class__)(*args, **kw)
File "/usr/local/lib/python3.9/site-packages/anndata/_io/utils.py", line 183, in func_wrapper
raise AnnDataReadError(
anndata._io.utils.AnnDataReadError: Above error raised while reading key '/layers' of type <class 'h5py._hl.group.Group'> from /.
This is likely a Tool Version error. If you use a newer version of a tool with an AnnData object, and then try and use an older version of the tool or other tool in the same toolsuite (Scanpy) later, this will often fail with the above error message. The Scanpy toolsuite is not ‘backwards compatable’ - few toolsuites are. If this happened while performing a tutorial, we recommend Tutorial Mode as this embeds the correct tool version in each tool button.
Tools are frequently updated to new versions. Your Galaxy may have multiple versions of the same tool available. By default, you will be shown the latest version of the tool. This may NOT be the same tool used in the tutorial you are accessing. Furthermore, if you use a newer tool in one step, and try using an older tool in the next step… this may fail! To ensure you use the same tool versions of a given tutorial, use the Tutorial mode feature.
Open your Galaxy server
Click on the curriculum icon on the top menu, this will open the GTN inside Galaxy.
Navigate to your tutorial
Tool names in tutorials will be blue buttons that open the correct tool for you
Note: this does not work for all tutorials (yet)
You can click anywhere in the grey-ed out area outside of the tutorial box to return back to the Galaxy analytical interface
Warning: Not all browsers work!
We’ve had some issues with Tutorial mode on Safari for Mac users.
Try a different browser if you aren’t seeing the button.
To fix this in your current history, try re-running the tool with the newer tool version. Or, re-run the prior dataset with an older version.
Tools are frequently updated to new versions. Your Galaxy may have multiple versions of the same tool available. By default, you will be shown the latest version of the tool.
Switching to a different version of a tool:
Open the tool
Click on the tool-versions versions logo at the top right
We also post new tutorials / workflows there from time to time, as well as any other news.
point-right If you’d like to contribute ideas, requests or feedback as part of the wider community building single-cell and spatial resources within Galaxy, you can also join our Single cell & sPatial Omics Community of Practice.
The tutorial uses the normalised count table for visualisation. What about using VST normalised counts or rlog normalised counts?
this depends on what you would like to do with the table. The DESeq2 wrapper in Galaxy can output all of these, and there is a nice discussion in the DESeq2 vignette about this topic.
I’m using the same training data, tools, and parameters as the tutorial, but I get a different number of transcripts with a significant change in gene expression between the G1E and megakaryocyte cellular states. Why?
This is okay! Many aspects of the tutorial can potentially affect the exact results you obtain. For example, the reference genome version used and versions of tools. It’s less important to get the exact results shown in the tutorial, and more important to understand the concepts so you can apply them to your own data.
Think of it like a fingerprint that some cells exhibit and others don’t. It’s a small collection of genes which are up or down regulated in relation to one another. Their differences are not absolute, but relative. So if CellA has 100 counts of Gene1 and 50 counts of Gene2, this creates a relation of 2:1 between Gene1 and Gene2. If CellB has a 20 counts of Gene1 and 10 counts of Gene2, then they share the same relation. If CellA and CellB share other relations with other genes than this might be enough to say that they share a Gene profile, and will therefore likely cluster together as they describe the same cell type.
Did you know we have a unique Single Cell Omics Lab with all our single cell tools highlighted to make it easier to use on Galaxy? We recommend this site for all your single cell analysis needs, particularly for newer users.
The Single Cell Omics Lab is a different view of the underlying Galaxy server that organises tools and resources better for single-cell users! It also provides a platform for communities to engage and connect; distribute more targeted news and events; and highlight community-specific funding sources.
Forgot your password? You can request a reset link in on the login page.
If you want to associate your account with a different email address, you can do so under User -> Preferences in the top menu bar.
To start over with a new account, delete your existing account(s) first before creating your new account. This can be done in User -> Preferences menu in the top bar.
Changing account email or password
Start at the Galaxy server where you are working. Remember that accounts at different Galaxy servers are distinct.
Log into your account.
Go to User -> Preferences in the masthead (find this on the right, near the top).
Click on Manage Information.
You may change your email address and public name on the form.
Your may also change your password by clicking on Change Password.
When done, click on the Save button at the bottom.
Go to your email account to find the message from us. Verify your account changes by clicking on the activation link. No email? Check your spam and trash folders.
Try logging into Galaxy with your new credentials!
tip Notes
Please do not open a new account if your email changes, instead, update the existing account’s email address.
We cannot merge accounts. Download your data then delete any excess accounts created by accident.
How can I reduce quota usage while still retaining prior work (data, tools, methods)?
Download Datasets as individual files or entire Histories as an archive. Then purge them from the public server.
Transfer/MoveDatasets or Histories to another Galaxy server, including your own Galaxy. Then purge.
Copy your most important Datasets into a new/other History (inputs, results), then purge the original full History.
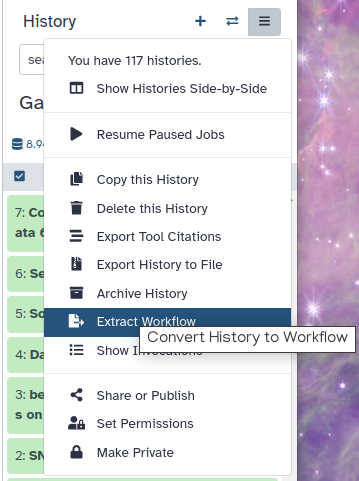
Extract a Workflow from the History, then purge it.
Back-up your work. It is a best practice to download an archive of your FULL original Histories periodically, even those still in use, as a backup.
Resources Much discussion about all of the above options can be found at the Galaxy Help forum.
How do I create an account on a public Galaxy instance?
To create an account at any public Galaxy instance, choose your server from the available list of Galaxy Platforms.
Click on “Login or Register” in the masthead on the server.
On the login page, find the Register here link and click on it.
Fill in the the registration form, then click on Create.
Your account should now get created, but will remain inactive until you verify the email address you provided in the registration form.
Check for a Confirmation Email in the email you used for account creation.
Missing? Check your Trash and Spam folders.
Click on the Email confirmation link to fully activate your account.
galaxy-info Delivery of the confimation email is blocked by your email provider or you mistyped the email address in the registration form?
Please do not register again, but follow the instructions to change the email address registered with your account! The confirmation email will be resent to your new address once you have changed it.
Trouble logging in later? Account email addresses and public names are caSe-sensiTive. Check your activation email for formats.
pref-info Manage Information (change your registered email addresses or public name)
pref-password Change Password (change your login credentials)
pref-permissions Set Dataset Permissions for New Histories (grant others default access to newly created histories)
pref-toolboxfilters Manage Toolbox Filters (customize your Toolbox by displaying or omitting sets of Tools)
pref-apikey Manage API Key (access your current API key or create a new one)
pref-notifications Manage Notifications (allow push and tab notifcations on job completion)
pref-cloud Manage Cloud Authorization (grants Galaxy to access your cloud-based resources)
pref-identities Manage Third-Party Identities (connect or disconnect access to your third-party identities)
pref-custombuilds Manage Custom Builds (custom databases based on fasta datasets)
pref-list Manage Activity Bar (a bonus navigation bar)
pref-palette Pick a Color Theme (interface color theme)
pref-dataprivate Make All Data Private (disable all data sharing)
pref-delete Delete Account (on this Galaxy server)
pref-signout Sign out of Galaxy (signs you out of all sessions)
Log in to Galaxy using Single Sign-on
In the Galaxy login screen, you may find the option to log in with an institutional or other external account. Which options are offered depend on which Galaxy you are using.
Contributors to the GTN have image and occasionally datasets they wish to include in the GTN. These datasets are generally quite small (kilobytes) but, are necessary for the understanding of a tutorial.
Decision Drivers
We prioritise contributor UX very highly, we cannot ask them to learn multiple systems. Git + Markdown is already enough.
We wish to be able to sufficiently serve the website offline, with just a clone.
Considered Options
Storage in git directly
In another system (e.g. S3)
Allowing linked images anywhere on the internet.
Decision Outcome
Chosen option: “Storage in git directly”, because it is the simplest solution that meets our requirements, and doesn’t require development we cannot fund, and doesn’t risk dead links over time.
Consequences
Good, because it is simple and doesn’t require additional development.
Bad, because it will permanently inflate the size of the repository, and it will never decrease. (We can offset this with
Pros and Cons of the Options
Storage in S3
Good, because it’s cheap and well known.
Bad, because we would need to build a way for users to upload images as part of a GTN tutorial development, and then link to them in markdown.
Bad, because then the website would not be hostable offline.
Hotlinking
Good, because it’s easy for contributors
Bad, because unnecessary impact on someone else’s bandwidth
Bad, because the links will rot over time, images and tutorials will not be able to be followed.
GTN ADR: Why Jekyll and not another Static Site Generator (SSG)
We needed a static site generator for the GTN, one had to be chosen. We chose Jekyll because of it’s good integration with GitHub and GitHub Pages. Over time our requirements have changed but we still need one SSG.
Decision Drivers
Must be easy for contributors to setup and use
Needs to be relatively performant (full rebuilds may not take more than 2 minutes.)
Must allow us to develop custom plugins
Considered Options
Jekyll
Hugo
A javascript option
Another SSG.
Decision Outcome
Chosen option: “Jekyll”, because of the amount of time and effort we have sunk into it over the years has made it a good platform for us, despite limitations.
Over time we have invested heavily into Jekyll, any choice to switch must take that into consideration. Consider the following output of scc _plugins bin/
Language
Files
Lines
Blanks
Comments
Code
Complexity
YAML
117
9830
71
33
9726
0
Ruby
90
14471
1795
2617
10059
1163
JSON
48
3075
0
0
3075
0
Python
24
3693
284
272
3137
310
Shell
21
1529
175
262
1092
84
JavaScript
5
299
38
19
242
48
Markdown
4
76
19
0
57
0
Dockerfile
2
60
15
1
44
14
Plain
Text
2
18
0
0
18
0
BASH
1
51
8
4
39
1
CSS
1
3
0
0
3
0
Docker
ignore
1
1
0
0
1
0
gitignore
1
123
0
0
123
0
Total
317
33229
2405
3208
27616
1620
Estimated Cost to Develop (organic) $880,671
Estimated Schedule Effort (organic) 13.11 months
Estimated People Required (organic) 5.97
Processed 1081253 bytes, 1.081 megabytes (SI)
This is a lot of code that would need to be rewritten if another language was ever chosen.
The YAML comprises our Kwalify Schemas. There is a good argument for moving to JSON Schema instead. The Ruby however is the bulk of the code that would need to be rewritten. It does a significant number of complex things:
collecting and collating files off disk / in Jekyll’s Page model into “Learning Materials”, very large objects with hundreds of properties that are used to render each and every template.
Generating hundreds of pages with a multitude of calculated properties. These would all need to be hand translated.
Additionally any layouts would need to be rewritten from our existing Liquid templates. Note that this is not the full set of templates.
Language
Files
Lines
Blanks
Comments
Code
Complexity
HTML
69
5937
830
96
5011
0
Markdown
4
125
1
0
124
0
Total
73
6062
831
96
5135
0
Estimated Cost to Develop (organic) $150,543
Estimated Schedule Effort (organic) 6.70 months
Estimated People Required (organic) 2.00
Consequences
Good, because it works well for us and has scaled sufficiently to an incredible number of output pages (~7k html/22k files in a full GTN production deployment.) with acceptable build times (<5 minutes in prod, most of the action execution is taken up by contacting other servers, dependencies, and uploading the results.)
Good, because it has a well supported ecosystem of plugins we can leverage for common tasks
Good, because we can easily write our own plugins for many tasks.
Bad, because we it remains difficult to install
Bad, because people must know Ruby and very few people do (but it isn’t that hard to learn!)
Pros and Cons of the Options
Hugo
Good, because it would be a single binary, easier to install
Bad, because plugins do not exist, it does not have a way to hook the internals and work with them which we use extensively.
Bad, because what plugins do exist, only exist as ‘shortcodes’ that are written in Go templates which are not as powerful as Ruby.
A JavaScript option
Good, because we could re-use code from other places
Bad, because the average lifetime of a JavaScript SSG is maybe one year.
Bad, because they are also quite slow on average (Hub compile times are on the order of 10 minutes.)
{short title, representative of solved problem and found solution}
Context and Problem Statement
{Describe the context and problem statement, e.g., in free form using two to three sentences or in the form of an illustrative story. You may want to articulate the problem in form of a question and add links to collaboration boards or issue management systems.}
Decision Drivers
{decision driver 1, e.g., a force, facing concern, …}
{decision driver 2, e.g., a force, facing concern, …}
…
Considered Options
{title of option 1}
{title of option 2}
{title of option 3}
…
Decision Outcome
Chosen option: “{title of option 1}”, because {justification. e.g., only option, which meets k.o. criterion decision driver
which resolves force {force}
…
comes out best (see below)}.
Consequences
Good, because {positive consequence, e.g., improvement of one or more desired qualities, …}
Bad, because {negative consequence, e.g., compromising one or more desired qualities, …}
…
Confirmation
{Describe how the implementation of/compliance with the ADR can/will be confirmed. Are the design that was decided for and its implementation in line with the decision made? E.g., a design/code review or a test with a library such as ArchUnit can help validate this. Not that although we classify this element as optional, it is included in many ADRs.}
Pros and Cons of the Options
{title of option 1}
{example | description | pointer to more information | …}
Good, because {argument a}
Good, because {argument b}
Neutral, because {argument c}
Bad, because {argument d}
…
{title of other option}
{example
description
pointer to more information
…}
Good, because {argument a}
Good, because {argument b}
Neutral, because {argument c}
Bad, because {argument d}
…
More Information
{You might want to provide additional evidence/confidence for the decision outcome here and/or document the team agreement on the decision and/or define when/how this decision the decision should be realized and if/when it should be re-visited. Links to other decisions and resources might appear here as well.}
What is an Architectural Decision Record (ADR)?
ADRs are documents that captures an important architectural decision made along with its context and consequences.
We feel that it is important to document these decisions to help future GTN maintainers understand the context and consequences of the decisions made in the past.
A number of our decisions were made with very explicit intentions, usually to prioritise contributors and ensure they have the best possible experience, maximising this over technical complexity and engineering efforts that are required to support it.
Most of our ADRs follow this pattern: Learners and Contributors come first, developers and deployers will be considered where possible.
In the top menu bar, go to User -> Preferences -> Manage Custom Builds
Create a unique Name for your reference build
Create a unique Database (dbkey) for your reference build
Under Definition, select the option FASTA-file from history
Under FASTA-file, select your fasta file
Click the Save button
Beware of Cuts
Galaxy has several different cut tools
The section below uses Cut tool. There are two cut tools in Galaxy due to historical reasons. This example uses tool with the full name Cut columns from a table. However, the same logic applies to the other tool called Advanced Cut ( Galaxy version 9.5+galaxy0). It simply has a slightly different interface.
Does MaxQuant in Galaxy support TMT, iTRAQ, etc.?
Yes, iTRAQ 4 and 8 plex; TMT 2,6,8,10,11 plex; iodoTMT6plex
Ergebnisse können variieren
Ihre Ergebnisse können sich aufgrund unterschiedlicher Versionen von Tools, Referenzdaten, externen Datenbanken oder aufgrund stochastischer Prozesse in den Algorithmen geringfügig von den in diesem Tutorium vorgestellten unterscheiden.
Extended Help for Differential Expression Analysis Tools
The error and usage help in this FAQ applies to most if not all Bioconductor tools.
DEseq2
Limma
edgeR
goseq
Diffbind
StringTie
Featurecounts
HTSeq-count
HTseq-clip
Kalisto
Salmon
Sailfish
DEXSeq
DEXSeq-count
IsoformSwitchAnalyzeR
galaxy-info Review your error messages and you’ll find some clues about what may be going wrong and what needs to be adjusted in your rerun. If you are getting a message from R, that usually means the underlying tool could not read in or understand your inputs. This can be a labeling problem (what was typed on the form) or a content problem (data within the files).
Expect odd errors or content problems if any of the usage requirements below are not met.
General
Are your reference genome, reference transcriptome, and reference annotation all based on the same genome assembly?
Check the identifiers in all inputs and adjust as needed.
These all may mean the same thing to a person but not to a computer or tool: chr1, Chr1, 1, chr1.1
The good news is that usage in Galaxy produces the same error messages as direct usage.
This means that a search at the Bioconductor Support website can provide useful clues! Come back to the Galaxy Help forum with any remaining questions.
tip Remember, for any value in your inputs that is not a number, using only alphanumeric characters and optionally underscores _ with no spaces is what the authors recommend. Check your factor names, sample names, gene identifiers, transcript identifiers, and header lines in files.
Reference genome (fasta)
Can be a server reference genome (hosted index in the pull down menu) or a custom reference genome (fasta from the history).
If a GTF dataset is not available for your genome, a two-column tabular dataset containing transcript <tab> gene can be used instead with most of these tools.
HTseq-count requires GTF attributes. Featurecounts is an alternative tool choice.
Sometimes the tool gffread is used to transform GFF3 data to GTF.
DO use UCSC’s reference annotation (GTF) and reference transcriptome (fasta) data from their Downloads area.
These are a match for the UCSC genomes indexed at public Galaxy servers.
Links can be directly copy/pasted into the Upload tool.
Allow Galaxy to autodetect the datatype to produce an uncompressed dataset in your history ready to use with tools.
Avoid GTF data from the UCSC Table Browser: this leads to scientific problems. GTFs will have the same content populated for both the transcript_id and gene_id values. See the note at UCSC for more about why.
Still have problems? Try removing all GTF header lines with the tool Remove beginning of a file.
For the “quantitation method” what is the default if I just leave it as “None”? Label free?
It will report raw intensity (NON-normalized) values which were not normalized like e.g. the LFQ intensities.
How can I adapt this tutorial to my own data?
If you would like to run this analysis on your own data, make sure to check which V-region was sequenced. In this tutorial, we sequenced the V4 region, and used a corresponding reference for just this region. If you sequenced another V-region, please use an appropriate reference (either the full SILVA reference, or the SILVA reference specific for your region). Similarly, the Screen.seqs step after the alignment filtered on start and end coordinates of the alignments. These will have to be adjusted to your V-region.
How can I do analysis X? - Getting help
If you don’t know how to perform a certain analysis, you can ask the Galaxy community for help.
Where to ask
The best places to ask your analysis questions are:
Note: For questions about errors you’ve encountered in Galaxy, please see our troubleshooting page.
How to ask
The more detail you provide, the better we can help you. Please provide information about:
Your data and experiment e.g. “paired-end RNASeq, mouse, 16 triplicates, 2 timepoints”, etc
Your goal and research question e.g. “I want to detect diffentially expressed genes between these two groups and generate a volcano plot”
What you have already tried? Do you already know which tools you want to use? Did you already try some but they didn’t work? Why not? Did you find good papers describing something similiar to what you want to do? etc.
Which Galaxy are you using? And if you have already tried some steps, please share your Galaxy history via URL and provide this along with your question.
Examples
Bad Question:“Help!!! How to perform metagenomics analysis. I need it urgent!”
Good Question:“Hello everybody, I have 16S rRNA sequencing data from Illumina, it was paired-end with 150bp reads. I want to perform a taxonomy analysis similar to this paper (provide link). I have followed this GTN tutorial (provide link), but my data is different because (reason) . How can I adapt this step of the analysis for my data? I read about a tool called X, but I cannot find it in Galaxy. I am using Galaxy EU, and here is a link to my history. Any help would be greatly appreciated!”
Before you ask
Check the Galaxy Help forum to see if others have already asked a similar question before.
Search the GTN website for a tutorial that matches what you want to do, and work your way through that. Even if it doesn’t doe exactly what you need, you usually learn a lot along the way that will help you adapt it to your own data or research question.
Be patient
Please remember that most of the people answering questions on Matrix chat and the help forum are volunteers from the community. They take time out of their busy days to help you. They may also be in a different time zone, so it may take some time to get answers. Please always be patient and kind to each other, and adhere to our code of conduct.
How many proteins can be identified and quantified in shotgun proteomics?
This is depending on the sample, the used technique(s) and the mass spectrometer. Routinely most labs obtain 4000 proteins, but with more effort 10.000 proteins could be analyzed in a single run.
I got slightly different numbers than were in the tutorial
This tutorial uses UCSC which is constantly updating it’s data! As a result it gets outdated very quickly before we can update it :( But it’s ok! It’s expected here to get different numbers.
I risultati possono variare
I risultati potrebbero essere leggermente diversi da quelli presentati in questo tutorial a causa di versioni diverse di strumenti, dati di riferimento, database esterni o a causa di processi stocastici negli algoritmi.
If you use a mqpar file, can you include modifications that are not in the Galaxy version? For instance, propionamide (Cys alkylation by acrylamide).
No, one is limited to the modifications which are installed in MaxQuant. The mqpar only contains more parameters / options than the GUI in galaxy. Note: one must use an mqpar from the same version like MaxQuant!
Including custom modifications into MaxQuant in Galaxy?
Unfortunately the inclusion of custom modifications is not possible by the user because it requires profound changes in the underlying code. Please let us know the modification you need by creating a new issue: https://github.com/galaxyproteomics/tools-galaxyp/issues entitled MaxQuant new modification request.
Los resultados pueden variar
Tus resultados pueden ser ligeramente diferentes de los presentados en este tutorial debido a las diferentes versiones de las herramientas, datos de referencia, bases de datos externas, o debido a procesos estocásticos en los algoritmos.
MSStats: what does ‘compare groups = yes’ mean? And the comparison matrix to define the contrast between the 2 groups?
MSstats consists of three parts:
Reading the input files and converting them into an MSstats compatible format, doing some processing of the data at the same time
Data processing: such as protein inference (summary), log2 transformation, normalization and missing value imputation
compare groups = yes, means that the third step is performed, which is statistical analysis: Statistical modelling to find differentially abundant protein between different groups. The groups should be specified as “condition” in the annotation file and the group comparison matrix file specifies which groups to compare against each other. In the example this is quite simple because there are only 2 groups, with 3 or more groups the comparison matrix could become more complex.
Merge Reads for Co/Grouped Assembly
How to merge reads from multiple samples for co- or group-assembly
Co-assembly is the process of assembling reads from multiple metagenomic samples together into contigs or genomes (MAGs), instead of assembling each sample individually. If only subsets of samples are assembled together, this can also be referred to as grouped assembly.
In principle, co- or grouped assembly can be performed with any assembler by merging reads from the desired samples before running the assembly.
To simplify this process, we provide the Fastq GroupMerge ( Galaxy version 1.0.1+galaxy0) tool. This tool allows flexible grouping (including multiple groupings) using a simple tabular file, as shown below:
sample
group
reads_A
1
reads_B
1
reads_B
2
reads_C
3
Explanation of the example:
Reads from A and B will be merged into a new synthetic sample called 1.
Reads from B will also be kept individually as sample 2.
Reads from C will remain as sample 3.
The tool supports merging of both single-end and paired-end reads, making it flexible for various sequencing datasets.
My jobs aren't running!
Please make sure you are logged in. At the top menu bar, you should see a section labeled “User”. If you see “Login/Register” here you are not logged in.
Activate your account. If you have recently registered your account, you may first have to activate it. You will receive an e-mail with an activation link.
Make sure to check your spam folder!
Be patient. Galaxy is a free service, when a lot of people are using it, you may have to wait longer than usual (especially for ‘big’ jobs, e.g. alignments).
Contact Support. If you really think something is wrong with the server, you can ask for support
Pick the right Concatenate tool
Most Galaxy servers will have two Concatenate tools installed - know which one to pick!
On most Galaxy servers you will find two toolConcatenate tools installed:
Concatenate multiple datasets or collections (or Concatenate datasets tail-to-head on previous Galaxy versions)
Concatenate datasets tail-to-head (cat)
The two tools have nearly identical interfaces, but behave differently in certain situations, specifically:
The second tool, “Concatenate datasets tail-to-head (cat)”, simply concatenates everything you give to it into a single output dataset.
Whether you give it multiple datasets or a collection as the first parameter, or some datasets as the first and some others as the second parameter, it will always concatenate them all. In fact, the only reason for having multiple parameters for this tool is that by providing inputs through multiple parameters, you can make sure they are concatenated in the order you pass them in.
The first tool (Concatenate multiple datasets or collections), on the other hand, will only ever concatenate inputs provided through different parameters.
This tool allows you to specify an arbitrary number of param-file single datasets, but if you also want to use param-files multiple datasets or param-collection a collection for some of the Dataset parameters, then all of these need to be of the same type (multiple datasets or collections) and have the same number of inputs.
Now depending on the inputs, one of the following behaviors will occur:
If all the different inputs are param-file single datasets, the tool will concatenate them all and produce a single output dataset.
If all the different inputs are specified either as param-files multiple datasets or as param-collection, and all have the same number of datasets, then the tool will concatenate the first datasets of each input parameter, the second datasets of each input parameter, the third, etc., and produce an output collection with as many elements as there are inputs per Dataset parameter.
In extension of the above, if some additional inputs are provided as param-file single datasets, the content of these will be recycled and be reused in the concatenation of all the nth elements of the other parameters.
Reporting usage problems, security issues, and bugs
For reporting Usage Problems, related to tools and functions, head to the Galaxy Help site.
To resolve it you may be asked to send in a shared history link and possibly a shared workflow link. For sharing your history, refer to this these instructions.
Using Galaxy Help is the best way to get help in most cases.
If the problem is more complex, email a description of the problem and how to reproduce it.
Administrative problems:
If the problem is present in your own Galaxy, the administrative configuration may be a factor.
For the fastest help directly from the development community, admin issues can be alternatively reported to the mailing list or the GalaxyProject Gitter channel.
For Security Issues, do not report them via GitHub. Kindly disclose these as explained in this document.
For Bug Reporting, create a Github issue. Include the steps mentioned in these instructions.
Search the GTN Search to find prior Q & A, FAQs, tutorials, and other documentation across all Galaxy resources, to verify in case your issue was already faced by someone.
Results may vary
Your results may be slightly different from the ones presented in this tutorial due to differing versions of tools, reference data, external databases, or because of stochastic processes in the algorithms.
Troubleshooting errors
When you get a red dataset in your history, it means something went wrong. But how can you find out what it was? And how can you report errors?
When something goes wrong in Galaxy, there are a number of things you can do to find out what it was. Error messages can help you figure out whether it was a problem with one of the settings of the tool, or with the input data, or maybe there is a bug in the tool itself and the problem should be reported. Below are the steps you can follow to troubleshoot your Galaxy errors.
Expand the red history dataset by clicking on it.
Sometimes you can already see an error message here
View the error message by clicking on the bug icongalaxy-bug
Check the logs. Output (stdout) and error logs (stderr) of the tool are available:
Expand the history item
Click on the details icon
Scroll down to the Job Information section to view the 2 logs:
What does it mean to normalize the LFQ intensities?
Median normalization typically refers to subtracting the median of all intensities within one sample from all of the intensities (e.g. Intensity of Protein A - Median of all intensities from Sample 1) , to account for measurement variations. Before normalization log2 transformation is required since many statistical tests demand that the data is actually normal distributed. (Non log intensities show very high values but have a minimum (limit of quantification) leading to a somehow right skewed distribution, after log-transformation the intensity distribution is more like a gaussian distribution. Beside the median (or median-polish) normalization there is also other e.g. the quantile normalization.
What is the advantage of breaking down protein to peptides before mass spec?
Mass spectrometry works better for peptides: LC separation and ionization is working better on peptides than on proteins and proteins generate too complex and overlaying mass spectra due to their isotopes and their mass might be shifted due to posttranslational modifications or point mutations.
When can you use (or cannot use) Match between runs in MaxQuant?
No golden rule here. For quantitative comparison of different sample groups it can be valuable to use MBR to increase the number of identified + quantified proteins in all samples and then have more proteins that occur in most of the samples to compare them.
Which isobaric labeled quantification methods does MaxQuant in Galaxy support?
The current MaxQuant version supports: iTRAQ 4 and 8 plex; TMT 2,6,8,10,11 plex; iodoTMT6plex. Includion of TMT16 plex is in preparation.
Will my jobs keep running?
Galaxy is a fantastic system, but some users find themselves wondering:
Will my jobs keep running once I’ve closed the tab? Do I need to keep my browser open?
No, you don’t! You can safely:
Start jobs
Shut down your computer
and your jobs will keep running in the background! Whenever you next visit Galaxy, you can check if your jobs are still running or completed.
However, this is not true for uploading data from your computer. You must wait for uploading a dataset from your computer to finish. (Uploading via URL is not affected by this, if you’re uploading from URL you can close your computer.)
the traced app will run on port 8082, you can then for instance in an upstream nginx section direct a portion of the traffic to your profiled app.
Define once, reference many times
Using variables, either by defining them ahead of time, or simply accessing them via existing data structures that have been defined, e.g.:
# defining a variable that gets reused is great! galaxy_user:galaxy
galaxy_config: galaxy: # Re-using the galaxy_config_dir variable saves time and ensures everything # is in sync! datatypes_config_file:"{{galaxy_config_dir}}/datatypes_conf.xml"
# and now we can re-use "{{ galaxy_config.galaxy.datatypes_config_file }}" # in other places!
Practices like those shown above help to avoid problems caused when paths are defined differently in multiple places. The datatypes config file will be copied to the same path as Galaxy is configured to find it in, because that path is only defined in one place. Everything else is a reference to the original definition! If you ever need to update that definition, everything else will be updated accordingly.
Error: "skipping: no hosts matched"
There can be multiple reasons this happens, so we’ll step through all of them. We’ll start by assuming you’re running the command
ansible-playbook galaxy.yml
The following things can cause issues:
Within your galaxy.yml, you’ve referred to a host group that doesn’t exist or is misspelled. Check the hosts: galaxyservers to ensure it matches the host group defined in the hosts file.
Vice-versa, the group in your hosts file should match the hosts selected in the playbook, galaxy.yml.
If neither of these are the issue, it’s possible Ansible doesn’t know to check the hosts file for the inventory. Make sure you’ve specified inventory = hosts in your ansible.cfg.
Failing all jobs from a specific user
This command will let you quickly fail every job from the user ‘service-account’ (replace with your preferred user)
The yearly Galaxy Admin Training follows a specific ordering of tutorials. Use this timeline to help keep track of where you are in Galaxy Admin Training.
How do I know what I can do with a role? What variables are available?
You don’t. There is no standard way for reporting this, but well written roles by trusted authors (e.g. geerlingguy, galaxyproject) do it properly and write all of the variables in the README file of the repository. We try to pick sensible roles for you in this course, but, in real life it may not be that simple.
So, definitely check there first, but if they aren’t there, then you’ll need to read through defaults/ and tasks/ and templates/ to figure out what the role does and how you can control and modify it to accomplish your goals.
How do I see what variables are set for a host?
If you are using a simple group_vars file only, per group, and no other variable sources, then it’s relatively easy to tell what variables are getting set for your host! Just look at that one file.
But if you have graduated into using a more complex setup, perhaps with multiple sets of variables, like for example:
$ ansible-inventory --host galaxy.example.com | head
[WARNING]: While constructing a mapping from
/group_vars/galaxyservers.yml, line 3, column
1, found a duplicate dict key (tiaas_templates_dir). Using last defined value
only.
{
    "ansible_connection": "local",
    "ansible_user": "ubuntu",
    "certbot_agree_tos": "--agree-tos",
    "certbot_auth_method": "--webroot",
    "certbot_auto_renew": true,
    "certbot_auto_renew_hour": "{{ 23 |random(seed=inventory_hostname)  }}",
    "certbot_auto_renew_minute": "{{ 59 |random(seed=inventory_hostname)  }}",
And, helpfully, if variables are overridden in precedence you can see that as well with the above warnings.
{ Y, true, Yes, ON   }    : Boolean true
{ n, FALSE, No, off  }    : Boolean false
Mapping Jobs to Specific Storage By User
It is possible to map your jobs to use specific storage backends based on user! If you have e.g. specific user groups that need their data stored separately from other users, for whatever political reasons, then in your dynamic destination you can do something like:
job_destination=app.job_config.get_destination(destination_id) ifuser=="alice": job_destination.params['object_store_id']='foo'# Maybe lookup the ID from a mapping somewhere
If you manage to do this in production, please let us know and we can update this FAQ with any information you encounter.
Operating system compatibility
These Ansible roles and training materials were last tested on Centos 7 and Ubuntu 18.04, but will probably work on other RHEL and Debian variants.
The roles that are used in these training are currently used by usegalaxy.*, and other, servers in maintaining their infrastructure. (US, EU, both are running CentOS 7)
If you have an issue running these trainings on your OS flavour, please report the issue in the training material and we can see if it is possible to solve.
Running Ansible on your remote machine
It is possible to have ansible installed on the remote machine and run it there, not just from your local machine connecting to the remote machine.
Your hosts file will need to use localhost, and whenever you run playbooks with ansible-playbook -i hosts playbook.yml, you will need to add -c local to your command.
Be certain that the playbook that you’re writing on the remote machine is stored somewhere safe, like your user home directory, or backed up on your local machine. The cloud can be unreliable and things can disappear at any time.
Updating from 22.01 to 23.0 with Ansible
Galaxy introduced a number of changes in 22.05 and 23.0 that are extremely important to be aware of during the upgrade process. Namely a new database migration system, and a new required running environment (gunicorn instead of uwsgi).
The scripts to migrate to the new database migration system are only compatible with release 22.05, and then were subsequently removed, so it is mandatory to upgrade to 22.05 if you want to go further.
Here is the recommended update procedure with ansible:
Update to 22.01 normally
Change the release to 22.05, and run the upgrade
Galaxy will probably not start correctly here, ignore it (even if the build fail, this if fine, just ignore).
Run the database migration manually (with the galaxy user with the venv activated)
GALAXY_CONFIG_FILE=/srv/galaxy/config/galaxy.yml sh /srv/galaxy/server/manage_db.sh -c /srv/galaxy/config/galaxy.yml upgrade
Update your system’s ansible, you probably need something with a major version of at least 2.
Set the release to 23.0 and make other required changes. There are a lot of useful changes, but the easiest procedure is probably something like:
git clone https://github.com/hexylena/git-gat/
cd git-gat
git checkout c2e7bf6d3584fbf3281fb57d8024a9189f957e0e (this corresponds to the version of the repo after the 23.0 integration without too much customization and after potential bug fixes)
Diff and sync (e.g. vimdiff group_vars/galaxyservers.yml git-gat/group_vars/galaxyservers.yml) for the main configuration files:
group_vars/all.yml
group_vars/dbservers.yml
galaxy.yml
requirements.yml (and don’t forget to install the new role versions)
hosts
templates/nginx/galaxy.j2
But the main change is the swap from uwsgi to gravity+gunicorn
uchida.miniconda is replaced with galaxyproject.conda
usegalaxy_eu.systemd is no longer needed
galaxy_user_name is defined in all.yml in the latest git-gat
the galaxy_job_config needs to have a database handling specified - assign set to db-skip-locked
git-gat also separates out the DB serving into a dbservers.yml host group
Backup your venv, mv /srv/galaxy/venv/ /srv/galaxy/venv-old/, as your NodeJS is probably out of date and Galaxy doesn’t handle that gracefully
Do any local customs for luck (knocking on wood, etc.)
Run the playbook
Things might go wrong with systemd units
try running galaxyctl -c /srv/galaxy/config/galaxy.yml update as root
you may also need to rm /etc/systemd/system/galaxy.service which is then no longer needed
you’ll have a galaxy.target and you can instead systemctl daemon-reload and systemctl start galaxy.target
You may need to restart galaxy manually with sudo galaxyctl restart
Variable connection
When the playbook runs, as part of the setup, it collects any variables that are set. For a playbook affecting a group of hosts named my_hosts, it checks many different places for variables, including “group_vars/my_hosts.yml”. If there are variables there, they’re added to the collection of current variables. It also checks “group_vars/all.yml” (for the built-in host group all). There is a precedence order, but then these variables are available for roles and tasks to consume.
What if you forget `--diff`?
If you forget to use --diff, it is not easy to see what has changed. Some modules like the copy and template modules have a backup option. If you set this option, then it will keep a backup copy next to the destination file.
However, most modules do not have such an option, so if you want to know what changes, always use --diff.
What is the difference between the roles with `role:` prefix and without?
The bare role name is just simplified syntax for the roles, you could equally specifiy role: <name> every time but it’s only necessary if you want to set additional variables like become_user
Click on the collection in your history to view it
Click on Editgalaxy-pencil next to the collection name at the top of the history panel
Click on Add Tagsgalaxy-tags
Add a tag starting with #
Tags starting with # will be automatically propagated to the outputs any tools using this dataset.
Click Savegalaxy-save
Check that the tag appears below the collection name
Changing the data type of multiple datasets or collections
This will set the data type for multiple datasets, collections, and the datasets therein. Does not change the datasets themselves.
Click on galaxy-selectorSelect Items at the top of the history panel
Check all the datasets and collections in your history you would like to change the data type for
Click n of N selected and choose Change data type
In the drop-down field, select your desired data type
tip: you can start typing the data type into the field to filter the dropdown menu
Click the OK button
Changing the datatype of a collection
This will set the datatype for all files in your collection. Does not change the files themselves.
Click on Editgalaxy-pencil next to the collection name in your history
In the central panel, click on the galaxy-chart-select-dataDatatypes tab on the top
Under new type, select your desired datatype
tip: you can start typing the datatype into the field to filter the dropdown menu
Click the Save button
Cannot find the feature?
If you are on a smaller Galaxy server, i.e. not one of the large (multi)national public servers, you may not be able to find this operation, and there is no indication it is missing or why it is disabled.
This will convert all files in your collection to a different format. This will change the files themselves and create a new collection.
Click on Editgalaxy-pencil next to the collection name in your history
In the central panel, click on the galaxy-gearConvert tab on the top
Under Converter Tool, select your desired conversion
Click the Convert Collection button
Creación de una colección emparejada
Haga clic en galaxy-selectorSelect Items en la parte superior del panel del historial
Marque todos los conjuntos de datos de su historial que desee incluir
Haga clic en n of N selected y elija Build List of Dataset Pairs
Cambie el texto de unpaired forward por un selector común para las lecturas forward
Cambie el texto de unpaired reverse por un selector común para las lecturas inversas
Haga clic en Pair this dataset para cada par válido anterior e inverso.
Introduzca un nombre para su colección
Haga clic en Create list para crear su colección
Vuelva a hacer clic en el icono de marca de verificación situado en la parte superior de su historial
Crear una colección de conjuntos de datos
Haz clic en galaxy-selectorSeleccionar elementos en la parte superior del panel del historial
Marque todos los conjuntos de datos de su historial que desee incluir
Haga clic en n of N selected y elija Build dataset list
Introduzca un nombre para su colección
Haz clic en Create collection para crear tu colección
Vuelve a hacer clic en el icono de la marca de verificación situado en la parte superior del historial
Creare una raccolta di set di dati
Cliccare su galaxy-selectorSeleziona elementi nella parte superiore del pannello della cronologia
Controllare tutti i dataset della cronologia che si desidera includere
Fare clic su n di N selezionati e scegliere Costruisci elenco dataset
Inserire un nome per la raccolta
Fare clic su Crea raccolta per creare la raccolta
Fare di nuovo clic sull’icona del segno di spunta in cima alla cronologia
Creating a dataset collection
Click on galaxy-selectorSelect Items at the top of the history panel
Check all the datasets in your history you would like to include
Click n of N selected and choose Advanced Build List
You are in collection building wizard. Choose Flat List and click ‘Next’ button at the right bottom corner.
Double clcik on the file names to edit. For example, remove file extensions or common prefix/suffixes to cleanup the names.
Enter a name for your collection
Click Build to build your collection
Click on the checkmark icon at the top of your history again
Creating a dataset collection with autobuild
Click on galaxy-selectorSelect Items at the top of the history panel (letter a)
Check all the datasets in your history you would like to include (letter b)
Click n of N selected (see letter b below) and choose Auto build List
Enter a name for your collection (letter c)
Turn off Remove file extension (letter d)
Click Build to build your collection (letter e)
Click on the checkmark icon at the top of your history again (first letter a)
Once the collection is created, all files turn green. You can limit visible files using the eye icons in the history panel.
Creating a paired collection
Click on galaxy-selectorSelect Items at the top of the history panel
Check all the datasets in your history you would like to include
Click n of N selected and choose Advanced Build List
You are in the collection building wizard. Choose List of Paired Datasets and click ‘Next’ button at the right bottom corner.
Check and configure auto-pairing. Commonly matepairs have suffix _1 and _2 or _R1 and _R2. Click on ‘Next’ at the bottom.
Edit the List Identifier as required.
Enter a name for your collection
Click Build to build your collection
Click on the checkmark icon at the top of your history again
Creazione di una raccolta accoppiata
Fare clic su galaxy-selectorSeleziona elementi nella parte superiore del pannello della cronologia
Controllare tutti i dataset della cronologia che si desidera includere
Fare clic su n di N selezionati e scegliere Costruisci elenco di coppie di set di dati
Cambiare il testo di unpaired forward in un selettore comune per le letture forward
Cambiare il testo di unpaired reverse con un selettore comune per le letture inverse
Fare clic su Accoppia questi set di dati per ogni coppia avanti e inversa valida.
Inserire un nome per la collezione
Fare clic su Crea elenco per creare la raccolta
Fare nuovamente clic sull’icona del segno di spunta in cima alla cronologia
Erstellen einer Datensatzsammlung
Klicken Sie auf galaxy-selectorElemente auswählen am oberen Rand des Verlaufsfensters
Überprüfen Sie alle Datensätze in Ihrer Historie, die Sie aufnehmen möchten
Klicken Sie auf n of N selected und wählen Sie Build Dataset List
You are in collection building wizard. Choose Flat List and click ‘Next’ button at the right bottom corner.
Doppelklicken Sie auf die Dateinamen, um sie zu bearbeiten. Entfernen Sie z. B. Dateiendungen oder gemeinsame Präfixe/Suffixe, um die Namen zu bereinigen.
Geben Sie einen Namen für Ihre Sammlung ein
Klicken Sie auf Sammlung erstellen, um Ihre Sammlung zu erstellen
Klicken Sie erneut auf das Häkchensymbol oben in Ihrem Verlauf
Erstellen einer gepaarten Sammlung
Klicken Sie auf galaxy-selectorElemente auswählen am oberen Rand des Verlaufsfensters
Überprüfen Sie alle Datensätze in Ihrem Verlauf, die Sie einschließen möchten
Klicken Sie auf n of N selected und wählen Sie Liste der Datensatzpaare erstellen
Sie befinden sich im Assistenten zum Erstellen von Sammlungen. Wählen Sie Liste gepaarter Datensätze und klicken Sie auf die Schaltfläche ‘Weiter’ unten rechts.
Überprüfen und konfigurieren Sie das automatische Paaren. Gewöhnlich haben Mate-Paare die Endungen _1 und _2 oder _R1 und _R2. Klicken Sie unten auf ‘Weiter’.
Bearbeiten Sie den Listenbezeichner nach Bedarf.
Geben Sie einen Namen für Ihre Sammlung ein
Klicken Sie auf Erstellen, um Ihre Sammlung zu erstellen
Klicken Sie erneut auf das Häkchen-Symbol oben in Ihrem Verlauf
Force a tool to process collection jobs one by one instead of using the collection as input
To map over or not to map over
Galaxy tools can either use a collection as a single input or map over a collection to process each element individually. Whether a collection is consumed as a whole or mapped over depends entirely on how the tool is designed. For example, fastp ( Galaxy version 1.0.1+galaxy3) processes each FASTQ file individually. When you supply a collection to fastp, Galaxy indicates that: The supplied input will be mapped over this tool.
Other tools can process an entire collection at once. For example collection_column_join ( Galaxy version 0.0.3) operates on all files in the collection together.
The catch
Some tools allow a collection as a single input, but you may want them to process each element one-by-one instead. A common example is metaspades ( Galaxy version 4.2.0+galaxy0): If you supply a collection of FASTA files, the tool will treat them as a single dataset and perform co-assembly, which is its default behavior. However, in many workflows you want to assemble each sample individually, not all together.
Because the tool form does not offer an option to switch this behavior, you can force mapping-over by creating a nested list.
Solution - Create a nested collection
Convert your original collection into a collection of collections (list:list:). This forces any tool - including ones that normally process the whole collection - to run on each subcollection individually.
Solution for Galaxy Server with Version > 25.1: Create a nested collection using Nest collection (where available)
Use the Nest collection tool to convert your original collection into a collection of collections.
Solution for Galaxy Server with Version < 25.1 or if nest collection isn’t available: Create a nested collection using APPLY_RULES
Use the Apply rules tool to convert your original collection into a collection of collections.
Open Apply rules
Select your collection
Click Edit
Adding another nesting level to create list:list requires a few changes:
From Column menu select Basename of Path of URL
From Column A
Click Apply This creates a new Column B with the same list identifier as Column A.
From Rules menu select Add / Modify Column Definitions
Click Add Definition button and select List Identifier(s)
“Select a column”: A
“… Assign Another Column”: B
Click Apply
Click Save
Click Run Tool
The rule logic in a workflow editor to follow for paired reads in the Apply rules tool looks like this:
Explanation of why collections are needed and what they are
Datasets versus collections
In Galaxy’s history datasets can be present as individual entries or they can be combined into Collections. Why do we need collections? Collections combine multiple individual datasets into a single entity which is easy to manage. Galaxy tools can use collections directly as inputs. Collection can be simple or nested.
Simple collections
Imagine that you’ve uploaded a hundred FASTQ files corresponding to a hundred samples. These will appear as a hundred individual datasets in your history making it very long. But the chances are that when you analyze these data you will do the same thing on each dataset.
To simplify this process you can combine all hundred datasets into a single entity called a dataset collection (or simply a collection or a list). It will appear as a single box in your history making it much easier to understand. Galaxy tools are designed to take collections as inputs. So, for example, if you want to map each of these datasets against a reference genome using, say, Minimap2, you will need to provide minmap2 with just one input, the collection, and it will automatically start 100 jobs behind the scenes and will combine all outputs into a single collection containing BAM files.
There is a number of situations when simple collections are not sufficient to reflect the complexity of the data. To deal with this situation Galaxy allows for nested collections.
Nested collections
Probably the most common example of this is paired end data when each sample is represented by two files: one containing forward reads and another containing reverse reads. In Galaxy you can create nested collection that reflects the hierarchy of the data. In the case of paired data Galaxy supports paired collections.
Contributing to Galaxy is a multi-step process, this will guide you through it.
To contribute to galaxy, a GitHub account is required. Changes are proposed via a pull request. This allows the project maintainers to review the changes and suggest improvements.
The general steps are as follows:
Fork the Galaxy repository
Clone your fork
Make changes in a new branch
Commit your changes, push branch to your fork
Open a pull request for this branch in the upstream Galaxy repository
You want to find tutorials without the -tests.yml file. The workflow file might also be missing.
Check if it has a workflow (if it does, skip to step 5.)
Follow the tutorial
Extract a workflow from the history
Run that workflow in a new history to test
Extract Tests (Online Version)
If you are on UseGalaxy.org or another server running 24.2 or later, you can use PWDK, a version of planemo running online to generate the workflow tests.
However if you are on an older version of Galaxy, or a private Galaxy server, then you’ll need to do the following:
Extract Tests (Manual Version)
Obtain the workflow invocation ID, and your API key (User → Preferences → Manage API Key)
Install the latest version of planemo
# In a virtualenv
pip install planemo
Run the command to initialise a workflow test from the workflows/ subdirectory - if it doesn’t exist, you might need to create it first.
planemo workflow_test_init --from_invocation <INVOCATION ID> --galaxy_url <GALAXY SERVER URL> --galaxy_user_key <GALAXY API KEY>
This will produce a folder of files, for example from a testing workflow:
You will need to check the -tests.yml file, it has some automatically generated comparisons. Namely it tests that output data matches the test-data exactly, however, you might want to replace that with assertions that check for e.g. correct file size, or specific text content you expect to see.
If the files in test-data are already uploaded to Zenodo, to save disk space, you should delete them from the test-data dir and use their URL in the -tests.yml file, as in this example:
-doc:Test the M. Tuberculosis Variant Analysis workflow job: 'Read1': location:https://zenodo.org/record/3960260/files/004-2_1.fastq.gz class:File filetype:fastqsanger.gz
GTN:: We will put the auto-generated captions from YouTube into a Google Doc
Instructor:: Check and fix the auto-generated captions
GTN: Upload the fixed captions to YouTube
GTN: Merge the Pull Request on GitHub
Done! Your recording will now show up on the tutorial for anybody to use and re-use
Note: If you are submitting a video to use in an event, please submit your recording 2 weeks before the start of your course to allow ample time to complete the submission process.
Recordings Metadata
Our bot will add some metadata about your recording to the tutorial or slide deck in question, and looks as follows:
recordings: - speakers: # speakers must be defined in the CONTRIBUTORS.yaml file - shiltemann - hexylena captioners: # captioners must also be present in the CONTRIBUTORS.yaml file - bebatut type: # optional, will default to Tutorial or Lecture, but if you do something different, set it here (e.g. Demo, Lecture & Tutorial, Background, Webinar) date: '2024-06-12' # date on which you recorded the video galaxy_version: '24.0' # version of Galaxy you used during the recording, can be found under 'Help->About' in Galaxy length: 1H17M # length of your video, in format: 17M or 2H34M etc youtube_id: "dQw4w9WgXcQ" # the bit of the YouTube URL after youtube.com/watch?v=
Note: If your videos are already uploaded to YouTube, for example as part of a different project’s account, you can add this metadata to the tutorial or slides manually, without using our submission form. Note that we do require all videos to have good-quality English captions, and we will not be able to help you configure these on other YouTube accounts.
Can the FAIR-by-Design Methodology be used for FAIR development of other types of resources?
The FAIR-by-Design Methodology stages can be relatively easily adapted to the processes for designing other FAIR objects.
For an example, the FAIR-by-Design Methodology can be adapted to create FAIR-by-Design software objects. This has been demonstrated on the IDCC24 W6 - FAIR-by-Design: introducing Skills4EOSC and FAIR-IMPACT workshop. The information regarding this example is available at https://fair-by-design-methodology.github.io/IDCC24workshop/latest/.
Can this tutorial be adapted to other instructional development platforms?
The tutorial has been specifically adapted to the rules and options available in GTN. However, the general FAIR-by-Design Methodology is platform agnostic and can be applied to any environment.
Thus, the tutorial can be reused and carefully adapted to be applicable to other platforms, as long as the adaptation is based on the originally published FAIR-by-Design Methodology.
Creating a GTN Event
To add your event to the GTN, you will need to supply your course information (dates, location, program, etc). You will then get an event page like this which you can use during your training. This page includes a course overview, course handbook (full program with links to tutorials) and setup instructions for participants.
Your event will also be shown on the GTN event horizon and on the homepage. We are also happy to advertise your event on social media and Matrix channels.
Already have your own event page? No problem! You can add your event as an external event (see below) and we will simply link to your page!
To add your event to the GTN:
Create a page in the events/ folder of the GTN repository
Have a look at example event definitions in this folder:
Please also feel free to contact us with ideas for improvements! We know that training comes in many different forms, so if something in your event is not yet supported, let us know and we are happy to add it!
External events
Already have a course webpage? Great! In this case, you only have to provide the most basic information about your course (title, desciption, dates, location).
date_start: date_end: # optional, for multi-day events
location: name: city: country:
contributions: organisers: - name1 - name2
Creating a GTN FAQ
If you have a snippet of knowledge that is reusable, we recommend you to share with the GTN community, and we encourage you to create an FAQ for it!
If you have a snippet of knowledge that is reusable, we recommend you to share with the GTN community, and we encourage you to create an FAQ for it!
Creating the FAQ: The Easy Way
Fill out this Google Form. Every day our bot will import the FAQs submitted via this Google Form, and we will process them, perhaps requesting small changes, so we recommend that you have a GitHub account already.
For Advanced Users
Have a look at the existing FAQs in the faqs/galaxy/ folder of the GTN repository for some examples.
A news post is a markdown file that looks as follows:
- To review all active Datasets in your account, go to **User > Datasets**.
Notes: - Logging out of Galaxy while the Upload tool is still loading data can cause uploads to abort. This is most likely to occur when a dataset is loaded by browsing local files. - If you have more than one browser window open, each with a different Galaxy History loaded, the Upload tool will load data into the most recently used history. - Click on refresh icon {% icon galaxy-refresh %} at the top of the History panel to display the current active History with the datasets.
Creating a GTN News post
If you have created a new tutorial, running an event, published a paper around training, or have anything else interesting to share with the GTN community, we encourage you to write a News item about it!
Fill out this Google Form. Every day our bot will import the news posts submitted via this Google Form, and we will process them, perhaps requesting small changes, so we recommend that you have a GitHub account already.
For Advanced Users
Have a look at the existing news items in the news/_posts/ folder of the GTN repository for some examples.
A news post is a markdown file that looks as follows:
tutorial:"topics/introduction/tutorials/data-manipulation-olympics/tutorial.html" cover:"path/to/cover-image.jpg"# usually an image from your tutorial coveralt:"descriptionofthecoverimage"
---
A bit of text containing your news, this is all markdown formatted, so you can do **bold** and *italic* text like this, and links look like [this](https://example.com) etc.
Describe everything you want to convey here, can be as long as you need.
Make sure the filename is structured as follows: year-month-day-title.md, so for example: 2022-10-28-my-new-tutorial.md
How can I contribute in "advanced" mode?
Most of the content is written in GitHub Flavored Markdown with some metadata (or variables) found in YAML files. Everything is stored on our GitHub repository. Each training material is related to a topic. All training materials (slides, tutorials, etc) related to a topic are found in a dedicated directory (e.g.transcriptomics directory contains the material related to transcriptomic analysis). Each topic has the following structure:
a metadata file in YAML format
a directory with the topic introduction slide deck in Markdown with introductions to the topic
a directory with the tutorials:
Inside the tutorials directory, each tutorial related to the topic has its own subdirectory with several files:
a tutorial file written in Markdown with hands-on
an optional slides file in Markdown with slides to support the tutorial
a directory with Galaxy Interactive Tours to reproduce the tutorial
a directory with workflows extracted from the tutorial
a YAML file with the links to the input data needed for the tutorial
a YAML file with the description of needed tools to run the tutorial
a directory with the Dockerfile describing the details to build a container for the topic (self-study environments).
To manage changes, we use GitHub flow based on Pull Requests (check our tutorial):
Clone your fork of this repository to create a local copy on your computer and initialize the required submodules (git submodule init and git submodule update)
Create a new branch in your local copy for each significant change
We also strongly recommend you read and follow The Carpentries recommendations on lesson design and lesson writing if you plan to add or change some training materials, and also to check the structure of the training material above.
How can I create new content without dealing with git?
If you feel uncomfortable with using the git and the GitHub flow, you can write a new tutorial with any text editor and then contact us (via Gitter or email). We will work together to integrate the new content.
How can I get started with contributing?
If you would like to get involved in the project but are unsure where to start, there are some easy ways to contribute which will also help you familiarize yourself with the project!
A great way to help out the project is to test/edit existing tutorials. Pick a tutorial and check the contents. Does everything work as expected? Are there things that could be improved?
Below is a checklist of things to look out for to help you get started. If you feel confident in making changes yourself, please open a pull request, otherwise please file an issue with any problems you run into or suggestions for improvements.
Run the existing tour and check that it is up-to-date with the tutorial contents
Datasets
Check that all datasets used in the tutorial are present in Zenodo
Add a data-library.yaml file if none exists
Another great way to help out the project is by reviewing open pull requests. You can use the above checklist as a guide for your review. Some documentation about how to add your review in the GitHub interface can be found in GitHub’s PR Reviewing Documentation
How can I give feedback?
At the end of each tutorial, there is a link to a feedback form. We use this information to improve our tutorials.
The easiest way to start contributing is to file an issue to tell us about a problem such as a typo, spelling mistake, or a factual error. You can then introduce yourself and meet some of our community members.
How can I test an Interactive Tour?
Perhaps you’ve been asked to review an interactive tour, or maybe you just want to try one out. The easiest way to run an interactive tour is to use the Tour builder browser extension.
Navigate to a Galaxy instance supporting the tutorial. To find which Galaxy instances support each tutorial, please see the dropdown menu next to the tutorial on the training website. Using one of the usegalaxy.* instances (UseGalaxy.ca, UseGalaxy.org, UseGalaxy.eu, UseGalaxy.org.au, UseGalaxy.fr) ) is usually a good bet.
Start the Tour Builder plugin by clicking on the icon in your browser menu bar
Copy the contents of the tour.yaml file into the Tour builder editor window
Click Save and then Run
How does the GTN ensure accessibility?
We are committed to an accessible training experience regardless of disability. Please see our accessibility page for more information.
How does the GTN ensure our training materials are FAIR?
This infrastructure has been developed in accordance with the FAIR (Findable, Accessible, Interoperable, Reusable) principles for training materials Garcia et al. 2020. Following these principles enables trainers and trainees to find, reuse, adapt, and improve the available tutorials.
Improve findability of your training materials by properly describing them
Rich metadata associated with each tutorial that are visible and accessible via schema.org on each tutorial webpage.
Give your training materials a unique identity
URL persistency with redirection in case of renaming of tutorials. Data used for tutorials stored on Zenodo and associated with a Digital Object Identifiers (DOI)
If appropriate, define access rules for your training materials
Online and free to use without registration
Use an interoperable format for your training materials
Content of the tutorials and slides written in Markdown. Metadata associated with tutorials stored in YAML, and workflows in JSON. All of this metadata is available from the GTN’s API
Make your training materials (re-)usable for trainers
Online. Rich metadata associated with each tutorial: title, contributor details, license, description, learning outcomes, audience, requirements, tags/keywords, duration, date of last revision. Strong technical support for each tutorial: workflow, data on Zenodo and also available as data libraries on UseGalaxy.*, tools installable via the Galaxy Tool Shed, list of possible Galaxy instances with the needed tools.
Make your training materials (re-)usable for trainees
Online and easy to follow hands-on tutorials. Rich metadata with “Specific, Measurable, Attainable, Realistic and Time bound” (SMART) learning outcomes following Bloom’s taxonomy. Requirements and follow-up tutorials to build learning path. List of Galaxy instances offering needed tools, data on Zenodo and also available as data libraries on UseGalaxy.*. Support chat embedded in tutorial pages.
Make your training materials contribution friendly and citable
Open and collaborative infrastructure with contribution guidelines, a CONTRIBUTING file and a chat. Details to cite tutorials and give credit to contributors available at the end of each tutorial.
Keep your training materials up-to-date
Open, collaborative and transparent peer-review and curation process. Short time between updates.
How does the GTN implement the "Ten simple rules for collaborative lesson development"
The GTN framework is inherently collaborative and community-driven, and comprises a growing number of contributors with expertise in a wide range of scientific and technical domains. Given this highly collaborative nature of a community with very different skill sets, the GTN framework has evolved over the years to facilitate the contribution and maintenance of the tutorials. We aim to adhere to best-practice guidelines for collaborative lesson development described in Devenyi et al. 2018. The structure of the tutorials and repository has been made modular with unified syntax and use of snippets enabling easy access for authors to add common tips and tricks new users might need to know. This system allows for easy updating of all tutorials, if there is a change in tools or interface. More generally, we continually strive to lower contribution barriers for content creators by providing a framework that is easy to use for training developers regardless of their level of knowledge of the underlying technical framework.
Implementation of the “Ten simple rules for collaborative lesson development” (Devenyi et al. 2018) in the training material:
Rules
Implementation in the GTN framework
Clarify audience
Tutorial metadata includes level indicators (introductory, intermediate, advanced) and a list of prerequisite tutorials as recommended prior knowledge. This information is rendered at the top of each tutorial.
Make lessons modular
Development of small tutorials linked together via learning paths
Teach best practice lesson development
We maintain the topic Contributing to the Galaxy Training Material including numerous tutorials describing how to create new content. Furthermore, quarterly online collaboration fest (CoFests) are organized, where contributors can get direct support. Development of a Train the Trainer program and a mentoring program for instructors, in which lesson development is taught
Encourage and empower contributors
Involve them in reviews. Mentor them. Encourage them to become maintainers.
Build community around lessons
Quarterly online collaboration fest (CoFests) and Community calls. Chat on our Gitter/Matrix channel.
Publish periodically and recognize contributions
Author listed on tutorials. Hall of fame listing all contributors. Full tutorial citation at the end of the tutorial. Tweet about new or updated tutorials. List of new or updated tutorials in Galaxy Community newsletter. Soon: publication of tutorials via article
Evaluate lessons at several scales
Tutorial change (Pull Request) review. Embedded feedback form in tutorials for trainee feedback. Instructor feedback. Automatic workflow testing
Reduce, re-use, recycle
Sharing content between tutorials, specially using snippets. Development of small modular tutorials linked by learning paths
Link to other resources
Links to original paper, documentation, external tutorials and other material
You can’t please everyone
but we can try (several different Galaxy introduction tutorials for different audience). Aim to clearly state what the tutorial does and does not cover, at the start.
Making a minor correction to any training material
If you find a minor mistake in any GTN training material, we encourage you to propose a correction. For small changes such as typos, this can be done from the browser. If you can implement the corrections yourself, in the context of where they happen, this saves a lot of time for the editors. When you submit your suggestion, it will be carefully checked by an expert, so do not worry about breaking anything!
Outline of the steps:
Start from the page with the minor mistake.
Open the page in the GitHub editor.
Make the correction.
Save the changes with a description of what you did.
Send the proposal to the GTN team to check, then apply the change.
In this example, we will show how to correct a typo in the metadata of a learning pathway. Note, this specific typo has now been corrected.
1. Start from the page with the minor mistake
From the learning pathways page, you can see the tags below each pathway. Here, one of the pathways has a tag ‘introcuction’, which should be ‘introduction’.
Click to open the page.
At the top-right of the page, click Settings then Propose a change or correction. This will open the page in edit mode. The training material is stored in GitHub, an external site, but we will walk you through how to navigate it.
You may be asked to create a fork of the GTN training materials repository. A fork is a linked copy of the training materials in your personal GitHub account. Click Fork this repository.
3. Make the correction
You will see the text that makes up the training material (it uses a language called Markdown).
In this example, we need to correct a line of the metadata at the top of the file (this is called the frontmatter). Type your correction.
4. Save the changes with a description of what you did
When you have finished making corrections, click the Commit changes… button.
You will be asked to provide a brief summary of the changes you have made. In the box labeled Commit message, type a summary.
You do not need to give an extended description here.
Click the Propose changes button.
5. Send the proposal to the GTN team to check, then apply the change
You are taken to a page titled Comparing changes. You will see a list of the changes you have made. This appears as lines removed (beginning with a minus sign, in red) and lines added (beginning with a plus sign, in green).
Click the Create pull request button. This will open a pull request; this is a submission of your proposal that contains all the essential information for the editors and the platform to implement and apply the correction.
The title will be the same as the commit message you typed earlier.
Add a description which describes your changes. You can include links as required.
Click the Create pull request button. Your change has now been submitted, or, in GitHub terms, you have now opened a pull request.
The pull request will need to be reviewed by a human. There are also some automated checks that will be run. After all this is completed, if your request is approved, it will be applied (or ‘merged’ in GitHub terms).
congratulations Thank you for helping improve our training materials.
Recording a video tutorial
This FAQ describes some general guidelines for recording your video
Anybody is welcome to record one of the GTN tutorials, even if another recording already exists! Both the GTN tutorial and Galaxy itself change significantly over time, and having regular and/or multiple recordings of tutorials is great!
Done with your recording? Check out the instructions for adding it to the GTN:
Command line option to merge videos (ubuntu) for f in *.mp4 ; do echo file \'$f\' >> list.txt; done && ffmpeg -f concat -safe 0 -i list.txt -c copy stitched-video.mp4 && rm list.txt
Great way to simply remove background noise and clicks ffmpeg -i stitched-video.mp4 -af "adeclick" output.mp4
Feel free to ask us for help if you need!
Standards
Zoom in, in every interface you’re covering! Many people will be watching the video while they’re doing the activity, and won’t have significant monitor space. Which video below would you rather be trying to follow?
Bad
Good 😍
Bad
Good 🤩
(Especially for introductory videos!) Clearly call out what you’re doing, especially on the first occurrence
Bad
Good
“Re-run the job”
“We need to re-run the job which we can do by first clicking to expand the dataset, and then using the re-run job button which looks like a refresh icon.”
Bad
Good
“As you can see here the report says X”
“I’m going to view the output of this tool, click on the eyeball icon, and as you can see the report says X.”
But the same goes for terminal aliases, please disable all of your favourite terminal aliases and quick shortcuts that you’re used to using, disable your bashrc, etc. These are all things students will try and type, and will fail in doing so. We need to be very clear and explicit because people will type exactly what is on the screen, and their environment should at minimum match yours.
Bad
Good
lg file
ls -al | grep file
z galaxy
cd path/to/the/galaxy
Consider using a pointer that is more visually highlighted.
There are themes available for your mouse pointer that you can temporarily use while recording that can make it easier for watchers to see what you’re doing.
Click on the dropdown options menu (dropdown icon)
Select Copy Tool ID
Example of a hands-on box using this feature:
> <hands-on-title> Counting SNPs </hands-on-title>
>
> 1. {% tool [Datamash](toolshed.g2.bx.psu.edu/repos/iuc/datamash_ops/datamash_ops/1.8+galaxy0) %} (operations on tabular data):
>
>    - *"Input tabular dataset"*: select the output dataset from **bedtools intersect intervals** {% icon tool %}
>    - *"Group by fields"*: `Column: 4` (the column with the exon IDs)
>
{: .hands_on}
Thanks!
First off, thanks for your interest in contributing to the Galaxy training materials!
Individual learners and instructors can make these training more effective by contributing back to them. You can report mistakes and errors, create more content, etc. Whatever is your background, there is a way to contribute: via the GitHub website, via command-line or even without dealing with GitHub.
We will address your issues and/or assess your change proposal as promptly as we can, and help you become a member of our community. You can also check our tutorials for more details.
What can I do to help the project?
In issues, you will find lists of issues to fix and features to implement (with the “newcomer-friendly” label for example). Feel free to work on them!
This section will guide you through downloading experimental metadata, organizing the metadata to short lists corresponding to conditions and replicates, and finally importing the data from NCBI SRA in collections reflecting the experimental design.
Downloading metadata
It is critical to understand the condition/replicate structure of an experiment before working with the data so that it can be imported as collections ready for analysis. Direct your browser to SRA Run Selector and in the search box enter GEO data set identifier (for example: GSE72018). Once the study appears, click the box to download the “RunInfo Table”.
Organizing metadata
The “RunInfo Table” provides the experimental condition and replicate structure of all of the samples. Prior to importing the data, we need to parse this file into individual files that contain the sample IDs of the replicates in each condition. This can be achieved by using a combination of the ‘group’, ‘compare two datasets’, ‘filter’, and ‘cut’ tools to end up with single column lists of sample IDs (SRRxxxxx) corresponding to each condition.
Importing data
Provide the files with SRR IDs to NCBI SRA Tools (fastq-dump) to import the data from SRA to Galaxy. By organizing the replicates of each condition in separate lists, the data will be imported as “collections” that can be directly loaded to a workflow or analysis pipeline.
Go to UCSC Genome Browser, navigate to “genomes”, then the species of interest.
On the home page for the genome build, immediately under the top navigation box, in the blue bar next to the full genome build name, you will find View sequences button.
Click on the View sequences button and it will take you to a detail page with a table listing out the contents.
Option 2
Use the tool Get Data -> UCSC Main.
In the Table Browser, choose the target genome and build.
For “group” choose the last option “All Tables”.
For “table” choose “chromInfo”.
Leave all other options at default and send the output to Galaxy.
This new dataset will load as a tabular dataset into your history.
It will list out the contents of the genome build, including the chromosome identifiers (in the first column).
How can I upload data using EBI-SRA?
Search for your data directly in the tool and use the Galaxy links.
Be sure to check your sequence data for correct quality score formats and the metadata “datatype” assignment.
Importación por medio de enlaces
Copia los enlaces
Abre el manejador de carga de datos de Galaxy (galaxy-upload (Upload) en la parte superior derecha del panel de herramientas)
Selecciona ‘Pegar/Traer datos’ Paste/Fetch Data
Copia los enlaces en el campo de textos
Presiona ‘Iniciar’ Start
Close Cierra la ventana.
Galaxy utiliza los URLs como nombres de forma predeterminada , así que los tendrás que cambiar a algunos que sean más útiles o informativos.
Importar datos de una biblioteca de datos
Como alternativa a cargar los datos desde una URL o desde su ordenador, los archivos también pueden estar disponibles desde una biblioteca de datos compartidos:
Entra en Libraries (panel izquierdo)
Navega a la carpeta correcta indicada por su instructor. - En la mayoría de los tutoriales de Galaxias los datos serán proporcionados en una carpeta llamada GTN - Material –> Topic name -> Tutorial name.
Seleccione los archivos deseados
Haz clic en Add to Historygalaxy-dropdown cerca de la parte superior y selecciona as Datasets en el menú desplegable
En la ventana emergente, elige
“Seleccionar historial “: el historial al que desea importar los datos (o crear uno nuevo)
Haga clic en Import
Importare i dati da una libreria di dati
In alternativa al caricamento dei dati da un URL o dal proprio computer, i file possono essere resi disponibili da una libreria di dati condivisi:
Entrare in Librerie (pannello sinistro)
Navigare verso alla cartella corretta indicata dal vostro istruttore. Nella maggior parte dei Galaxies i dati delle esercitazioni vengono forniti in una cartella denominata GTN - Materiale –> Nome argomento -> Nome esercitazione.
selezionare i file desiderati
Fare clic su Aggiungi alla cronologiagalaxy-dropdown vicino alla parte superiore e selezionare as Datasets dal menu a tendina
Nella finestra pop-up, scegliere
“Seleziona cronologia “: la cronologia in cui si desidera importare i dati (o crearne una nuova)
Cliccare su Import
Importazione tramite link
Copia la posizione del collegamento
Fare clic su galaxy-uploadCarica i dati nella parte superiore del pannello degli strumenti
Selezionare galaxy-wf-editIncollare/recuperare i dati
Incollare il/i link nel campo di testo
Premere Avvio
Chiude la finestra
Importer via un lien
Copier le lien
Ouvrez le gestionnaire de téléchargement Galaxy (galaxy-upload en haut à droite du panneau d’outils)
Selectionnez Coller/Récupérer les données
Collez le lien dans le champ de texte
Appuyez sur Start**
Ferme la fenêtre
Galaxy utilise les URL comme noms par défaut, vous devrez donc les remplacer par des URL plus utiles ou informatives. the window
Importieren von Daten aus einer Datenbibliothek
Als Alternative zum Hochladen der Daten von einer URL oder Ihrem Computer können die Dateien auch von einer Shared Data Library zur Verfügung gestellt werden:
Gehen Sie in Bibliotheken (linker Bereich)
Navigieren Sie zu dem richtigen Ordner, wie von Ihrem Ausbilder angegeben.
Auf den meisten Galaxies werden die Tutoriumsdaten in einem Ordner mit dem Namen GTN - Material –> Topic Name -> Tutorial Name bereitgestellt.
Wählen Sie die gewünschten Dateien aus
Klicken Sie auf Zur Historie hinzufügengalaxy-dropdown am oberen Rand und wählen Sie as Datasets aus dem Dropdown-Menü
Wählen Sie im Pop-up-Fenster
“Historie auswählen “: die Historie, in die Sie die Daten importieren möchten (oder erstellen Sie eine neue)
Klicken Sie auf Importieren
Importieren über Links
Kopieren der Linkposition
Klicken Sie auf galaxy-uploadDaten hochladen am oberen Rand der Werkzeugleiste
Wählen Sie galaxy-wf-editDaten einfügen/holen
Fügen Sie den/die Link(s) in das Textfeld ein
Drücken Sie Start
Schließen Sie das Fenster
Importing data from Sierra LIMS
This section will guide you through generating external links to your data stored in the Sierra LIMS system to be downloaded directly into Galaxy.
Click on the Sample ID of the sample you want to download data from.
Click on the Edit Sample Details button.
At the bottom of the page there will be an input box for creating a link, enter a description for the link in the Reason for link section, and click Create link. This will reload the page and add a new link to the sample under Authorised links to this sample.
Go back to the sample page or click on the hyperlink called link to take you back.
In the Results section select the lane you want to access your data from.
The bottom of the page, under the Links section, will now contain a list of wget commands with links for accessing all the files within that sample/lane.
Since this list is for wget commands, you need to extract out the links from the command. You can copy the link in the first set of double quotes for each line and galaxy-wf-editPaste/Fetch Data them directly into Galaxy to download the files.
Importing data from a data library
As an alternative to uploading the data from a URL or your computer, the files may also have been made available from a shared data library:
Go into Libraries (left panel)
Navigate to the correct folder as indicated by your instructor.
On most Galaxies tutorial data will be provided in a folder named GTN - Material –> Topic Name -> Tutorial Name.
Select the desired files
Click on Add to Historygalaxy-dropdown near the top and select as Datasets from the dropdown menu
In the pop-up window, choose
“Select history”: the history you want to import the data to (or create a new one)
Click on Import
Importing data from repositories
As an alternative to uploading the data from a URL or your computer, the files may also have been made available from a Choose from repositories:
Click on Upload Data on the top of the left panel
Click on Choose from repository and scroll down to find your repository or type the repository name in the search box on the top.
Select the datasets you want to import
click on OK
Click on Start
Click on Close
You can find the dataset has begun loading in you history.
Importing via links
Copy the link location
Click galaxy-uploadUpload at the top of the activity panel
Select galaxy-wf-editPaste/Fetch Data
Paste the link(s) into the text field
Press Start
Close the window
NCBI SRA sourced fastq data
In these FASTQ data:
The quality score identifier (+) is sometimes not a match for the sequence identifier (@).
The forward and reverse reads may be interlaced and need to be separated into distinct datasets.
Both may be present in a dataset. Correct the first, then the second, as explained below.
Format problems of any kind can cause tool failures and/or unexpected results.
Fix the problems before running any other tools (including FastQC, Fastq Groomer, or other QA tools)
For inconsistent sequence (@) and quality (+) identifiers
Correct the format by running the tool Replace Text in entire line with these options:
Find pattern: ^\+SRR.+
Replace with: +
Note: If the quality score line is named like “+ERR” instead (or other valid options), modify the pattern search to match.
For interlaced forward and reverse reads
Solution 1 (reads named /1 and /2)
Use the tool FASTQ de-interlacer on paired end reads
Solution 2 (reads named /1 and /2)
Create distinct datasets from an interlaced fastq dataset by running the tool Manipulate FASTQ reads on various attributes on the original dataset. It will run twice.
Note: The solution does NOT use the FASTQ Splitter tool. The data to be manipulated are interlaced sequences. This is different in format from data that are joined into a single sequence.
Use the Manipulate FASTQ settings to produce a dataset that contains the /1 reads**
Match Reads
Match Reads by Name/Identifier
Identifier Match Type Regular Expression
Match by .+/2
Manipulate Reads
Manipulate Reads by Miscellaneous Actions
Miscellaneous Manipulation Type Remove Read
Use these Manipulate FASTQ settings to produce a dataset that contains the /2 reads**
Exact same settings as above except for this change: Match by .+/1
Solution 3 (reads named /1 and /3)
Use the same operations as in Solution 2 above, except change the first Manipulate FASTQ query term to be:
Match by .+/3
Solution 4 (reads named without /N)
If your data has differently formatted sequence identifiers, the “Match by” expression from Solution 2 above can be modified to suit your identifiers.
Click on the Genome Ark button and then click on species
You can find the data by following this path: /species/${Genus}_${species}/${specimen_code}/genomic_data. Inside a given datatype directory (e.g.pacbio), select all the relevant files individually until all the desired files are highlighted and click the Ok button. Note that there may be multiple pages of files listed. Also note that you may not want every file listed.
Upload fasta datasets via links
Uploading fasta or fasta.gz datasets via URL.
Upload fasta datasets via links
Uploading fasta or fasta.gz datasets via URL.
Upload fastqsanger datasets via links
Uploading fastqsanger or fastqsanger.gz datasets via URL.
Click on Upload Data on the top of the left panel:
Click on Paste/Fetch:
Paste URL into text box that would appear:
Set Type (set all) to fastqsanger or, if your data is compressed as in URLs above (they have .gz extensions), to fastqsanger.gz
:
Warning: Danger: Make sure you choose corect format!
When selecting datatype in “Type (set all)” dropdown, make sure you select fastaqsanger or fastqsanger.gz BUT NOT fastqcssanger or anything else!
Upload few files (1-10)
Click on Upload Data on the top of the left panel
Click on Choose local file and select the files or drop the files in the Drop files here part
Click on Start
Click on Close
Upload many files (>10) via FTP
Some Galaxies offer FTP upload for very large datasets.
Note: the “Big Three” Galaxies (Galaxy Main, Galaxy EU, and Galaxy Australia) no longer support FTP upload, due to the recent improvements of the default web upload, which should now support large file uploads and almost all use cases. For situations where uploading via the web interface is too tedious, the galaxy-upload commandline utility is also available as an alternative to FTP.
To upload files via FTP, please
Check that your Galaxy supports FTP upload and look up the FTP settings.
Make sure to have an FTP client installed
There are many options. We can recommend FileZilla, a free FTP client that is available on Windows, MacOS, and Linux.
Establish FTP connection to the Galaxy server
Provide the Galaxy server’s FTP server name (e.g. ftp.mygalaxy.com)
Provide the username (usually the e-mail address) and the password on the Galaxy server
Connect
Add the files to the FTP server by dragging/dropping them or right clicking on them and uploading them
The FTP transfer will start. We need to wait until they are done.
When running setup-data-libraries it imports the library with the permissions of the admin user, rather locked down to the account that handled the importing.
Due to how data libraries have been implemented, it isn’t sufficient to share the folder with another user, instead you must also share individual items within this folder. This is an unfortunate issue with Galaxy that we hope to fix someday.
Until then, we can recommend you install the latest version of Ephemeris which includes the set-library-permissions command which let’s you recursively correct the permissions on a data library. Simply run:
set-library-permissions -g https://galaxy.example.com -a $API_KEY LIBRARY --roles ROLES role1,role2,role3
Where LIBRARY is the id of the library you wish to correct.
Tags can help you to better organize your history and track datasets.
Datasets can be tagged. This simplifies the tracking of datasets across the Galaxy interface. Tags can contain any combination of letters or numbers but cannot contain spaces.
To tag a dataset:
Click on the dataset to expand it
Click on Add Tagsgalaxy-tags
Add tag text. Tags starting with # will be automatically propagated to the outputs of tools using this dataset (see below).
Press Enter
Check that the tag appears below the dataset name
Tags beginning with # are special!
They are called Name tags. The unique feature of these tags is that they propagate: if a dataset is labelled with a name tag, all derivatives (children) of this dataset will automatically inherit this tag (see below). The figure below explains why this is so useful. Consider the following analysis (numbers in parenthesis correspond to dataset numbers in the figure below):
a set of forward and reverse reads (datasets 1 and 2) is mapped against a reference using Bowtie2 generating dataset 3;
dataset 3 is used to calculate read coverage using BedTools Genome Coverageseparately for + and - strands. This generates two datasets (4 and 5 for plus and minus, respectively);
datasets 4 and 5 are used as inputs to Macs2 broadCall datasets generating datasets 6 and 8;
datasets 6 and 8 are intersected with coordinates of genes (dataset 9) using BedTools Intersect generating datasets 10 and 11.
Now consider that this analysis is done without name tags. This is shown on the left side of the figure. It is hard to trace which datasets contain “plus” data versus “minus” data. For example, does dataset 10 contain “plus” data or “minus” data? Probably “minus” but are you sure? In the case of a small history like the one shown here, it is possible to trace this manually but as the size of a history grows it will become very challenging.
The right side of the figure shows exactly the same analysis, but using name tags. When the analysis was conducted datasets 4 and 5 were tagged with #plus and #minus, respectively. When they were used as inputs to Macs2 resulting datasets 6 and 8 automatically inherited them and so on… As a result it is straightforward to trace both branches (plus and minus) of this analysis.
I tag possono aiutarti a organizzare meglio la cronologia e a tenere traccia dei dataset.
I dataset possono essere etichettati. Questo semplifica il tracciamento dei dataset nell’interfaccia di Galaxy. I tag possono contenere qualsiasi combinazione di lettere o numeri, ma non possono contenere spazi.
Per etichettare un set di dati:
fare clic sul set di dati per espanderlo
Cliccare su Aggiungi taggalaxy-tags
Aggiungere tag text. I tag che iniziano con # saranno automaticamente propagati agli output degli strumenti che utilizzano questo set di dati (vedi sotto).
Premere Invio
verificare che il tag appaia sotto il nome del set di dati
**I tag che iniziano con # sono speciali!
Sono chiamati Name tags. La caratteristica unica di questi tag è che si propagano: se un set di dati è etichettato con un tag name, tutti i derivati (figli) di questo set di dati erediteranno automaticamente questo tag (vedi sotto). La figura seguente spiega perché questo è così utile. Si consideri la seguente analisi (i numeri tra parentesi corrispondono ai numeri dei set di dati nella figura sottostante):
un insieme di letture forward e reverse (set di dati 1 e 2) viene mappato rispetto a un riferimento utilizzando Bowtie2 generando il set di dati 3;
il dataset 3 è usato per calcolare la copertura delle letture usando BedTools Genome Coverageseparatamente per i filamenti + e -. Questo genera due set di dati (4 e 5 per il più e il meno, rispettivamente);
i set di dati 4 e 5 sono utilizzati come input per i set di dati Macs2 broadCall che generano i set di dati 6 e 8;
gli insiemi di dati 6 e 8 vengono intersecati con le coordinate dei geni (insiemi di dati 9) usando BedTools Intersect generando gli insiemi di dati 10 e 11.
Ora si consideri che questa analisi è stata fatta senza tag dei nomi. Questo è mostrato sul lato sinistro della figura. È difficile individuare quali set di dati contengono dati “più” e quali “meno”. Ad esempio, il set di dati 10 contiene dati “positivi” o “negativi”? Probabilmente “meno”, ma ne siete sicuri? Nel caso di una storia di piccole dimensioni, come quella mostrata qui, è possibile tracciarla manualmente, ma con l’aumentare delle dimensioni di una storia diventa molto impegnativo.
La parte destra della figura mostra esattamente la stessa analisi, ma utilizzando i tag dei nomi. Quando è stata condotta l’analisi, i dataset 4 e 5 erano etichettati rispettivamente con #plus e #minus. Quando sono stati utilizzati come input per Macs2, i dataset 6 e 8 li hanno ereditati automaticamente e così via… Di conseguenza, è facile tracciare entrambi i rami (più e meno) di questa analisi.
Las etiquetas pueden ayudarte a organizar mejor tu historial y a hacer un seguimiento de los conjuntos de datos.
Los conjuntos de datos se pueden etiquetar. Esto simplifica el seguimiento de los conjuntos de datos a través de la interfaz de Galaxy. Las etiquetas pueden contener cualquier combinación de letras o números, pero no pueden contener espacios.
Para etiquetar un conjunto de datos:
Haga clic en el conjunto de datos para expandirlo
Haz click en Añadir Etiquetasgalaxy-tags
Añade tag text. Las etiquetas que empiecen por # se propagarán automáticamente a los resultados de las herramientas que utilicen este conjunto de datos (véase más abajo).
Pulse Intro
Compruebe que la etiqueta aparece debajo del nombre del conjunto de datos
¡Las etiquetas que empiezan por # son especiales!
Se llaman etiquetas de nombre. La característica única de estas etiquetas es que se propagan: si un conjunto de datos se etiqueta con una etiqueta de nombre, todos los derivados (hijos) de este conjunto de datos heredarán automáticamente esta etiqueta (véase más abajo). La figura siguiente explica por qué es tan útil. Considere el siguiente análisis (los números entre paréntesis corresponden a los números de los conjuntos de datos en la siguiente figura):
un conjunto de lecturas hacia adelante y hacia atrás (conjuntos de datos 1 y 2) se mapea contra una referencia usando Bowtie2 generando el conjunto de datos 3;
dataset 3 se utiliza para calcular la cobertura de lectura utilizando BedTools Genome Coveragepor separado para las cadenas + y -. Esto genera dos conjuntos de datos (4 y 5 para más y menos, respectivamente);
los conjuntos de datos 4 y 5 se utilizan como entrada para los conjuntos de datos Macs2 broadCall que generan los conjuntos de datos 6 y 8;
los conjuntos de datos 6 y 8 son intersecados con las coordenadas de los genes (conjunto de datos 9) usando BedTools Intersect generando los conjuntos de datos 10 y 11.
Ahora considere que este análisis se realiza sin etiquetas de nombre. Esto se muestra en el lado izquierdo de la figura. Es difícil determinar qué conjuntos de datos contienen datos “positivos” y cuáles “negativos”. Por ejemplo, ¿el conjunto de datos 10 contiene datos “más” o datos “menos”? Probablemente “menos”, pero ¿está seguro? En el caso de un historial pequeño, como el que se muestra aquí, es posible rastrearlo manualmente, pero a medida que aumenta el tamaño del historial se convierte en todo un reto.
La parte derecha de la figura muestra exactamente el mismo análisis, pero utilizando etiquetas de nombre. Cuando se realizó el análisis, los conjuntos de datos 4 y 5 estaban etiquetados con #plus y #minus, respectivamente. Cuando se utilizaron como entradas para Macs2, los conjuntos de datos resultantes 6 y 8 las heredaron automáticamente, y así sucesivamente… Por lo tanto, es fácil rastrear las dos ramas (positiva y negativa) de este análisis.
Haga clic en el galaxy-pencilicono lápiz del conjunto de datos para editar sus atributos
En el panel central, cambie el campo Name
Haga clic en el botón Save
Cambiar el tipo de datos
Galaxy will try to autodetect the datatype of your files, but you may need to manually set this occasionally.
Selecciona sobre el galaxy-pencilicono del lápiz para editar los atributos del conjunto de datos
Selecciona en la pestaña galaxy-chart-select-dataDatatypes en la parte superior del panel central
Selecciona tu tipo de datos
Da clic en el botón Change datatype
Changer le type de données
Galaxy will try to autodetect the datatype of your files, but you may need to manually set this occasionally.
Cliquez sur l’icône galaxy-pencilicône crayon pour modifier les attributs du jeu de données
Sélectionnez l’onglet galaxy-chart-select-dataTypes de données en haut du volet central
Sélectionnez votre type de données
Cliquez sur le bouton Modifier le type de données
Changing database/build (dbkey)
You can tell Galaxy which dbkey (e.g. reference genome) your dataset is associated with. This may be used by tools to automatically use the correct settings.
Click the desired dataset’s name to expand it.
Click on the “?” next to database indicator:
In the central panel, change the Database/Build field
Select your desired database key from the dropdown list
Click the Save button
Changing the datatype
Galaxy will try to autodetect the datatype of your files, but you may need to manually set this occasionally.
Click on the galaxy-pencilpencil icon for the dataset to edit its attributes
In the central panel, click galaxy-chart-select-dataDatatypes tab on the top
In the galaxy-chart-select-dataAssign Datatype, select your desired datatype from “New Type” dropdown
Tip: you can start typing the datatype into the field to filter the dropdown menu
Click the Save button
Converting the file format
Some datasets can be transformed into a different format. Galaxy has some built-in file conversion options depending on the type of data you have.
Click on the galaxy-pencil pencil icon for the dataset to edit its attributes.
In the central panel, click galaxy-chart-select-data Datatypes tab on the top.
In the galaxy-gear Convert to Datatype section, select your desired datatype from “Target datatype” dropdown.
Click the Create Dataset button to start the conversion.
Creación de un nuevo fichero
Galaxy permite crear nuevos ficheros desde el menú de carga. Puedes proporcionar el contenido del fichero.
Pulse galaxy-uploadCargar Datos en la parte superior del panel de herramientas
Seleccione galaxy-wf-editPegar/Obtener Datos en la parte inferior
Pegue el contenido del archivo en el campo de texto * Pulse Iniciar y Cerrar la ventana
Creare un nuovo file
Galaxy permette di creare nuovi file dal menu di caricamento. È possibile fornire direttamente il contenuto del file.
Fare clic su galaxy-uploadCaricamento dati nella parte superiore del pannello degli strumenti
Selezionare galaxy-wf-editIncolla/Recupera dati in basso
Incollare il contenuto del file nel campo di testo * Premere Avvio e Chiudere la finestra
Creating a new file
Galaxy allows you to create new files from the upload menu. You can supply the contents of the file.
Click galaxy-uploadUpload Data at the top of the tool panel
Select galaxy-wf-editPaste/Fetch Data at the bottom
Paste the file contents into the text field
Press Start and Close the window
Datasets not downloading at all
Check to see if pop-ups are blocked by your web browser. Where to check can vary by browser and extensions.
Double check your API key, if used. Go to User > Preferences > Manage API key.
Check the sharing/permission status of the Datasets. Go to Dataset > Pencil icon galaxy-pencil > Edit attributes > Permissions. If you do not see a “Permissions” tab, then you are not the owner of the data.
Notes:
If the data was shared with you by someone else from a Shared History, or was copied from a Published History, be aware that there are multiple levels of data sharing permissions.
All data are set to not shared by default.
Datasets sharing permissions for a new history can be set before creating a new history. Go to User > Preferences > Set Dataset Permissions for New Histories.
User > Preferences > Make all data private is a “one click” option to unshare ALL data (Datasets, Histories). Note that once confirmed and all data is unshared, the action cannot be “undone” in batch, even by an administrator. You will need to re-share data again and/or reset your global sharing preferences as wanted.
Only the data owner has control over sharing/permissions.
Any data you upload or create yourself is automatically owned by you with full access.
You may not have been granted full access if the data were shared or imported, and someone else is the data owner (your copy could be “view only”).
After you have a fully shared copy of any shared/published data from someone else, then you become the owner of that data copy. If the other person or you make changes, it applies to each person’s copy of the data, individually and only.
Histories can be shared with included Datasets. Datasets can be downloaded/manipulated by others or viewed by others.
Share access to Datasets is distinct but it relates to Histories’ access.
Detecting the datatype (file format)
Click on the galaxy-pencilpencil icon for the dataset to edit its attributes
In the central panel, click on the galaxy-chart-select-dataDatatypes tab on the top
Click the Auto-detect button to have Galaxy try to autodetect it.
Different dataset icons and their usage
Icons provide a visual experience for objects, actions, and ideas
Dataset icons and their usage:
galaxy-eye“Eye icon”: Display dataset contents.
galaxy-pencil“Pencil icon”: Edit attributes of dataset metadata: labels, datatype, database.
galaxy-delete“Trash icon”: Delete the dataset.
galaxy-save“Disc icon”: Download the dataset.
galaxy-link“Copy link”: Copy link URL to the dataset.
Galaxy ermöglicht es Ihnen, über das Upload-Menü neue Dateien zu erstellen. Sie können den Inhalt der Datei angeben.
Klicken Sie auf galaxy-uploadDaten hochladen am oberen Rand des Werkzeugfensters
Wählen Sie galaxy-wf-editEinfügen/Daten holen am unteren Rand
Fügen Sie den Inhalt der Datei in das Textfeld ein
Drücken Sie Start und Schließen Sie das Fenster
Finding BAM dataset identifiers
How to find the reference sequence identifiers inside of a BAM file
Explore the content of your BAM.
Run Samtools: IdxStats on your bam dataset.
The reference sequence identifiers inside the “BAM header” will be listed in the result report.
The report is a summary of the BAM content that includes: reference sequence identifiers (chromosome names), their lengths, and a count of the reads mapping to that reference sequence within the BAM file.
Compare the sequence identifiers in your BAM file to the the sequence identifiers (aka “chrom” field) field in all other inputs: VCF, GTF, GFF3, BED, Interval, Tabular.
It is usually important to use the same reference assembly for all steps within the same analysis. If you discover differences, you may need to choose different reference data.
tip Notes
This method will not work for “sequence-only” bam datasets, as these usually have no header and are not associated with a reference assembly yet.
Finding Datasets
To review all active Datasets in your account, go to User > Datasets.
Notes:
Logging out of Galaxy while the Upload tool is still loading data can cause uploads to abort. This is most likely to occur when a dataset is loaded by browsing local files.
If you have more than one browser window open, each with a different Galaxy History loaded, the Upload tool will load data into the most recently used history.
Click on refresh icon galaxy-refresh at the top of the History panel to display the current active History with the datasets.
Hinzufügen eines Tags
Tags können dir helfen, deinen Verlauf besser zu organisieren und Datensätze nachzuverfolgen.
Datensätze können getaggt werden. Dies vereinfacht die Verfolgung von Datensätzen über die Galaxy-Schnittstelle. Tags können eine beliebige Kombination von Buchstaben oder Zahlen enthalten, dürfen aber keine Leerzeichen enthalten.
Um einen Datensatz zu taggen:
Klicken Sie auf den Datensatz, um ihn zu erweitern
Klicken Sie auf Add Tagsgalaxy-tags
Fügen Sie tag text hinzu. Tags, die mit # beginnen, werden automatisch an die Ausgaben von Tools weitergegeben, die diesen Datensatz verwenden (siehe unten).
Drücken Sie Enter
Stellen Sie sicher, dass das Tag unter dem Namen des Datensatzes erscheint
Tags, die mit # beginnen, sind speziell!
Sie werden Name-Tags genannt. Das Besondere an diesen Tags ist, dass sie sich vererben: Wenn ein Datensatz mit einem Name-Tag gekennzeichnet ist, erben alle Ableitungen (Kinder) dieses Datensatzes automatisch dieses Tag (siehe unten). Die folgende Abbildung erklärt, warum dies so nützlich ist. Betrachten Sie die folgende Analyse (die Zahlen in Klammern entsprechen den Datensatznummern in der Abbildung unten):
Ein Satz von Vorwärts- und Rückwärts-Reads (Datensätze 1 und 2) wird mit Bowtie2 gegen eine Referenz gemappt, wodurch Datensatz 3 erzeugt wird;
Datensatz 3 wird verwendet, um die Read Coverage mit BedTools Genome Coveragegetrennt für + und - Stränge. Dies erzeugt zwei Datensätze (4 und 5 für plus bzw. minus);
Die Datensätze 4 und 5 werden als Input für die Macs2 broadCall-Datensätze verwendet, die die Datensätze 6 und 8 erzeugen;
Die Datensätze 6 und 8 werden mit BedTools Intersect mit den Koordinaten von Genen (Datensatz 9) geschnitten, wodurch die Datensätze 10 und 11 entstehen.
Betrachten wir nun, dass diese Analyse ohne Namens-Tags durchgeführt wird. Dies ist auf der linken Seite der Abbildung zu sehen. Es ist schwer nachzuvollziehen, welche Datensätze “Plus”-Daten und welche “Minus”-Daten enthalten. Enthält zum Beispiel Datensatz 10 “Plus”-Daten oder “Minus”-Daten? Wahrscheinlich “minus”, aber sind Sie sicher? Bei einem kleinen Verlauf wie dem hier gezeigten ist es möglich, dies manuell nachzuvollziehen, aber wenn der Umfang eines Verlaufs wächst, wird es sehr schwierig.
Die rechte Seite der Abbildung zeigt genau die gleiche Analyse, jedoch unter Verwendung von Namens-Tags. Als die Analyse durchgeführt wurde, waren die Datensätze 4 und 5 mit #plus bzw. #minus gekennzeichnet. Als sie als Eingaben in Macs2 verwendet wurden, übernahmen die Datensätze 6 und 8 automatisch diese Markierungen und so weiter… Daher ist es einfach, beide Zweige (plus und minus) dieser Analyse zu verfolgen.
To delete datasets individually simply click the galaxy-delete button with dataset’s box. That’s it! This action is reversible: datasets can be undeleted.
Deleting datasets in bulk
To delete multiple datasets at once:
Click history-select-multiple icon at the top of the history pane;
Select datasets you want to delete;
Click the dropdown that would appear at the top of the history;
Select “Delete” option.
This action is also reversible: datasets can be undeleted.
Deleting datasets permanentlywarningDanger zone!
Warning: Permanent is ... PERMANENT!
Datasets deleted in this fashion CANNOT be undeleted!
To delete multiple datasets PERMANENTLY:
Click history-select-multiple icon at the top of the history pane;
Select datasets you want to delete;
Click the dropdown that would appear at the top of the history;
Select “Delete (permanently)” option.
How to hide datasets?
To hide datasets:
Click history-select-multiple icon at the top of the history pane;
Select datasets you want to hide;
Click the dropdown that would appear at the top of the history;
Select “Hide” option.
How to un-delete datasets?
If your history contains deleted datasets you will see galaxy-delete“Include deleted” button directly above dataset display.
To un-delete datasets:
Type deleted:true in the search box
Select datasets you want to un-delete
Click the dropdown that would appear at the top of the history;
Select “Undelete” option.
Alternatively, you can:
click galaxy-delete“Include deleted” button directly above dataset display. This will cause deleted datasets to appear in history along with normal (un-deleted) datasets;
deleted datasets are distinguished by having dataset-undelete within dataset box. Clicking on this icon will un-delete a given dataset;
How to un-hide datasets?
If your history contains hidden datasets you will see galaxy-show-hidden“Include hidden” button directly above the dataset display.
To un-hide datasets:
Type visible:hidden in the search box
Select datasets you want to un-hide
Click the dropdown that would appear at the top of the history;
Select “Unhide” option.
Alternatively, you can:
click galaxy-show-hidden“Include hidden” button directly above dataset display. This will cause hidden datasets to appear in history along with normal (un-hidden) datasets;
hidden datasets are distinguished by having galaxy-show-hidden within dataset box. Clicking on this icon will un-hide a given dataset;
Mismatched Chromosome identifiers and how to avoid them
Reference data mismatches are similiar to bad reagents in a wet lab experiment: all sorts of odd problems can come up!
You inputs must be all based on an identical genome assembly build to achieve correct scientific results.
There are two areas to review for data to be considered identical.
The data are based on the same exact genome assembly (or “assembly release”).
The “assembly” refers to the nucleotide sequence of the genome.
If the base order and length of the chromosomes are not the same, then your coordinates will have scientific problems.
Converting coordinates between assemblies may be possible. Search tool panel with CrossMap.
The data are based on the same exact genome assembly build.
The “build” refers to the labels used inside the file. In this context, pay attention to the chromosome identifiers.
These all may mean the same thing to a person but not to a computer or tool: chr1, Chr1, 1, chr1.1
Converting identifiers between builds may be possible. Search tool panel with Replace.
The methods listed below help to identify and correct errors or unexpected results when the underlying genome assembly build for all inputs are not identical.
Native reference genomes (FASTA) are built as pre-computed indexes on the Galaxy server where you are working.
Different servers host both common and different reference genome data.
Most reference annotation (tabular, GTF, GFF3) is supplied from the history by the user, even when the genome is indexed.
Public Galaxy servers source reference genomes preferentially from UCSC.
A reference transcriptome (FASTA) is supplied from the history by the user.
Many experiements use a combination of all three types of reference data. Consider pre-preparing your files at the start!
The default variant for a native genome index is “Full”. Defined as: all primary chromosomes (or scaffolds/contigs) including mitochondrial plus associated unmapped, plasmid, and other segments.
When only one version of a genome is available for a tool, it represents the default “Full” variant.
Some genomes will have more than one variant available.
The “Canonical Male” or sometimes simply “Canonical” variant contains the primary chromosomes for a genome. For example a human “Canonical” variant contains chr1-chr22, chrX, chrY, and chrM.
The “Canonical Female” variant contains the primary chromosomes excluding chrY.
Modifica del tipo di dato
Galaxy cercherà di rilevare automaticamente il tipo di dati dei tuoi file, ma potrebbe essere necessario impostarlo manualmente in alcuni casi.
Cliccare sull’icona galaxy-pencilicona della matita per il set di dati per modificarne gli attributi
Nel pannello centrale, fare clic su galaxy-chart-select-data *scheda *Datipi** in alto
Nella sezione galaxy-chart-select-dataAssegna tipo di dato, selezionare il tipo di dato desiderato dal menu a discesa “Nuovo tipo”
Suggerimento: si può iniziare a digitare il tipo di dato nel campo per filtrare il menu a discesa
Fare clic sul pulsante Salva
Moving datasets between Galaxy servers
On the origin Galaxy server:
Click on the name of the dataset to expand the info.
Click on the Copy link icongalaxy-link.
On the destination Galaxy server:
Click on Upload data > Paste / Fetch Data and paste the link. Select attributes, such as genome assembly, if required. Hit the Start button.
Note: The copy link icon galaxy-link cannot be used to move HTML datasets (but this can be downloaded using the download button galaxy-save) and SQLite datasets.
Purging datasets
All account Datasets can be reviewed under User > Datasets.
To permanently delete: use the link from within the dataset, or use the Operations on Multiple Datasets functions, or use the Purge Deleted Datasets option in the History menu.
Notes:
Within a History, deleted/permanently deleted Datasets can be reviewed by toggling the deleted link at the top of the History panel, found immediately under the History name.
Both active (shown by default) and hidden (the other toggle link, next to the deleted link) datasets can be reviewed the same way.
Click on the far right “X” to delete a dataset.
Datasets in a deleted state are still part of your quota usage.
Datasets must be purged (permanently deleted) to not count toward quota.
Quotas for datasets and histories
Deleted datasets and deleted histories containing datasets are considered when calculating quotas.
Permanently deleted datasets and permanently deleted histories containing datasets are not considered.
Histories/datasets that are shared with you are only partially considered unless you import them.
Click on the galaxy-pencilpencil icon for the dataset to edit its attributes
In the central panel, change the Name field
Click the Save button
Rinominare un set di dati
Fare clic sull’icona galaxy-pencilicona della matita per il set di dati per modificarne gli attributi
Nel pannello centrale, cambiare il campo Name
Fare clic sul pulsante Save
Umbenennen eines Datensatzes
Klicken Sie auf das galaxy-pencilBleistift-Symbol für den Datensatz, um seine Attribute zu bearbeiten
Ändern Sie im zentralen Bereich das Feld Name
Klicken Sie auf die Schaltfläche Speichern
Understanding job statuses
Job statuses will help you understand the stages of your work.
Compare the color of your datasets to these job processing stages.
Grey: The job is queued. Allow this to complete!
Yellow: The job is executing. Allow this to complete!
Green: The job has completed successfully.
Red: The job has failed. Check your inputs and parameters with Help examples and GTN tutorials. Scroll to the bottom of the tool form to find these.
Light Blue: The job is paused. This indicates either an input has a problem or that you have exceeded the disk quota set by the administrator of the Galaxy instance you are working on.
Grey, Yellow, Grey again: The job is waiting to run due to admin re-run or an automatic fail-over to a longer-running cluster.
galaxy-info Don’t lose your queue placement! It is essential to allow queued jobs to remain queued, and to never interrupt an executing job. If you delete/re-run jobs, they are added back to the end of the queue again.
Working with GFF GFT GTF2 GFF3 reference annotation
All annotation datatypes have a distinct format and content specification.
Data providers may release variations of any, and tools may produce variations.
GFF3 data may be labeled as GFF.
Content can overlap but is generally not understood by tools that are expecting just one of these specific formats.
Best practices
The sequence identifiers must exactly match between reference annotation and reference genomes transcriptomes exomes.
Most tools expect GFT format unless the tool form specifically notes otherwise.
Get the GTF version from the data providers if it is available.
If only GFF3 is available, you can attempt to transform it with the tool gffread.
Was GTF data detected as GFF during Upload? It probably has headers. -Remove the headers (lines that start with a “#”) with the Select tool using the option “NOT Matching” with the regular expression: ^#
Find annotation under their Downloads area. The path will be similar to: https://hgdownload.soe.ucsc.edu/goldenPath/<database>/bigZips/genes/
Copy the URL from UCSC and paste it into the Upload tool, allowing Galaxy to detect the datatype.
Working with deleted datasets
Deleted datasets and histories can be recovered by users as they are retained in Galaxy for a time period set by the instance administrator. Deleted datasets can be undeleted or permanently deleted within a History. Links to show/hide deleted (and hidden) datasets are at the top of the History panel.
To review or adjust an individual dataset:
Click on the name to expand it.
If it is only deleted, but not permanently deleted, you’ll see a message with links to recover or to purge.
Click on Undelete it to recover the dataset, making it active and accessible to tools again.
Click on Permanently remove it from disk to purge the dataset and remove it from the account quota calculation.
To review or adjust multiple datasets in batch:
Click on the checked box icon galaxy-selector near the top left of the history panel (Select Items) to switch into “Operations on Multiple Datasets” mode.
Accordingly for each individual dataset, choose the selection box. Check the datasets you want to modify and choose your option (show, hide, delete, undelete, purge, and group datasets).
Working with very large fasta datasets
Run FastQC on your data to make sure the format/content is what you expect. Run more QA as needed.
Search GTN tutorials with the keyword “qa-qc” for examples.
Search Galaxy Help with the keywords “qa-qc” and “fasta” for more help.
Assembly result?
Consider filtering by length to remove reads that did not assemble.
Formatting criteria:
All sequence identifiers must be unique.
Some tools will require that there is no description line content, only identifiers, in the fasta title line (“>” line). Use NormalizeFasta to remove the description (all content after the first whitespace) and wrap the sequences to 80 bases.
Only appropriate for smaller genomes (bacterial, viral, most insects).
Not appropriate for any mammalian genomes, or some plants/fungi.
Sequence identifiers must be an exact match with all other inputs or expect problems. See GFF GFT GFF3.
Formatting criteria:
All sequence identifiers must be unique.
ALL tools will require that there is no description content, only identifiers, in the fasta title line (“>” line). Use NormalizeFasta to remove the description (all content after the first whitespace) and wrap the sequences to 80 bases.
The only exception is when executing the MakeBLASTdb tool and when the input fasta is in NCBI BLAST format (see the tool form).
Working with very large fastq datasets
Run FastQC on your data to make sure the format/content is what you expect. Run more QA as needed.
Search GTN tutorials with the keyword “qa-qc” for examples.
Search Galaxy Help with the keywords “qa-qc” and “fastq” for more help.
How to create a single smaller input. Search the tool panel with the keyword “subsample” for tool choices.
How to create multiple smaller inputs. Start with Split file to dataset collection, then merge the results back together using a tool specific for the datatype. Example: BAM results? Use MergeSamFiles.
Ändern des Datentyps
Galaxy wird versuchen, den Datentyp Ihrer Dateien automatisch zu erkennen, aber gelegentlich müssen Sie ihn möglicherweise manuell festlegen.
Klicken Sie auf das galaxy-pencilBleistift-Symbol für den Datensatz, um seine Attribute zu bearbeiten
Klicken Sie im zentralen Panel auf galaxy-chart-select-data *registerkarte *Datentypen** oben
Im Feld galaxy-chart-select-dataDatentyp zuweisen, wählen Sie Ihren gewünschten Datentyp aus dem “Neuer Typ“-Dropdown
Tipp: Sie können mit der Eingabe des Datentyps in das Feld beginnen, um das Dropdown-Menü zu filtern
As of release 17.09, fastq data will have the datatype fastqsanger auto-detected when that quality score scaling is detected and “autodetect” is used within the Upload tool. Compressed fastq data will be converted to uncompressed in the history.
To preserve fastq compression, directly assign the appropriate datatype (eg: fastqsanger.gz).
If the data is close to or over 2 GB in size, be sure to use FTP.
If the data was already loaded as fastq.gz, don’t worry! Just test the data for correct format (as needed) and assign the metadata type.
Compressed FASTQ files, (`*.gz`)
Files ending in .gz are compressed (zipped) files.
The fastq.gz format is a compressed version of a fastq dataset.
The fastqsanger.gz format is a compressed version of the fastqsanger datatype, etc.
Compression saves space (and therefore your quota).
Tools can accept the compressed versions of input files
Make sure the datatype (compressed or uncompressed) is correct for your files, or it may cause tool errors.
FASTQ files: `fastq` vs `fastqsanger` vs ..
FASTQ files come in various flavours. They differ in the encoding scheme they use. See our QC tutorial for a more detailed explanation of encoding schemes.
Nowadays, the most commonly used encoding scheme is sanger. In Galaxy, this is the fastqsanger datatype. If you are using older datasets, make sure to verify the FASTQ encoding scheme used in your data.
Be Careful: choosing the wrong encoding scheme can lead to incorrect results!
Tip: There are 2 Galaxy datatypes that have similar names, but are not the same, please make sure you fastqsanger and fastqcssanger (not the additional cs).
Tip: When in doubt, choose fastqsanger
How do `fastq.gz` datasets relate to the `.fastqsanger` datatype metadata assignment?
Before assigning fastqsanger or fastqsanger.gz, be sure to confirm the format.
TIP:
Using non-fastqsanger scaled quality values will cause scientific problems with tools that expected fastqsanger formatted input.
Even if the tool does not fail, get the format right from the start to avoid problems. Incorrect format is still one of the most common reasons for tool errors or unexpected results (within Galaxy or not).
How to format fastq data for tools that require .fastqsanger format?
Most tools that accept FASTQ data expect it to be in a specific FASTQ version: .fastqsanger. The .fastqsanger datatype must be assigned to each FASTQ dataset.
Run FASTQ Groomer if the data needs to have the quality scores rescaled.
If you are certain that the quality scores are already scaled to Sanger Phred+33 (the result of an Illumina 1.8+ pipeline), the datatype .fastqsanger can be directly assigned. Click on the pencil icon galaxy-pencil to reach the Edit Attributes form. In the center panel, click on the “Datatype” tab, enter the datatype .fastqsanger, and save.
Run FastQC again on the entire dataset if any changes were made to the quality scores for QA.
Other tips
If you are not sure what type of FASTQ data you have (maybe it is not Illumina?), see the help directly on the FASTQ Groomer tool for information about types.
For Illumina, first run FastQC on a sample of your data (how to read the full report). The output report will note the quality score type interpreted by the tool. If not .fastqsanger, run FASTQ Groomer on the entire dataset. If .fastqsanger, just assign the datatype.
For SOLiD, run NGS: Fastq manipulation → AB-SOLID DATA → Convert, to create a .fastqcssanger dataset. If you have uploaded a color space fastq sequence with quality scores already scaled to Sanger Phred+33 (.fastqcssanger), first confirm by running FastQC on a sample of the data. Then if you want to double-encode the color space into psuedo-nucleotide space (required by certain tools), see the instructions on the tool form Fastq Manipulation for the conversion.
If your data is FASTA, but you want to use tools that require FASTQ input, then using the tool NGS: QC and manipulation → Combine FASTA and QUAL. This tool will create “placeholder” quality scores that fit your data. On the output, click on the pencil icon galaxy-pencil to reach the Edit Attributes form. In the center panel, click on the “Datatype” tab, enter the datatype .fastqsanger, and save.
Identifying and formatting Tabular Datasets
Format help for Tabular/BED/Interval Datasets
A Tabular datatype is human readable and has tabs separating data columns. Please note that tabular data is different from comma separated data (.csv) and the common datatypes are: .bed, .gtf, .interval, or .txt.
Click the pencil icon galaxy-pencil to reach the Edit Attributes form.
Change the datatype (3rd tab) and save.
Label columns (1st tab) and save.
Metadata will be assigned, then the dataset can be used.
If the required input is a BED or Interval datatype, adjusting (.tab → .bed, .tab → .interval) maybe possible using a combination of Text Manipulation tools, to create a dataset that matches required specifications.
Some tools require that BED format be followed, even if the datatype Interval (with less strict column ordering) is accepted on the tool form.
These tools will fail, if they are run with malformed BED datasets or non-specific column assignments.
Solution: reorganize the data to be in BED format and rerun.
Understanding Datatypes
Allow Galaxy to detect the datatype during Upload, and adjust from there if needed.
Tool forms will filter for the appropriate datatypes it can use for each input.
Directly changing a datatype can lead to errors. Be intentional and consider converting instead when possible.
Dataset content can also be adjusted (tools: Data manipulation) and the expected datatype detected. Detected datatypes are the most reliable in most cases.
If a tool does not accept a dataset as valid input, it is not in the correct format with the correct datatype.
Once a dataset’s content matches the datatype, and that dataset is repeatedly used (example: Reference annotation) use that same dataset for all steps in an analysis or expect problems. This may mean rerunning prior tools if you need to make a correction.
Tip: Not sure what datatypes a tool is expecting for an input?
Create a new empty history
Click on a tool from the tool panel
The tool form will list the accepted datatypes per input
Warning: In some cases, tools will transform a dataset to a new datatype at runtime for you.
This is generally helpful, and best reserved for smaller datasets.
Why? This can also unexpectedly create hidden datasets that are near duplicates of your original data, only in a different format.
For large data, that can quickly consume working space (quota).
Deleting/purging any hidden datasets can lead to errors if you are still using the original datasets as an input.
Consider converting to the expected datatype yourself when data is large.
Then test the tool directly on converted data. If it works, purge the original to recover space.
Using compressed fastq data as tool inputs
If the tool accepts fastq input, then .gz compressed data assigned to the datatype fastq.gz is appropriate.
If the tool accepts fastqsanger input, then .gz compressed data assigned to the datatype fastqsanger.gz is appropriate.
Using uncompressed fastq data is still an option with tools. The choice is yours.
TIP: Avoid labeling compressed data with an uncompressed datatype, and the reverse. Jobs using mismatched datatype versus actual format will fail with an error.
Have you ever experienced that you would submit a job but your history wouldn’t update? Maybe it doesn’t scroll or the datasets stay permanently grey even when you know they should be complete, until you refresh the webpage?
One possible cause of this can be a difference in the clocks of your browser and the server. Check that your clocks match, and if not, reconfigure them! If you are following the Galaxy Admin Training, you will have setup chrony. Check that your chrony configuration is valid and requesting time from a local pool.
# chronyc -n sources
210 Number of sources = 1
MS Name/IP address         Stratum Poll Reach LastRx Last sample
===============================================================================
^? 169.254.169.123               0   7     0     -     +0ns[   +0ns] +/-    0ns
This command should return some valid sources. THe above shows an example of a time source that isn’t working, 0ns is not a realistic office and LastRx is empty. Instead it should look more like::
Here we see a number of sources, with more plausible offsets and non-empty LastRx.
If your time was misconfigured, you might now see something like:
# chronyc -n tracking
Reference ID    : B950F724 (185.80.247.36)
Stratum         : 2
Ref time (UTC)  : Tue Oct 22 09:44:29 2024
System time     : 929.234680176 seconds slow of NTP time
as chrony slowly adjusts the system clock to match NTP time.
Additionally you can use py-spy to record the issue and generate a flame graph.
Tool missing from Galaxy
First, restart Galaxy and watch the log for lines like:
Loaded tool id: toolshed.g2.bx.psu.edu/repos/iuc/sickle/sickle/1.33, version: 1.33 into tool panel....
After startup, check integrated_tool_panel.xml for a line like the following to be sure it was loaded properly and added to the toolbox (if not, check the logs further)
Additionally if you have multiple job handlers, sometimes, rarely they don’t all get the update. Just restart them if that’s the case. Alternatively you can send an (authenticated) API requested:
curl -X PUT https://galaxy.example.org/api/configuration
Using data source tools with Pulsar
Data source tools such as UCSC Main will fail if Pulsar is the default destination.
To fix this issue you can force individual tools to run on a specific destination or handler by adding to your job_conf file:
If you haven’t worked with diffs before, this can be something quite new or different.
If we have two files, let’s say a grocery list, in two files. We’ll call them ‘a’ and ‘b’.
Code In: Old
$ cat old
🍎
🍐
🍊
🍋
🍒
🥑
Code Out: New
$ cat new
🍎
🍐
🍊
🍋
🍍
🥑
We can see that they have some different entries. We’ve removed 🍒 because they’re awful, and replaced them with an 🍍
Diff lets us compare these files
$ diff old new
5c5
< 🍒
---
> 🍍
Here we see that 🍒 is only in a, and 🍍 is only in b. But otherwise the files are identical.
There are a couple different formats to diffs, one is the ‘unified diff’
$ diff -U2 old new
--- old	2022-02-16 14:06:19.697132568 +0100
+++ new	2022-02-16 14:06:36.340962616 +0100
@@ -3,4 +3,4 @@
 🍊
 🍋
-🍒
+🍍
 🥑
This is basically what you see in the training materials which gives you a lot of context about the changes:
--- old is the ‘old’ file in our view
+++ new is the ‘new’ file
@@ these lines tell us where the change occurs and how many lines are added or removed.
Lines starting with a - are removed from our ‘new’ file
Lines with a + have been added.
So when you go to apply these diffs to your files in the training:
Ignore the header
Remove lines starting with - from your file
Add lines starting with + to your file
The other lines (🍊/🍋 and 🥑) above just provide “context”, they help you know where a change belongs in a file, but should not be edited when you’re making the above change. Given the above diff, you would find a line with a 🍒, and replace it with a 🍍
Added & Removed Lines
Removals are very easy to spot, we just have removed lines
--- old	2022-02-16 14:06:19.697132568 +0100
+++ new	2022-02-16 14:10:14.370722802 +0100
@@ -4,3 +4,2 @@
 🍋
 🍒
-🥑
And additions likewise are very easy, just add a new line, between the other lines in your file.
--- old	2022-02-16 14:06:19.697132568 +0100
+++ new	2022-02-16 14:11:11.422135393 +0100
@@ -1,3 +1,4 @@
 🍎
+🍍
 🍐
 🍊
Completely new files
Completely new files look a bit different, there the “old” file is /dev/null, the empty file in a Linux machine.
In 'infer experiments' I get unequal numbers, but in the IGV it looks like it is unstranded. What does this mean?
It’s also often the case that elimination of the second strand is not perfect, and there are genuine cases of bidirectional transcription in the genome. 70 / 30 % as in your report is not a good result for a stranded library. You can treat this as a stranded library in your analysis, but for instance you couldn’t make the conclusion that a given gene is actually transcribed from the reverse strand. Likely that the library preparation didn’t work perfectly. This can depend on many factors, one is that you need to completely digest your DNA using a high quality DNase before doing the reverse transcription.
When is the "infer experiment" tool used in practice?
Often you are already aware whether the RNA-seq data is stranded or not in the first place because you sequenced it yourself or ordered it from a company.
But it can happen in cases where you get the data from someone else, that this information is lost and you need to find out.
If you performed your data analysis in Galaxy, you can easily export a list of all the tools you used—and should cite—as follows:
Click on the History options button ( galaxy-history-options ) in the right-hand panel.
Select Export Tool Citations from the menu.
The middle panel will display a list of tools used in your history, with citation information provided in two formats: APA and BibTeX.
Don’t forget to also cite Galaxy itself in your publication.
Proper citation helps support the developers and ensures reproducibility—thank you for taking this step!
How do I manage my Galaxy storage?
Now, it is possible to bring your own Storage to Galaxy for computation, storage, and archiving of your results. You can add more storage options to your account by following these steps:
Click on your Username on top right part of the website and then click on Preferences.
From the middle panel, click on the Manage Your Galaxy Storage (previously called Storage location).
Click on the + Create button on top of the page. Here, you get multiple options to connect various storage options to your account.
For all of the possible storage options, you should fill the following fields:
In the Name section, give a name to your storage. This name will be used to choose the storage on Galaxy when you want to select a Storage using User preferences > Preferred Galaxy Storage.
Optionally, you can provide a Description for this Storage. This is a note for yourself.
Hands-on: Choose Your Own Tutorial
This is a 'Choose Your Own Tutorial' (CYOT) section (also known as 'Choose Your Own Analysis' (CYOA)), where you can select between multiple paths. Click one of the buttons below to select how you want to follow the tutorial
Select the Storage you like to add to your Galaxy account.
If you have an account in Onedata, you can use such an object store as a Storage for your Galaxy datasets; they will be stored in the Onedata space of your choice. The minimal supported Onezone version is 21.02.4. More information on Onedata can be found on Onedata’s website.
There are extensive tutorials for setting up and utilizing of OneData on Galaxy Training Network (GTN). At the moment, we have the following tutorials for Onedata on GTN:
In short, you can connect your Galaxy account to an Onedata Storage as follows:
In the Onezone domain field, please fill in the address to your Onezone domain. It could be something like “datahub.egi.eu”.
In case you want to disable validation of SSL certificates, you can use Disable tls certificate validation? option. However, we strongly recommend you to not use this option unless you know what your are doing.
Provide name of a space that Galaxy data will be stored on Onedata using Space Name. If there is more than one space with the same name, you can explicitly specify which one to select by using the format <space_name>@<space_id> (for example demo@7285220ecc636075ae5759aec7ad65d3cha8f9).
If you want to provide a path to store Galaxy data, you can use the Galaxy root directory field. If this field is empty, the data will be stored in the space’s root directory.
You should provide an Access Token to Galaxy for the Onedata space. Your access token, suitable for REST API access in a Oneprovider service. Must allow both read and write data access.
Click on Create.
Amazon’s Simple Storage Service (S3) is Amazon’s primary cloud storage service. More information on S3 can be found in Amazon’s documentation. You have to create a bucket to use in your AWS web console before using this feature.
You have to provide an Access Key ID to be able to use AWS Storage on Galaxy. A security credential for interacting with AWS services can be created from your AWS web console. Creating an “Access Key” creates a pair of keys used to identify and authenticate access to your AWS account - the first part of the pair is “Access Key ID” and should be entered here. The second part of your key is the secret part called the “Secret Access Key”. Place that in the secure part of this form below.
Provide the AWS S3 Bucket to store your datasets in the Bucket field.
You should enter the second part of the key you created above, Access Key ID, in the Secret Access Key section. Read more on access keys on AWS documentation.
Click on Create.
To setup access to your Azure Blob Storage within the Galaxy, follow the steps:
Provide the name of your Azure Blob Storage account in the Container Name field. More information about container’s name could be found on the Microsoft documentation here.
Fill the Storage Account Name based on your account. More information is available on Microsoft website.
Please provide the account access key to your Azur Blob Storage account, using Account Key field. This is the documentation on Managing storage account access keys.
Click on Create.
For the setup you will need to generate HMAC Keys - these can be linked to your user or a service account. Additionally, you will need to define a default Google cloud project to allow Galaxy to access your Google Cloud Storage via the interfaces described in this FAQs.
To connect Galaxy to your Google Cloud Storage, you have to generate HMAC Keys. You can use the information after generating the keys to fill the Access ID field.
You will receive a Secret Key after you generated HMAC Keys. Secret Key should be 40 characters long and look something like the example used the Google documentation - bGoa+V7g/yqDXvKRqq+JTFn4uQZbPiQJo4pf9RzJ.
Click on Create.
The APIs used to connect to Amazon’s S3 (Simple Storage Service) have become something of an unofficial standard for cloud storage across a variety of vendors and services. Many vendors offer storage APIs compatible with S3. Here, you can configure such service as a Galaxy storage as long as you are able to find the connection details and have the relevant credentials.
Provide the Access Key ID. This is part of your access tokens or access keys that describe the user that is accessing the data. The Amazon documentation calls these an “access key ID”, the CloudFlare documentation describes these as “aws_access_key_id”. Internally to Galaxy, we often just call this the “access_key”.
Provide the Bucket name. The bucket to store your datasets in. How to setup buckets for your storage will vary from service to service but all S3 compatible storage services should have the concept of a bucket to namespace a grouping of your data together with.
Using the S3-Compatible API Endpoint, you should provide the endpoint URL for your storage service. It is also called “endpoint URL” in some services and the format varies based on the providers. For example, CloudFlare endpoint URL is something like john.r2.cloudflarestorage.com and MinIO endpoint URL is similar to https://play.min.io:9000.
Secret Access Key compliment your Access Key ID to connect to the S3 compatible storage. The Amazon documentation calls these an “secret access key” and the CloudFlare documentation describes these as “aws_secret_access_key”. Internally to Galaxy, we often just call this the “secret_key”.
Click on Create.
You can pick the connected Storage for your analysis as follows:
Click on your username. Click on Preferences.
Click on Preferred Galaxy Storage. Here, you can pick the Storage of your choice. The default option is Galaxy Storage.
Instead of using a default storage location for your account, it is also possible to select it at different levels: per History, per Tool, and Workflow.
To set a Storage for a specific History, you should click on the Galaxy History Storage choice (galaxy-history-storage-choice) icon on the right panel. Then, select the added external storage as the preferred storage location for the History. If you execute a Workflow in this history, the all results of the workflow will be stored in the external storage (that you selected). To verify it, you can click on the Dataset details icon (details) of a job on the right panel and you can see that the user’s external storage is used as the “Dataset Storage”.
Of course, if instead of a workflow, you can run just one tool using your connected Storage. To do this, you have to set the Galaxy History Storage choice (galaxy-history-storage-choice) as described above. Then, you can run one (or more) tool in this history and the results will be available on your Storage.
How do I manage my repositories on Galaxy?
Here, we are going to briefly explain how you can Bring-Your-Own-Data to Galaxy or export your dataset, results, or history to 3rd party repositories. In order to add a new repository to your account follow these steps:
Click on your Username on top right part of the website and then click on Preferences.
From the middle panel, click on the Manage Your Repositories (previously called Manage your remote file sources).
Click on the + Create button on top of the page. Here, you get multiple options to connect various repositories to your account.
For all of the possible repositories, you should fill the following fields:
In the Name section, give a name to your repository. This name will be used to choose the repository on Galaxy for importing or exporting datasets.
Optionally, you can provide a Description for this repository. This is a note for yourself.
Hands-on: Choose Your Own Tutorial
This is a 'Choose Your Own Tutorial' (CYOT) section (also known as 'Choose Your Own Analysis' (CYOA)), where you can select between multiple paths. Click one of the buttons below to select how you want to follow the tutorial
Select the repository you like to add to your Galaxy account.
If you have an Onedata account, you can use this repository to import and/or export your data directly from and to Onedata. The minimal supported Onezone version is 21.02.4. More information on Onedata can be found on Onedata’s website.
There are extensive tutorials for setting up and utilizing of OneData on Galaxy Training Network (GTN). At the moment, we have the following tutorials for Onedata on GTN:
In short, you can connect your Galaxy account to an Onedata repository as follows:
In the Onezone domain field, please fill in the address to your Onezone domain. It could be something like “datahub.egi.eu”.
Using the Writable? option you can decide whether to grant access to Galaxy to export (write) to your Onedata or not.
You should provide an Access Token to Galaxy so it can read (import) and write (export) data to your OneData. Read more on access tokens here. You can limit the access to read-only data access, unless you wish to export data to your repository (write permissions are needed then).
In case you want to disable validation of SSL certificates, you can use Disable tls certificate validation? option. However, we strongly recommend you to not use this option unless you know what your are doing.
Click on Create.
To connect an AWS private bucket to your Galaxy account, you need to submit the following information on the form:
Please fill in the Access Key ID (something like AKIAIOSFODNN7EXAMPLE) and Secret Access Key (similar to wJalrXUtnFEMI/K7MDENG/bPxRfiCYEXAMPLEKEY) in the corresponding fields on the Galaxy interface.
Please enter the URL to your Bucket (for example, https://amzn-s3-demo-bucket.s3.us-west-2.amazonaws.com) in the Bucket section.
Click on Create.
To connect anonymously to an AWS public bucket using your Galaxy account, you need to enter the Bucket address in the Bucket section. For more information about AWS Bucket, please read AWS documentaion. Click on Create.
To setup access to your Azure Blob Storage within the Galaxy, follow the steps:
Provide the name of your Azure Blob Storage account in the Container Name field. More information about container’s name could be found on the Microsoft documentation here.
Fill the Storage Account Name based on your account. More information is available on the Microsoft website.
Using the Hierarchical? option you can determine whether your storage is hierarchical or not. More information on Data Lake Storage namespaces can be found in the Azure Blob Storage documentation.
Please provide the account access key to your Azur Blob Storage account, using Account Key field. This is the documentation on Managing storage account access keys.
If you want to be able to export data to your Azure Blob Storage container, please set Writable? option to “Yes”.
Click on Create.
We recommend to first login to your Dropbox account.
On the Galaxy website, click on the Create button of the Dropbox section. You will be redirected to the Dropbox website for authentication.
You have to login there and grant access for the Galaxy.
Click on Create.
eLabFTW is a free and open source electronic lab notebook from Deltablot. Each lab can either host their own installation or go for Deltablot’s hosted solution. Using Galaxy, you can connect to an eLabFTW instance of your choice.
Provide a URL with the protocol (http or https) and the domain name in the eLabFTW instance endpoint (e.g. https://demo.elabftw.net) field.
If you want to let Galaxy to export data to your eLabFTW, please set the Allow Galaxy to export data to eLabFTW? to “Yes” to grant required access to Galaxy. Keep in mind that your API key must have matching permissions.
You should provide an API Key to your eLabFTW as well. To do so, navigate to the Settings page on your eLabFTW server and go to the API Keys tab to generate a new key. Choose “Read/Write” permissions to enable both importing and exporting data. “Read Only” API keys still work for importing data to Galaxy, but they will cause Galaxy to error out when exporting data to eLabFTW. You will receive a string (similar to 2-50dd721027f56a2e119b3bdbf64f4b8518b3f82b97e7876d56dad74109c8be73d8919b88097d3c9eb8952) and you should enter this in the API Key field of Galaxy interface.
Click on Create.
You can setup connections to FTP and FTPS servers to import and export files as follows:
Provide the address to your FTP server using the FTP Host field.
If you want to login with a specific user, provide the username in the FTP User field. Leave this blank to connect to the server anonymously (if allowed by the server).
If you want to export data to this FTP, you should set the Writable? option to “Yes”.
Please specify the port that Galaxy should use to connect to your FTP server using the FTP Port field.
In the FTP Password field provide the password to connect to the FTP server. Leave this blank to connect to the server anonymously (if allowed by the server).
Click on Create.
We recommend to login to your Google account first.
On the Galaxy website, click on Select button of Export to Google Drive. You will be redirected to the Google.
Pick the account that you want to connect to Galaxy for import and export. Grant the required permissions.
You will be back on the Galaxy portal and you can access your Google Drive for import and export (depending on your how you set up your accuont).
Click on Create.
InvenioRDM is a research data management platform that allows you to store, share, and publish research data. You can connect to an InvenioRDM instance of your choice by following these steps:
Please fill the address to your InvenioRDM in the following field: InvenioRDM instance endpoint (for example, https://inveniordm.web.cern.ch/). This should include the protocol (http or https).
Use the Allow Galaxy to export data to InvenioRDM? option to give permission to Galaxy to export data to your repository or not.
Click on Create.
You should fill Publication Name with a name as the “creator” metadata of the records. This could be a person or an organization. You can later modify this. If left blank, an anonymous user will be used as the creator.
You should also enter your Personal Access Token. You can get this information in your InvenioRDM instance. Navigate to Account Settings. Then, go to Applications to generate a new token. This will allow Galaxy to display your draft records and upload files to them.
Click on Create.
Using WebDAV you can connect various services that supports WebDAV protocol such as OwnCloud and NextCloud among others. The configuration of WebDAV is slightly variable from service to service but the general principles apply everywhere.
Provide the server address to this repository in the Server Domain field.
In the WebDAV server Path, you have to provide the path on this server to WebDAV.
In the Username field, you should write the username you use to login to this server.
You can grant write access for this repository using the Writable? (set to Yes) and therefore make it possible to export datasets, or histories to your connected repository.
Click on Create.
As an example, if I want to connect my nextCloud repository to my Galaxy account, I should login to my nextCloud server and find the information from File settings (bottom left of the page) under the WebDAV section to fill this template. It could be something like: https://server_address.com/remote.php/dav/files/username_or_text. Here, the Server Domain is https://server_address.com and WebDAV server Path is remote.php/dav/files/username_or_text.
In some cases, you may need to activate some features on your ownCloud or nextCloud to allow this integration. For example, some nextCloud servers require the user to use “App Passwords”. This can be done using the Settings > Security > Devices & sessions > Create new app password.
Zenodo is an open-access repository for research data, software, publications, and other digital artifacts. It is developed and maintained by CERN and funded by the European Commission as part of the OpenAIRE project. Zenodo provides a free platform for researchers to share and preserve their work, ensuring long-term access and reproducibility. Zenodo is widely used by researchers, institutions, and organizations to share scientific knowledge and comply with open-access mandates from funding agencies.
Using the Allow Galaxy to export data to Zenodo?, you can decide whether you like to give write access to Galaxy or not. Set it to “Yes” if you want to export data from Galaxy to Zenodo, set it to “No” if you only need to import data from Zenodo to Galaxy.
Provide a name for the “creator” metadata of your records on Zenodo using the Publication Name field. You can always change this value later by editing the records in Zenodo. If left blank, an anonymous user will be used as the creator.
You have to provide a Personal Access Token from your Zenodo account to Galaxy. To do so, you need to log into your account. Then, visit this site: https://zenodo.org/account/settings/applications/. Alternatively, you can click on your username on top right and then click on “Applications”. Here, you need to create a “Personal Access Token”. This will allow Galaxy to display your draft records and upload files to them. If you enabled the option to export data from Galaxy to Zenodo, make sure to enable the deposit:write scope when creating the token.
Click on Create.
Importing data to your Galaxy account
When you connect a repository to your Galaxy account, you can use it to import data to Galaxy. To do so, you can click on the Upload Icon on the left panel. In the poped up window, you can click on Choose from repository to select a repository that you have added to your account. Navigate to a file that you want to upload to your Galaxy account, check the box of the file, and click on Select. You can determine the format of the file, give it a name, and then click on Start to upload the file to your Galaxy account.
Exporting histories, datasets, and results to connected repositories
If you have given Galaxy the permission to write to your repository, you can export your histories, datasets and reulsts in the history to that repository.
Histories
If you want to export a history, you should click on the History Options icon (galaxy-history-options) on the right panel. Then, you can click on Export History to File. Next, you can click on to repository on the middle panel. If you click on the Click to select directory, there will be a pop up window. Here, you can pick a repository that you have added to your account and when you are in that repository, click on Select. You can give a Name to your exported history, so you can find it easier in your connected repository. Finally, click on Export to write the history to your repository. Similarly, you can use to RDM repository or to Zenodo instead of the to repository option in the middle panel to export your history to connected RDM repositories or Zenodo.
To have more options on exporting your history, you can click on Show advanced export options on top of the middle panel. This provides further control over the format and datasets that will be included in your exported history.
Datasets
If you are interested to export a single dataset or results to a connected repository, you can use a tool called Export datasets.
Select the desired option from What would you like to export?.
Using the Directory URI option, you can Select a connected repository. You can also give it a directory name here.
We recommend to export the metadata with your datasets and results using the Include metadata files in export?.
How do I re-use equivalent jobs in Galaxy (aka Job Cache)?
We can reuse the reproducibility of Galaxy to detect if a tool has been run with the exact same parameters and inputs before. In this case, we can simply skip the computational step and just reuse the data we have previously computed. We call this feature the job cache. Part of the job cache is all your personal data and all data in public histories. This can be highly helpful, e.g., for training events, if the instructor makes a respective training history public before the event. If the trainee activates this option in their account and uses the same input and parameters, they will immediately receive the results. This feature reduces the waiting time in the training sessions, saves energy and computational resources, and therefore reduces environmental impact.
To activate this feature, take the following steps:
To activate this option for your account, click on your username at the top right of the page.
Select Preferences and navigate to your user-references.
In your middle panel search for Manage Information and select them. You can also navigate to “https:///user" — for example, https://usegalaxy.eu/user.
Find the grey box: Do you want to be able to re-use equivalent jobs?
Within the box, change the slider from no to yes.
Scroll down to the bottom of the page and click the Save button.
For every tool you want to run now, you will notice the option Attempt to re-use jobs with identical parameters?. To test this:
Click on any tool you would like to run
If you scroll down to the end of the Tool Parameters section until you see the Run tool button, you will notice the new option Attempt to re-use jobs with identical parameters? above the Run tool button.
You can enable this option by sliding the No to Yes
Once you click on the Run tool, Galaxy will check if this tool was run before with the exact same parameters and inputs. If so, the results will be retrieved from the job cache and not be calculated.
⚠️ At the moment, this feature only works with data shared/reused inside Galaxy. If you upload the same file twice, we can not detect that it is the same file.
Switching Galaxy Labs
Explains how to switch to Galaxy Labs (subdomains)
Galaxy offers different domain-specific views of its interface. These are sometimes called Galaxy Labs, or Galaxy subsites, or Galaxy subdomains.
This is the same Galaxy, but with a few differences:
Different home page, containing information aimed at domain researchers
Different tool bar, filtered for most useful tools for that domain
You may have to re-login, you do this with the same account as always, and you can access all your existing histories etc from any subsite.
On the top menu bar, on the right, click on the “switch sites” icon, galaxy_sites or galaxy_sites2 depending on the version of Galaxy
Select the Lab you want to start using
The options will be different per Galaxy instance
You can always switch back to the main Galaxy site by selecting “base site” in this list
Usare la Gestione finestre per visualizzare più insiemi di dati
Se si desidera visualizzare due o più insiemi di dati contemporaneamente, è possibile utilizzare la funzione Window Manager di Galaxy:
Cliccare sull’icona Gestore finestregalaxy-scratchbook nella barra dei menu superiore.
ora dovrebbe comparire un piccolo segno di spunta sull’icona
Visualizzagalaxy-eye un set di dati facendo clic sull’icona occhio galaxy-eye per visualizzare l’output
Si dovrebbe vedere l’output in una finestra sovrapposta a Galaxy
È possibile ridimensionare questa finestra trascinando l’angolo in basso a destra
Cliccare all’esterno del file per uscire dal gestore delle finestre
Visualizzagalaxy-eye un secondo set di dati dalla tua cronologia
Si dovrebbe ora vedere una seconda finestra con il nuovo set di dati
In questo modo è più facile confrontare i due output
Ripetere l’operazione per il numero di file che si desidera confrontare
È possibile disattivare il Gestore finestregalaxy-scratchbook facendo di nuovo clic sull’icona
Using the Window Manager to view multiple datasets
If you would like to view two or more datasets at once, you can use the Window Manager feature in Galaxy:
Click on the Window Manager icon galaxy-scratchbook on the top menu bar.
You should see a little checkmark on the icon now
Viewgalaxy-eye a dataset by clicking on the eye icon galaxy-eye to view the output
You should see the output in a window overlayed over Galaxy
You can resize this window by dragging the bottom-right corner
Viewgalaxy-eye a second dataset from your history
You should now see a second window with the new dataset
This makes it easier to compare the two outputs
Repeat this for as many files as you would like to compare
You can turn off the Window Managergalaxy-scratchbook by clicking on the icon again
Uso del scratchbook para ver varios conjuntos de datos
Si deseas ver dos o más conjuntos de datos al mismo tiempo, puedes usar la función Scratchbook en Galaxy:
Haz clic en el icono Scratchbookgalaxy-scratchbook en la barra de menú superior.
Debería aparecer ver una pequeña marca de verificación en el icono
Vergalaxy-eye un conjunto de datos haciendo clic en el icono de ojo galaxy-eye para ver el resultado.
Deberías ver la salida en una ventana emergente sobre Galaxy
Puedes cambiar el tamaño de esta ventana arrastrando la esquina inferior derecha
Haz clic fuera del archivo para salir del Scratchbook
Vergalaxy-eye un segundo conjunto de datos de tu historial
Ahora deberías poder ver una segunda ventana con el nuevo conjunto de datos
Esto hace que sea más fácil comparar las dos salidas.
Repite estos pasos para todos los archivos que desees comparar.
Puedes desactivar Scratchbookgalaxy-scratchbook haciendo clic en el icono nuevamente.
Verwendung des Fenstermanagers zur Anzeige mehrerer Datensätze
Wenn Sie zwei oder mehr Datensätze gleichzeitig betrachten möchten, können Sie die Funktion Fenster-Manager in Galaxy verwenden:
Klicken Sie auf das Symbol Fenstermanagergalaxy-scratchbook in der oberen Menüleiste.
Sie sollten jetzt ein kleines Häkchen auf dem Symbol sehen
Betrachtengalaxy-eye Sie einen Datensatz, indem Sie auf das Augensymbol galaxy-eye klicken, um die Ausgabe zu betrachten
Sie sollten die Ausgabe in einem Fenster sehen, das sich über Galaxy legt
Sie können die Größe dieses Fensters ändern, indem Sie an der rechten unteren Ecke ziehen
Klick außerhalb der Datei, um den Fenstermanager zu beenden
Betrachtengalaxy-eye einen zweiten Datensatz aus Ihrer Historie
Sie sollten nun ein zweites Fenster mit dem neuen Datensatz sehen
Dies erleichtert den Vergleich der beiden Ausgaben
Wiederholen Sie diesen Vorgang für so viele Dateien, wie Sie vergleichen möchten
Sie können den Fenstermanagergalaxy-scratchbook ausschalten, indem Sie erneut auf das Symbol klicken
Why not use Excel?
Excel is a fantastic tool and a great place to build simple analysis models, but when it comes to scaling, Galaxy wins every time.
You could just as easily use Excel to answer the same question, and if the goal is to learn how to use a tool, then either tool would be great! But what if you are working on a question where your analysis matters? Maybe you are working with human clinical data trying to diagnose a set of symptoms, or you are working on research that will eventually be published and maybe earn you a Nobel Prize?
In these cases your analysis, and the ability to reproduce it exactly, is vitally important, and Excel won’t help you here. It doesn’t track changes and it offers very little insight to others on how you got from your initial data to your conclusions.
Galaxy, on the other hand, automatically records every step of your analysis. And when you are done, you can share your analysis with anyone. You can even include a link to it in a paper (or your acceptance speech). In addition, you can create a reusable workflow from your analysis that others (or yourself) can use on other datasets.
Another challenge with spreadsheet programs is that they don’t scale to support next generation sequencing (NGS) datasets, a common type of data in genomics, and which often reach gigabytes or even terabytes in size. Excel has been used for large datasets, but you’ll often find that learning a new tool gives you significantly more ability to scale up, and scale out your analyses.
Although it looks complicated (and maybe it is), the FASTQ format is easy to understand with a little decoding. Each read, representing a fragment of DNA, is encoded by 4 lines:
Line
Description
1
Always begins with @ followed by the information about the read
2
The actual nucleic sequence
3
Always begins with a + and contains sometimes the same info in line 1
4
Has a string of characters which represent the quality scores associated with each base of the nucleic sequence; must have the same number of characters as line 2
So for example, the first sequence in our file is:
It means that the fragment named @03dd2268-71ef-4635-8bce-a42a0439ba9a (ID given in line1) corresponds to:
the DNA sequence AGTAAGTAGCGAACCGGTTTCGTTTGGGTGTTTAACCGTTTTCGCATTTATCGTGAAACGCTTTCGCGTTTTCGTGCGGAAGGCGCTTCACCCAGGGCCTCTCATGCTTTGTCTTCCTGTTTATTCAGGATCGCCCAAAGCGAGAATCATACCACTAGACCACACGCCCGAATTATTGTTGCGTTAATAAGAAAAGCAAATATTTAAGATAGGAAGTGATTAAAGGGAATCTTCTACCAACAATATCCATTCAAATTCAGGCA (line2)
this sequence has been sequenced with a quality $'())#$$%#$%%'-$&$%'%#$%('+;<>>>18.?ACLJM7E:CFIMK<=@0/.4<9<&$007:,3<IIN<3%+&$(+#$%'$#$.2@401/5=49IEE=CH.20355>-@AC@:B?7;=C4419)*$$46211075.$%..#,529,''=CFF@:<?9B522.(&%%(9:3E99<BIL?:>RB--**5,3(/.-8B>F@@=?,9'36;:87+/19BAD@=8*''&''7752'$%&,5)AM<99$%;EE;BD:=9<@=9+%$ (line 4).
But what does this quality score mean?
The quality score for each sequence is a string of characters, one for each base of the nucleotide sequence, used to characterize the probability of misidentification of each base. The score is encoded using the ASCII character table (with some historical differences):
So there is an ASCII character associated with each nucleotide, representing its Phred quality score, the probability of an incorrect base call:
Phred Quality Score
Probability of incorrect base call
Base call accuracy
10
1 in 10
90%
20
1 in 100
99%
30
1 in 1000
99.9%
40
1 in 10,000
99.99%
50
1 in 100,000
99.999%
60
1 in 1,000,000
99.9999%
Kraken2 and the k-mer approach for taxonomy classification
In the \(k\)-mer approach for taxonomy classification, we use a database containing DNA sequences of genomes whose taxonomy we already know. On a computer, the genome sequences are broken into short pieces of length \(k\) (called \(k\)-mers), usually 30bp.
Kraken examines the \(k\)-mers within the query sequence, searches for them in the database, looks for where these are placed within the taxonomy tree inside the database, makes the classification with the most probable position, then maps \(k\)-mers to the lowest common ancestor (LCA) of all genomes known to contain the given \(k\)-mer.
Kraken2 uses a compact hash table, a probabilistic data structure that allows for faster queries and lower memory requirements. It applies a spaced seed mask of s spaces to the minimizer and calculates a compact hash code, which is then used as a search query in its compact hash table; the lowest common ancestor (LCA) taxon associated with the compact hash code is then assigned to the k-mer.
Il punteggio di qualità per ogni sequenza è una stringa di caratteri, uno per ogni base della sequenza nucleotidica, utilizzata per caratterizzare la probabilità di errata identificazione di ogni base. Il punteggio è codificato utilizzando la tabella dei caratteri ASCII (con alcune differenze storiche):
Per risparmiare spazio, il sequenziatore registra un carattere ASCII per rappresentare i punteggi da 0 a 42. Ad esempio, 10 corrisponde a “+”. Ad esempio, 10 corrisponde a “+” e 40 a “I”. FastQC sa come tradurlo. Questo viene spesso chiamato punteggio “Phred”.
Quindi a ogni nucleotide è associato un carattere ASCII che rappresenta il suo punteggio di qualità Phred, la probabilità di una chiamata di base errata:
Phred Quality Score
Probability of incorrect base call
Base call accuracy
10
1 in 10
90%
20
1 in 100
99%
30
1 in 1000
99.9%
40
1 in 10,000
99.99%
50
1 in 100,000
99.999%
60
1 in 1,000,000
99.9999%
Cosa rappresenta 0-42? Questi numeri, se inseriti in una formula, ci dicono la probabilità di errore per quella base. Questa è la formula, dove Q è il nostro punteggio di qualità (0-42) e P è la probabilità di errore:
Q = -10 log10(P)
Utilizzando questa formula, possiamo calcolare che un punteggio di qualità di 40 significa solo 0,00010 probabilità di errore!
Puntuación de calidad
¿Pero qué significa esta puntuación de calidad?
La puntuación de calidad de cada secuencia es una cadena de caracteres, uno por cada base de la secuencia de nucleótidos, que se utiliza para caracterizar la probabilidad de identificación errónea de cada base. La puntuación se codifica utilizando la tabla de caracteres ASCII (con algunas diferencias históricas):
Para ahorrar espacio, el secuenciador registra un carácter ASCII para representar las puntuaciones 0-42. Por ejemplo, 10 corresponde a “+” y 40 a “I”. FastQC sabe cómo traducir esto. A menudo se denomina puntuación “Phred”.
Así que hay un carácter ASCII asociado a cada nucleótido, que representa su puntuación de calidad Phred, la probabilidad de una llamada de base incorrecta:
Puntuación de calidad Phred
Probabilidad de una llamada de base incorrecta
Precisión de llamada de base
10
1 in 10
90%
20
1 in 100
99%
30
1 in 1000
99.9%
40
1 in 10,000
99.99%
50
1 in 100,000
99.999%
60
1 in 1,000,000
99.9999%
¿Qué representa 0-42? Estos números, cuando se introducen en una fórmula, nos indican la probabilidad de error para esa base. Esta es la fórmula, donde Q es nuestra puntuación de calidad (0-42) y P es la probabilidad de error:
Q = -10 log10(P)
Utilizando esta fórmula, podemos calcular que una puntuación de calidad de 40 significa sólo 0,00010 de probabilidad de error
Quality Scores
But what does this quality score mean?
The quality score for each sequence is a string of characters, one for each base of the nucleotide sequence, used to characterize the probability of misidentification of each base. The score is encoded using the ASCII character table (with some historical differences):
To save space, the sequencer records an ASCII character to represent scores 0-42. For example 10 corresponds to “+” and 40 corresponds to “I”. FastQC knows how to translate this. This is often called “Phred” scoring.
So there is an ASCII character associated with each nucleotide, representing its Phred quality score, the probability of an incorrect base call:
Phred Quality Score
Probability of incorrect base call
Base call accuracy
10
1 in 10
90%
20
1 in 100
99%
30
1 in 1000
99.9%
40
1 in 10,000
99.99%
50
1 in 100,000
99.999%
60
1 in 1,000,000
99.9999%
What does 0-42 represent? These numbers, when plugged into a formula, tell us the probability of an error for that base. This is the formula, where Q is our quality score (0-42) and P is the probability of an error:
Q = -10 log10(P)
Using this formula, we can calculate that a quality score of 40 means only 0.00010 probability of an error!
Qualitätswerte
Aber was bedeutet dieser Qualitätswert?
Der Qualitätsscore für jede Sequenz ist eine Zeichenkette, eine für jede Base der Nukleotidsequenz, um die Wahrscheinlichkeit einer falschen Identifizierung jeder Base zu charakterisieren. Der Score wird unter Verwendung der ASCII-Zeichentabelle (mit einigen historischen Unterschieden) kodiert:
Um Platz zu sparen, zeichnet der Sequenzer ein ASCII-Zeichen auf, um die Punktzahlen 0-42 darzustellen. Zum Beispiel entspricht 10 einem “+” und 40 einem “I”. FastQC weiß, wie dies zu übersetzen ist. Dies wird oft als “Phred”-Bewertung bezeichnet.
Jedem Nukleotid ist also ein ASCII-Zeichen zugeordnet, das seinen Phred-Qualitätsscore, die Wahrscheinlichkeit eines falschen Basenrufs, darstellt:
Phred Quality Score
Probability of incorrect base call
Base call accuracy
10
1 in 10
90%
20
1 in 100
99%
30
1 in 1000
99.9%
40
1 in 10,000
99.99%
50
1 in 100,000
99.999%
60
1 in 1,000,000
99.9999%
Was bedeutet 0-42? Wenn man diese Zahlen in eine Formel einsetzt, erhält man die Fehlerwahrscheinlichkeit für diese Basis. Die Formel lautet wie folgt: Q ist unser Qualitätswert (0-42) und P ist die Fehlerwahrscheinlichkeit:
Q = -10 log10(P)
Mit dieser Formel können wir berechnen, dass eine Qualitätsbewertung von 40 nur 0,00010 Wahrscheinlichkeit eines Fehlers bedeutet!
What is Taxonomy?
Taxonomy is the method used to naming, defining (circumscribing) and classifying groups of biological organisms based on shared characteristics such as morphological characteristics, phylogenetic characteristics, DNA data, etc. It is founded on the concept that the similarities descend from a common evolutionary ancestor.
Defined groups of organisms are known as taxa. Taxa are given a taxonomic rank and are aggregated into super groups of higher rank to create a taxonomic hierarchy. The taxonomic hierarchy includes eight levels: Domain, Kingdom, Phylum, Class, Order, Family, Genus and Species.
The classification system begins with 3 domains that encompass all living and extinct forms of life
The Bacteria and Archae are mostly microscopic, but quite widespread.
Domain Eukarya contains more complex organisms
When new species are found, they are assigned into taxa in the taxonomic hierarchy. For example for the cat:
Level
Classification
Domain
Eukaryota
Kingdom
Animalia
Phylum
Chordata
Class
Mammalia
Order
Carnivora
Family
Felidae
Genus
Felis
Species
F. catus
From this classification, one can generate a tree of life, also known as a phylogenetic tree. It is a rooted tree that describes the relationship of all life on earth. At the root sits the “last universal common ancestor” and the three main branches (in taxonomy also called domains) are bacteria, archaea and eukaryotes. Most important for this is the idea that all life on earth is derived from a common ancestor and therefore when comparing two species, you will -sooner or later- find a common ancestor for all of them.
Let’s explore taxonomy in the Tree of Life, using Lifemap
This tutorial was adapted from the mothur MiSeq SOP created by the Schloss lab. Here you can find more information about the mothur tools and file formats. Their FAQ page and Help Forum are also quite useful!
Where can I read more about this analysis?
This tutorial was adapted from the mothur MiSeq SOP created by the Schloss lab. Here you can find more information about the mothur tools and file formats. Their FAQ page and Help Forum are also quite useful!
How can I get my container requiring jobs to run in a container?
Some tools will only run in a container, i.e. they have a container defined in the ‘requirements’ section of the tool’s XML file. Galaxy will not refuse to run these tools if the container isn’t available or if Galaxy isn’t configured use containers. Instead it’ll run in the host system and likely fail.
Job Configuration
You can resolve this by configuring your job conf to have destinations that support containers (or even require them.):
The destination must have docker_enabled (Or singularity_enabled), and you can consider adding require_container to make sure the job will fail if the container isn’t available. The docker_volumes string will allow you to control which volumes are attached to that container;
In TPV configuration (provided by @gtn:thanhleviet) this would look like:
<destinationid="podman"runner="local"> <paramid="docker_enabled">true</param> <paramid="require_container">true</param> <paramid="docker_sudo">false</param> <paramid="docker_cmd">/usr/bin/podman</param> <paramid="docker_run_extra_arguments">--userns=keep-id</param> <!-- This will not work until https://github.com/galaxyproject/galaxy/pull/18998 is merged for SELinux users. For now you may want to patch it manually. --> <!-- <param id="docker_volumes">$galaxy_root:ro,$tool_directory:ro,$job_directory:ro,$working_directory:z,$default_file_path:z</param> --> </destination>
If you’re using the default container_resolvers_conf.yml then there is nothing you need to do. Otherwise you may want to ensure that you have items in there such as explicit and explicit_singularity among others. See the galaxy documentation on the topic.
Testing
Here is an example of a tool that requires a container, that you can use to test your container configuration:
Start with 2 and add more as needed. If you notice that your jobs seem to inexplicably sit for a long time before being dispatched to the cluster, or after they have finished on the cluster, you may need additional handlers.
It’s time to commit your work! Check the status with
git status
Add your changed files with
git add ... # any files you see that are changed
And then commit it!
git commit -m 'Finished '
Using Git With Ansible Vaults
When looking at git log to see what you changed, you cannot easily look into Ansible Vault changes: you just see the changes in the encrypted versions which is unpleasant to read.
Instead we can use .gitattributes to tell git that we want to use a different program to visualise differences between two versions of a file, namely ansible-vault.
Check your git log -p and see how the Vault changes look (you can type /vault to search). Notice that they’re just changed encoded content.
Create the file .gitattributes in the same folder as your galaxy.yml playbook, with the following contents:
To resolve it you may be asked to send in a shared history link and possibly a shared workflow link. For sharing your history, refer to this these instructions.
Using Galaxy Help is the best way to get help in most cases.
If the problem is more complex, email a description of the problem and how to reproduce it.
Administrative problems:
If the problem is present in your own Galaxy, the administrative configuration may be a factor.
For the fastest help directly from the development community, admin issues can be alternatively reported to the mailing list or the GalaxyProject Gitter channel.
For Security Issues, do not report them via GitHub. Kindly disclose these as explained in this document.
For Bug Reporting, create a Github issue. Include the steps mentioned in these instructions.
Search the GTN Search to find prior Q & A, FAQs, tutorials, and other documentation across all Galaxy resources, to verify in case your issue was already faced by someone.
Help Galaxy
Alternatively, have you found a definite problem with Galaxy and/or had an idea that could improve Galaxy?
Report an Issue on the correct Github repository:
Tools: Need a tool added to a server? Check out the FAQ for this:
To request tools that already exist in the Galaxy toolshed, but not in your server, please raise an issue at:
Tools: Problem in a tool, such as a parameter you want to use is missing: Select your tool in the Galaxy interface
Drop-down arrow to See in Tool Shed
Development repository , then describe the issue there
Tools: Request for developers to wrap a tool: Either you will have a domain-specific location (such as the Single-cell & sPatial Omics Community tool request form or you can post the request in our Intergalatic Utilities Commission: https://github.com/galaxyproject/tools-iuc
User interface: https://github.com/galaxyproject/galaxy
Subdomains / Galaxy Labs: Specific community content: https://github.com/galaxyproject/galaxy_codex or General Galaxy Labs issue: https://github.com/usegalaxy-au/galaxy-labs-engine
Galaxy Community Hub: https://github.com/galaxyproject/galaxy-hub/
Galaxy Training Network: https://github.com/galaxyproject/training-material
Warning: Be thorough!
Remember to be thorough when posting issues! Consider the FAQ on posting!
Writing bug reports is a good skill to have as bioinformaticians, and a key point is that you should include enough information from the first message to help the process of resolving your issue more efficient and a better experience for everyone.
What to include
Which commands did you run, precisely, we want details. Which flags did you set?
Which server(s) did you run those commands on?
What account/username did you use?
Where did it go wrong?
What were the stdout/stderr of the tool that failed? Include the text.
Did you try any workarounds? What results did those produce?
(If relevant) screenshot(s) that show exactly the problem, if it cannot be described in text. Is there a details panel you could include too?
If there are job IDs, please include them as text so administrators don’t have to manually transcribe the job ID in your picture.
It makes the process of answering ‘bug reports’ much smoother for us, as we will have to ask you these questions anyway. If you provide this information from the start, we can get straight to answering your question!
What does a GOOD bug report look like?
The people who provide support for Galaxy are largely volunteers in this community, so try and provide as much information up front to avoid wasting their time:
I encountered an issue: I was working on (this server> and trying to run (tool)+(version number) but all of the output files were empty. My username is jane-doe.
Here is everything that I know:
The dataset is green, the job did not fail
This is the standard output/error of the tool that I found in the information page (insert it here)
I have read it but I do not understand what X/Y means.
The job ID from the output information page is 123123abdef.
I tried re-running the job and changing parameter Z but it did not change the result.
Could you help me?
What we ask from anyone raising an issue, is that you be willing to follow up with us. We may need more information or have different ideas, and it would be very helpful to continue the conversation to make the best fix or feature!
Syncing your Fork of the GTN
Whenever you want to contribute something new to the GTN, it is important to start with an up-to-date branch. To do this, you should always update the main branch of your fork, before creating a so-called feature branch, a branch where you make your changes.
Point your browser to your fork of the GTN repository
The url will be https://github.com/<your username>/training-material (replacing ‘your username’ with your GitHub username)
You might see a message like “This branch is 367 commits behind galaxyproject/training-material:main.” as in the screenshot below.
Click the Sync Fork button on your fork to update it to the latest version.
TIP: never work directly on your main branch, since that will make the sync process more difficult. Always create a new branch before committing your changes.
Updating the default branch from master to main
If you created your fork a long time ago, the default branch on your fork may still be called master instead of main
Point your browser to your fork of the GTN repository
The url will be https://github.com/<your username>/training-material (replacing with your GitHub username)
Check the default branch that is shown (at top left).
Does it say main?
Congrats, nothing to do, you can skip the rest of these steps
Does it say master? Then you need to update it, following the instructions below
Go to your fork’s settings (Click on the gear icon called “Settings”)
Find “Branches” on the left
If it says master you can click on the ⇆ icon to switch branches.
Select main (it may not be present).
If it isn’t present, use the pencil icon to rename master to main.
If you are adding a tutorial, annotating the pre-requisites is an important task! It will help ensure learners know what they need to know before starting the tutorial. They also let instructors plan a schedule optimally.
Internal requirements often include specific features of Galaxy you plan to use in your training material, and let learners know which tutorials to follow first, before starting your tutorial.
Least commonly needed are software requirements. These are usually used in e.g. Galaxy Admin Training tutorials, but if you have specific software requirements, you can list them here:
Tutorials sometimes require significant amounts of data or data prepared in a very specific manner which often is shown to cause errors for learners that significantly affect downstream results. Input histories are an answer to that:
Additionally once the learner has gotten started, tutorials sometimes feature tools which produce stochastic outputs, or have very long-running steps. In these cases, the tutorial authors may provide answer histories to help learners verify that they are on the right track, or to enable them to catch up if they fall behind or something goes wrong.
This is especially important if you want to track funding or infrastructure contributions. The old way doesn’t allow for this, and thus we would strongly recommend you use the new format!
Haz clic sobre Unnamed history (o el nombre que tenga el historial sobre el que estás trabajando) (Haz clic para cambiar el nombre del historial) en la parte superior de tu panel de historial
Escribe el nombre nuevo
Pulsa Enter
Para la creación de un historial nuevo
Los historiales son una parte importante de Galaxy, la mayoría de la gente utiliza un historial para cada análisis nuevo. Asegúrate siempre de darle buenos nombres a tus historiales, de tal forma que después puedas encontrar fácilmente tus resultados.
Haz click sobre el icono new-history en la parte superior del panel de historiales.
If you want to remove the history from your active histories but keep it around for reference, you can move it to the Archived Histories section.
Select galaxy-history-optionsHistory Options which is on the top of the list of datasets in the history panel
Select galaxy-history-archiveArchive History
Select the Archive history button
Your history is now archived! To find it again, you will need to go to Data → Histories → Archived Histories.
Compartiendo un historial
Puedes compartir tu trabajo en Galaxy. Hay varias formas de dar acceso a tus historiales a otros usuarios.
Compartir tu historial permite a otros importar y acceder a los conjuntos de datos, parámetros y pasos de tu historial.
Compartir a través de un enlace
Abre el menú Opciones de historialgalaxy-gear (icono de engranaje) en la parte superior del panel de historial
galaxy-toggleHacer que el historial sea accesible
Aparecerá un Compartir enlace que puedes dar a otros usuarios.
Cualquiera que tenga este enlace puede ver y copiar tu historial.
Publica tu historial
galaxy-toggleHacer que el historial esté disponible públicamente en Historias publicadas
Cualquiera en este servidor Galaxy podrá ver tu historial en el menú Datos compartidos
Comparte solo con otro usuario.
Haz clic en el botón Compartir con un usuario en la parte inferior
Ingresa una dirección de correo electrónico del usuario con el que deseas compartir
Tu historial se compartirá solo con este usuario.
Encontrar historiales que otros han compartido conmigo
Haz clic en el menú Usuario en la barra superior
Selecciona Historiales compartidos conmigo
Aquí verás todos los historiales que otros han compartido contigo directamente ** Nota: ** Si deseas realizar cambios en tu historial sin afectar la versión compartida, crea una copia mediante al ícono galaxy-gearOpciones de historial en tu historial y haciendo clic en Copiar
Copiar un conjunto de datos entre historiales
A veces puedes querer usar un conjunto de datos en varios historiales. No es necesario volver a subir los datos; puedes copiar conjuntos de datos de un historial a otro.
Hay 3 formas de copiar conjuntos de datos entre historiales
Del historial original
Haga clic en el icono galaxy-gear que se encuentra en la parte superior de la lista de conjuntos de datos en el panel de historial
Haga clic en Copiar conjuntos de datos
Seleccione los archivos deseados
Dé un nombre relevante al “Nuevo historial”
Validar por ‘Copiar elementos del historial’
Haga clic en el nombre de la nueva historia en el cuadro verde que acaba de aparecer para cambiar a esta historia
Uso del galaxy-columnsMostrar Historias lado a lado
Haga clic en la flecha desplegable galaxy-dropdown arriba a la derecha del panel de historial (Opciones de historial)
Haga clic en galaxy-columnsMostrar Historias lado a lado
Si el historial de destino no está presente
Haga clic en “Seleccionar historiales
Haga clic en el historial de destino
Validar por ‘Cambiar seleccionado’
Arrastre el conjunto de datos a copiar desde su historial original
Colócalo en el historial de destino
Del historial de destino
Haga clic en Usuario en la barra superior
Haga clic en Conjuntos de datos
Buscar el conjunto de datos a copiar
Haga clic en su nombre
Haga clic en Copiar al historial actual
Copiare un set di dati tra le cronologie
A volte può essere utile usare un dataset in più cronologie. Non è necessario caricare di nuovo i dati, puoi semplicemente copiare i dataset da una cronologia all’altra.
Esistono 3 modi per copiare i set di dati tra le cronologie
Dalla cronologia originale
Cliccare sull’icona galaxy-gear che si trova in cima all’elenco dei dataset nel pannello della cronologia
Fare clic su Copia set di dati
Selezionare i file desiderati
Dare un nome rilevante alla “Nuova cronologia”
Convalida per ‘Copia elementi della cronologia’
Fare clic sul nome della nuova cronologia nel riquadro verde appena visualizzato per passare a questa cronologia
Utilizzo dell’icona galaxy-columnsMostra le cronologie affiancate
Fare clic sulla freccia a discesa galaxy-dropdown in alto a destra del pannello della cronologia (opzioni cronologia)
Cliccare su galaxy-columnsMostra le cronologie affiancate
se la cronologia di destinazione non è presente
Fare clic su “Seleziona cronologia”
Fare clic sulla cronologia di destinazione
Convalidare con ‘Cambia selezionato’
Trascinare il dataset da copiare dalla sua cronologia originale
rilasciarlo nella cronologia di destinazione
Dalla cronologia di destinazione
Cliccare su Utente nella barra in alto
Cliccare su Datasets
Ricerca del set di dati da copiare
Fare clic sul suo nome
Cliccare su Copia nella cronologia corrente
Copy a dataset between histories
Sometimes you may want to use a dataset in multiple histories. You do not need to re-upload the data, but you can copy datasets from one history to another.
There 3 ways to copy datasets between histories
From the original history
Click on the galaxy-gear icon which is on the top of the list of datasets in the history panel
Click on Copy Datasets
Select the desired files
Give a relevant name to the “New history”
Validate by ‘Copy History Items’
Click on the new history name in the green box that have just appear to switch to this history
Using the galaxy-columnsShow Histories Side-by-Side
Click on the galaxy-dropdown dropdown arrow top right of the history panel (History options)
Click on galaxy-columnsShow Histories Side-by-Side
If your target history is not present
Click on ‘Select histories’
Click on your target history
Validate by ‘Change Selected’
Drag the dataset to copy from its original history
Drop it in the target history
From the target history
Click on User in the top bar
Click on Datasets
Search for the dataset to copy
Click on its name
Click on Copy to current History
Creare una nuova cronologia
Le "Histories" sono una parte importante di Galaxy; la maggior parte degli utenti utilizza una nuova history per ogni nuova analisi. Assicurati sempre di dare alle tue history nomi chiari, in modo da poter ritrovare facilmente i risultati in seguito.
Per creare una nuova storia è sufficiente fare clic sull’icona new-history nella parte superiore del pannello della storia:
Creating a new history
Histories are an important part of Galaxy, most people use a new history for every new analysis. Always make sure to give your histories good names, so you can easily find your results back later.
To create a new history simply click the new-history icon at the top of the history panel:
Créer un nouvel history
Les historiques sont une partie importante de Galaxy, la plupart des gens utilisent un nouvel historique pour chaque nouvelle analyse. Assurez-vous toujours de donner de bons noms à vos historiques, afin de pouvoir retrouver facilement vos résultats plus tard.
Cliquez sur l’icone new-history en haut du panneau d’historique.
Si l’icone new-history est manquant :
Cliquez sur l’icone galaxy-gear (Options d’historique) en haut du panneau d’historique
Selectionner l’option Créer un nouveau depuis le menu
Dataset colors
Explains meaning of dataset colors in Galaxy's history
There are several different “states” a dataset can be in. These states are indicated by colors:
ok: everything is fine, life is good;
new: the dataset was just created. Galaxy does not yet know when it is available;
queued: indicates that the job generating this dataset is scheduled for execution but not running yet;
running: job generating this dataset is running;
setting metadata: when a new dataset is uploaded Galaxy examines it to understand what kind of data it is (e.g., BAM, FASTQ, fasta, BED, etc.). This is called “setting metadata”;
deferred: sometimes it does not make sense to upload the dataset until it is needed for an analysis. Galaxy will download deferred datasets later during the job execution. Those datasets do not count toward your quota;
paused: in some cases, workflow executions or upstream errors can prevent subsequent jobs from starting to create datasets in “paused” state. Rerun the errored tool with the option Resume dependencies from this job? to resume paused jobs;
discarded: something went wrong. For example, a job producing this dataset might have been cancelled;
error: everything is not fine; life is bad! Click on the information i button to know more about what happened;
placeholder: similar to “new”; we know something will be there, but are not yet sure what;
failed populated state: this refers to collections (not individual datasets). Here, a collection has failed to be populated with datasets;
new populated state: this refers to collections (not individual datasets). A collection was created but not populated yet.
Dataset snippet
Describes features of a single dataset element in the history
A single Galaxy dataset can either be “collapsed” or “expanded”.
Collapsed dataset view
Datasets in the panel are initially shown in a “collapsed” view:
It contains the following elements:
Dataset number: (“1”) order of dataset in the history;
Dataset name: (“M117-bl_1.fq.gz”) its name;
galaxy-eye: click this to view the dataset contents;
galaxy-pencil: click this to edit dataset properties;
galaxy-delete: click this to delete the dataset from the history (don’t worry, you can undo this action!).
Clicking on a collapsed dataset will expand it.
Some of the buttons above may be disabled if the dataset is in a state that doesn’t allow the action. For example, the ‘edit’ button is disabled for datasets that are still queued or running
Expanded dataset view
Expanded dataset view adds a preview element and many additional controls.
In addition to the elements described above for the collapsed dataset, its expanded view contains:
Add tagsgalaxy-tags: click on this to tag this dateset;
Dataset size: (“2 lines, 18 comments”) lists the size of the dataset. When datasets are small (like in this example) the exact size is shown. For large datasets, Galaxy gives an approximate estimate.
format: (“VCF”) lists the datatype;
database: (“?”) lists which genome built this dataset corresponds to. This usually lists “?” unless the genome build is set explicitly or the dataset is derived from another dataset with defined genome build information;
info field: (“INFO [2024-03-26 12:08:53,435]…”) displays information provided by the tool that generated this dataset. This varies widely and depends on the type of job that generated this dataset.
dataset-save: Saves dataset to disk;
dataset-link: Copies dataset link into clipboard;
dataset-info: Displays additional details about the dataset in the center pane;
dataset-rerun: Reruns job that generated this dataset. This button is unavailable for datasets uploaded into history because they were not produced by a Galaxy tool;
dataset-visualize: Displays visualization options for this dataset. The list of options is dependent on the datatype;
dataset-related-datasets: Shows datasets related to this dataset. This is useful for tracking down parental datasets - those that were used as inputs into a job that produced this particular dataset.
Downloading histories
Click on the gear icon galaxy-gear on the top of the history panel.
Select “Export History to File” from the History menu.
Click on the “Click here to generate a new archive for this history” text.
Wait for the Galaxy server to prepare history for download.
Click on the generated link to download the history.
Erstellen eines neuen Verlaufs
Histories sind ein wichtiger Teil von Galaxy. Die meisten Benutzer verwenden für jede neue Analyse eine neue History. Achten Sie immer darauf, Ihren Histories aussagekräftige Namen zu geben, damit Sie Ihre Ergebnisse später leicht wiederfinden können.
Um einen neuen Verlauf zu erstellen, klicken Sie einfach auf das Symbol new-history am oberen Rand des Verlaufsfensters:
Export tool citations from a history
When you publish your analysis, you will have to cite the tools you used. Galaxy makes this easy for you:
Click on History optionsgalaxy-history-options
Select Export Tool References
Here you will find all known citations for the tools used in your current history
They are provided in 2 formats, References (APA) and Bibtex
Exporting a history
Click on History options galaxy-history-options
Select Export history to file
Select the format. RO-crate or compressed TGZ file.
Select a destination. Options include:
Temporary Direct Download (will generate a download link valid for 24 hours)
Find all Histories and purge (aka permanently delete)
Login to your Galaxy account.
On the top navigation bar Click on User.
On the drop down menu that appears Click on Histories.
Click on Advanced Search, additional fields will be displayed.
Next to the Status field, click All, a list of all histories will be displayed.
Check the box next to Name in the displayed list to select all histories.
Click Delete Permanently to purge all histories.
A pop up dialogue box will appear letting you know history contents will be removed and cannot be undone, then click OK to confirm.
Finding Histories
To review all histories in your account, go to Historiesgalaxy-histories-activity in the Activity Bar (on the left).
There you will find 4 tabs with histories:
My Histories
Historires Shared with Me
Public Histories
Archived Histories
At the top of each tab is a search bar
Click Advanced Searchgalaxy-advanced-search at the right of the search bar for more search options
Searching by taggalaxy-tags
Filtering by state (e.g. published, deleted, purged)
Histories in all states are listed for registered accounts. Meaning one will always find their data here if it ever appears to be “lost”.
Note: Permanently deleted (purged) Histories may be fully removed from the server at any time. The data content inside the History is always removed at the time of purging (by a double-confirmed user action), but the purged History artifact may still be in the listing. Purged data content cannot be restored, even by an administrator.
Finding and working with shared histories
How to find and work on histories shared with you
To find shared histories
Select Histories from the Activity Bar
Click on the Histories shared with me tab
Published workflows are available from the Public Histories tab
To work with shared histories:
Click on viewgalaxy-eye on the history item.
Preview the history to make sure it is the one you want
Click on Import this history button at the top to make a copy under your own account
Note: Shared Histories (when copied into your account or not) do count in portion toward your total account data quota usage. More details on histories shared concerning account quota usage can be found in this link.
History annotation
Explains how to annotate a history
Sometimes tags and names are not enough to describe the work done within a history. Galaxy allows you to create history annotations: longer text entries that allow for more formatting options. The formatting of the text is preserved. Later, if you publish or share the history, the annotation will be displayed automatically - allowing you to share additional notes about the analysis. Multiple lines, spaces, and emoji! 😹🏳️⚧️🌈 can be used while writing annotations.
To annotate a history:
Click on galaxy-pencil (Edit) next to the history name. A larger text section will appear displaying any existing annotation or Annotation (optional) if empty.
Add your text. Enter will move the cursor to the next line. (Tabs cannot be entered since the ‘Tab’ button is used to switch between controls on the page - tabs can be pasted in, however).
Click on Savegalaxy-save.
To cancel, click the galaxy-undo “Cancel” button.
History options
Explains different history options
Clicking the galaxy-history-options button will open a drop-down menu with several options:
Show histories side-by-side - brings up a view in which multiple histories can be viewed and manipulated simultaneously. Datasets can be dragged between histories in this view.
Resume Paused Jobs - restarts paused jobs in history.
Copy this history - creates an exact copy of the current history in the current account.
Delete this history - deletes the current history.
Export tool citations - export citations for tools that were used in the current history.
Export history to File - creates a compressed archive containing data from the current history.
Archive history - moves history to a non-active, archived, state.
Extract workflow - converts the current history into a workflow
Show invocations - shows a list of all workflows that were run in the current history
Share or Publish - allows controlling access to history. It can be made public or shared with a specific user.
Set Permissions - allows to set the rules on who can access daysets in the current history.
Make Private - resets all permission and makes the current history private.
History tagging
Explains how to add tags to a history
Tags are short pieces of text used to describe the thing they’re attached to and many things in Galaxy can be tagged. Each item can have many tags and you can add new tags or remove them at any time. Tags can be another useful way to organize and search your data. For instance, you might tag a history with the type of analysis you did in it: assembly or variants. Or you may tag them according to data sources or some other metadata: long-term-care-facility or yellowstone-park:2014.
To tag a history:
Click on galaxy-pencil (Edit) next to the history name (which by default is “Unnamed history”).
Click on Add tagsgalaxy-tags and start typing. Any tags that you’ve used previously will show below your partial entry - allowing you to use this ‘autocomplete’ data to re-use your previous tags without typing them in full.
Click on Savegalaxy-save.
To cancel, click the galaxy-undo “Cancel” button.
Warning: Do not use spaces
It is strongly recommended to replace spaces in tags with _ or -, as spaces will automatically be removed when the tag is saved.
How to set Data Privacy Features?
Privacy controls are only enabled if desired. Otherwise, datasets by defaults remain private and unlisted in Galaxy. This means that a dataset you’ve created is virtually invisible until you publish a link to it.
Below are three optional steps to setting private Histories, a user can make use of any of the options below depending on what the user want to achieve:
Changing the privacy settings of individual dataset.
Click on the dataset name for a dropdown.
Clicking the ‘pencil - galaxy-pencil icon
Move on the Permissions tab.
On the permission tab is two input tab
On the second input with a label of access
Search for the name of the user to grant permission
Click on save permission
Note: Adding additional roles to the ‘access’ permission along with your “private role” does not do what you may expect. Since roles are always logically added together, only you will be able to access the dataset, since only you are a member of your “private role”.
Make all datasets in the current history private.
Open the History Options galaxy-gear menu galaxy-gear at the top of your history panel
Click the Make Private option in the dropdown menu available
Sets the default settings for all new datasets in this history to private.
Set the default privacy settings for new histories
Click user button on top of the main channel for a dropdown galaxy-dropdown
Click on the preferences under the dropdown galaxy-dropdown
Select Set Dataset Permissions for New Histories icon cofest
Add a permission and click save permission
Note: Changes made here will only affect histories created after these settings have been stored.
Importing a history
Open the link to the shared history
Click on the Import this history button on the top left
Enter a title for the new history
Click on Copy History
Kopieren eines Datensatzes zwischen Historien
Manchmal möchten Sie ein Dataset in mehreren Histories verwenden. Sie müssen die Daten nicht erneut hochladen, sondern können Datasets von einer History in eine andere kopieren.
Es gibt 3 Möglichkeiten, Datensätze zwischen Historien zu kopieren
Aus der ursprünglichen Historie
Klicken Sie auf das Symbol galaxy-gear, das sich am Anfang der Liste der Datensätze im Verlaufsfenster befindet
Klicken Sie auf Datensätze kopieren
Wählen Sie die gewünschten Dateien
Geben Sie der “Neuen Historie” einen passenden Namen
Validieren durch ‘Kopieren von Verlaufsdaten’
Klicken Sie auf den neuen Namen der Historie in dem grünen Feld, das gerade erschienen ist, um zu dieser Historie zu wechseln
Verwendung des galaxy-columnsHistorien nebeneinander anzeigen
Klicken Sie auf den galaxy-dropdown Dropdown-Pfeil oben rechts im Verlaufsfenster (History options)
Klicken Sie auf galaxy-columnsHistorien nebeneinander anzeigen
Wenn Ihr Zielverlauf nicht vorhanden ist
Klicken Sie auf ‘Historien auswählen’
Klicken Sie auf Ihren Zielverlauf
Validieren durch ‘Change Selected’
Ziehen Sie den zu kopierenden Datensatz aus seiner ursprünglichen Historie
Legen Sie ihn in der Zielhistorie ab
Aus der Zielhistorie
Klicken Sie auf Benutzer in der oberen Leiste
Klicken Sie auf Datensätze
Suche nach dem zu kopierenden Datensatz
Klicken Sie auf den Namen
Klicken Sie auf Kopieren in die aktuelle Historie
Manipulating multiple history datasets
Explains how to manipulate multiple history datasets at once
You can also hide, delete, and purge multiple datasets at once by multi-selecting datasets:
galaxy-selector Click the multi-select button containing the checkbox just below the history size.
Checkboxes will appear inside each dataset in the history.
Scroll and click the checkboxes next to the datasets you want to manage.
Click the ‘n of N selected’ to choose the action. The action will be performed on all selected datasets, except for the ones that don’t support the action. That is, if an action doesn’t apply to a selected dataset, like deleting a deleted dataset, nothing will happen to that dataset, while all other selected datasets will be deleted.
You can click the multi-select button again to hide the checkboxes.
Renaming a history
Explains how to rename a history
Click on galaxy-pencil (Edit) next to the history name (which by default is “Unnamed history”)
Type the new name
Click on Save
To cancel renaming, click the galaxy-undo “Cancel” button
If you do not have the galaxy-pencil (Edit) next to the history name (which can be the case if you are using an older version of Galaxy) do the following:
Click on Unnamed history (or the current name of the history) (Click to rename history) at the top of your history panel
Type the new name
Press Enter
Rinominare una cronologia
Spiega come rinominare una history
Fare clic su galaxy-pencil (Modifica) accanto al nome della storia (che per impostazione predefinita è “Storia senza nome”)
Digitare il nuovo nome
fare clic su Salva
Per annullare la ridenominazione, fare clic sul pulsante galaxy-undo “Annulla”
Se non si ha l’icona galaxy-pencil (Modifica) accanto al nome della cronologia (cosa che può accadere se si utilizza una versione precedente di Galaxy), procedere come segue:
Fare clic su Cronologia senza nome (o sul nome attuale della cronologia) (Clicca per rinominare la cronologia) nella parte superiore del pannello della cronologia
Digitare il nuovo nome
Premere Invio
Searching your history
To make it easier to find datasets in large histories, you can filter your history by keywords as follows:
Click on the search datasets box at the top of the history panel.
Type a search term in this box
For example a tool name, or sample name
To undo the filtering and show your full history again, press on the clear search button galaxy-clear next to the search box
Sharing your History
You can share your work in Galaxy. There are various ways you can give access to one of your histories to other users.
Sharing your history allows others to import and access the datasets, parameters, and steps of your history.
Access the history sharing menu via the History Options dropdown (galaxy-history-options), and clicking “history-share Share or Publish”
Share via link
Open the History Optionsgalaxy-history-options menu at the top of your history panel and select “history-share Share or Publish”
galaxy-toggleMake History accessible
A Share Link will appear that you give to others
Anybody who has this link can view and copy your history
Publish your history
galaxy-toggleMake History publicly available in Published Histories
Anybody on this Galaxy server will see your history listed under the Published Histories tab opened via the galaxy-histories-activityHistories activity
Share only with another user.
Enter an email address for the user you want to share with in the Please specify user email input below Share History with Individual Users
Your history will be shared only with this user.
Finding histories others have shared with me
Click on the galaxy-histories-activityHistories activity in the activity bar on the left
Click the Shared with me tab
Here you will see all the histories others have shared with you directly
Note: If you want to make changes to your history without affecting the shared version, make a copy by going to History Optionsgalaxy-history-options icon in your history and clicking Copy this History
Switching to an existing history
Shows how to switch to another existing history in your account
To switch to an existing history simply click the switch-histories icon at the top of the history panel. This opens a list of histories existing in a given Galaxy account in the middle part of the interface.
Top level history controls
Description of three history buttons for creating a new histiory, switching histories, and opening history options dropdown
Above the current history panel are three buttons:
The new-history “Create new history” button will create an empty history.
The switch-histories “Switch to history” will open a window letting you easily swap to any of your other histories.
The galaxy-history-options “History options” (formerly the galaxy-gear “Gear menu”) gives you access to advanced options to work with your history.
Transfer entire histories from one Galaxy server to another
Transfer a Single Dataset
At the sender Galaxy server, set the history to a shared state, then directly capture the galaxy-link link for a dataset and paste the URL into the Upload tool at the receiver Galaxy server.
Transfer an Entire History
Have an account at two different Galaxy servers, and be logged into both.
Click into the History Options menu in the history panel.
Select from the menu galaxy-history-archiveExport History to File.
Choose the option for How do you want to export this History? as to direct download.
Click on Generate direct download.
Allow the archive generation process to complete. *
Copy the galaxy-link link for your new archive.
At the receiver Galaxy server
Confirm that you are logged into your account.
Click on Data in the top menu, and choose Histories to reach your Saved Histories.
Click on Import history in the grey button on the top right.
Paste in your link’s URL from step 7.
Click on Import History.
Allow the archive import process to complete. *
The transfered history will be uncompressed and added to your Saved Histories.
* For steps 6 and 13: It is Ok to navigate away for other tasks during processing. If enabled, Galaxy will send you status notifications.
tip If the history to transfer is large, you may copy just your important datasets into a new history, and create the archive from that new smaller history. Clearing away deleted and purged datasets will make all histories smaller and faster to archive and transfer!
Umbenennen eines Verlaufs
Erklärt, wie man eine History umbenennt
Klicken Sie auf galaxy-pencil (Bearbeiten) neben dem Namen der Geschichte (der standardmäßig “Unbenannte Geschichte” lautet)
Geben Sie den neuen Namen ein
Klicken Sie auf Speichern
Um die Umbenennung abzubrechen, klicken Sie auf die galaxy-undo schaltfläche “Abbrechen”
Wenn Sie nicht das galaxy-pencil (Edit) neben dem Verlaufsnamen haben (was der Fall sein kann, wenn Sie eine ältere Version von Galaxy verwenden), gehen Sie wie folgt vor:
Klicken Sie auf Unbenannter Verlauf (oder den aktuellen Namen des Verlaufs) (Klicken Sie zum Umbenennen des Verlaufs) oben in Ihrem Verlaufsfenster
Geben Sie den neuen Namen ein
Drücken Sie Enter
Undeleting history
Undelete your deleted histories
Deleted histories can be undeleted:
Select “Histories” from the activity bar on the left
Toggle “Advanced search”
Click “Deleted”
Click on the title of the history you want to un-delete and un-delete it!
Unsharing unwanted histories
All account Histories owned by others but shared with you can be reviewed under User > Histories shared with me.
The other person does not need to unshare a history with you. Unshare histories yourself on this page using the pull-down menu per history.
Dataset and History privacy options, including sharing, can be set under User > Preferences.
Three key features to work with shared data are:
View is a review feature. The data cannot be worked with, but many details, including tool and dataset metadata/parameters, are included.
Copy those you want to work with. This will increase your quota usage. This will also allow you to manipulate the datasets or the history independently from the original owner. All History/Dataset functions are available if the other person granted full access to the datasets to you.
Unshare any on the list not needed anymore. After a history is copied, you will still have your version of the history, even if later unshared or the other person who shared it with you changes their version later. Meaning, that each account’s version of a History and the Datasets in it are distinct (unless the Datasets were not shared, you will still only be able to “view” but not work with or download them).
Note: “Histories shared with me” result in only a tiny part of your quota usage. Unsharing will not significantly reduce quota usage unless hundreds (or more!) or many significant histories are shared. If you share a History with someone else, that does not increase or decrease your quota usage.
View a list of all histories
This FAQ demonstrates how to list all histories for a given user
There are multiple ways in which you can view your histories:
Viewing histories using switch-histories “Switch to history” button. This is best for quickly switching between multiple histories.
Click the “Switch history” icon at the top of the history panel to bring up a list of all your histories:
Using the “Activity Bar”:
Click the “Show all histories” button within the Activity Bar on the left:
Using “Data” drop-down:
Click the “Data” link on the top bar of Galaxy interface and select “Histories”:
Using the Multi-view, which is best for moving datasets between histories:
Click the galaxy-history-options menu, and select galaxy-multihistoryShow histories side-by-side
View histories side-by-side
This FAQ demonstrates how to view histories side-by-sde
You can view multiple Galaxy histories at once. This allows to better understand your analyses and also makes it possible to drag datasets between histories. This is called “History multiview”. The multiview can be enabled either view History menu or via the Activity Bar:
Option 1: Enabling Multiview via History menu is done by first clicking on the galaxy-history-options “History options” drop-down and selecting galaxy-multihistory “Show Histories Side-by-Side option”:
Option 2: Clicking the galaxy-multihistory “History Multiview” button within the Activity Bar:
My jobs are not running / I cannot see the history overview menu
Please make sure you are logged in. At the top menu bar, you should see a section labeled “User”. If you see “Login/Register” here you are not logged in.
Do I need to create collections to run MaxQuant analysis or can I use single sample inputs?
Collections are not necessary to run MaxQuant but they make the history more clean and easier to navigate. The multiple datasets options allows to select multiple files that are not part of a collection and will give the same result as with a collection as input.
Do we need a contaminant FASTA for MQ in galaxy?
Normally MaxQuant has a default contaminant fasta that we don’t have to input ourselves. MaxQuant in galaxy comes with the option to add contaminants automatically (one does not need to add contaminants to the fasta file)
Do you need to merge the databases? Because you can select multiple fasta files in MaxQuant.
For MaxQuant one does not need to merge the databases, also MaxQuant offers the function to add common contaminants to the provided fasta.
Every material in the GTN is automatically assigned two short URLs:
a PURL which will always point to the material, and looks like https://gxy.io/GTN:T00001
a tutorial ID based short URL like https://gxy.io/GTN:admin/ansible-galaxy, which will redirect to topics/admin/tutorials/ansible-galaxy/tutorial.md
The PURLs, when available, are listed in the Metadata box of a given material, or on the first slide of a slide deck. Additionally any page with a PURL lists it in the footer of the page. PURLs are generated every monday, so it can take up to a week for your PURL to be available. If you need it sooner, please let us know.
The second short URL is not currently displayed anywhere but can be constructed manually based on the URL of the page.
How do I get help?
The support channel for instructors is the same as for individual learners. We suggest you start by posting a question to the Galaxy Training Network Gitter chat. Anyone can view the discussion, but you’ll need to login (using your GitHub or Twitter account) to add to the discussion.
If you have questions about Galaxy in general (that are not training-centric) then there are several support options.
What Galaxy instance should I use for my training?
To teach the hands-on tutorials you need a Galaxy server to run the examples on.
Each tutorial is annotated with the information on which public Galaxy servers it can be run. These servers are available to anyone on the world wide web and some may have all the tools that are needed by a specific tutorial. If you choose this option then you should work with that server’s admins to confirm that the server can handle the workload for a workshop. For example, the usegalaxy.eu
If your organization/consortia/community has its own Galaxy server, then you may want to run tutorials on that. This can be ideal because then the instance you are teaching on is the same as your participants will be using after the training. They’ll also be able to revisit any analysis they did during the training. If you pursue this option you’ll need to work with your organization’s Galaxy Admins to confirm that
the server can support a room full of people all doing the same analysis at the same time.
all tools and reference datasets needed in the tutorial are locally installed. To learn how to setup a Galaxy instance for a tutorial, you can follow our dedicated tutorial.
all participants will be able to create/use accounts on the system.
Some training topics have a Docker image that can be installed and run on all participants’ laptops. These images contain Galaxy instances that include all tools and datasets used in a tutorial, as well as saved analyses and repeatable workflows that are relevant.
What are the best practices for teaching with Galaxy?
We started to collect some best practices for instructors inside our Good practices slides
Where do I start?
Spend some time exploring the different tutorials and the different resources that are available. Become familiar with the structure of the tutorials and think about how you might use them in your teaching.
One of the other nice features of RMarkdown documents is making lovely presentation-quality worthy documents. You can take, for example, a tutorial and produce a nice report like output as HTML, PDF, or .doc document that can easily be shared with colleagues or students.
Now you’re ready to preview the document:
Click Preview. A window will popup with a preview of the rendered verison of this document.
The preview is really similar to the GTN rendering, no cells have been executed, and no output is embedded yet in the preview document. But if you have run cells (e.g. the first few loading a library and previewing the msleep dataset:
When you’re ready to distribute the document, you can instead use the Knit button. This runs every cell in the entire document fresh, and then compiles the outputs together with the rendered markdown to produce a nice result file as HTML, PDF, or Word document.
tip Tip: PDF + Word require a LaTeX installation
You might need to install additional packages to compile the PDF and Word document versions
And at the end you can see a pretty document rendered with all of the output of every step along the way. This is a fantastic way to e.g. distribute read-only lesson materials to students, if you feel they might struggle with using an RMarkdown document, or just want to read the output without doing it themselves.
Interactive Jupyter Notebook. Note that on some Galaxies this is called Interactive JupyTool and notebook:
Click Run Tool
The tool will start running and will stay running permanently
This may take a moment, but once the Executed notebook in your history is orange, you are up and running!
On the left menu bar you should see the Interactive Tools Icon now. Click on it to open the Active Interactive Tools and locate the JupyterLab instance you started.
Click on your JupyterLab instance (JupyTool interactive tool)
If JupyterLab is not available on the Galaxy instance:
Depending on which server you are using, you may be able to run RStudio directly in Galaxy. If that is not available, RStudio Cloud can be an alternative.
The tool will start running and will stay running permanently
Click on the “User” menu at the top and go to “Active InteractiveTools” and locate the RStudio instance you started.
If RStudio is not available on the Galaxy instance:
Register for RStudio Cloud, or login if you already have an account
Create a new project
Launch RStudio
Depending on which server you are using, you may be able to run RStudio directly in Galaxy. If that is not available, RStudio Cloud can be an alternative.
The tool will start running and will stay running permanently
Click on the “User” menu at the top and go to “Active InteractiveTools” and locate the RStudio instance you started.
If RStudio is not available on the Galaxy instance:
Register for RStudio Cloud, or login if you already have an account
Create a new project
Learning with RMarkdown in RStudio
Learning with RMarkdown is a bit different than you might be used to. Instead of copying and pasting code from the GTN into a document you’ll instead be able to run the code directly as it was written, inside RStudio! You can now focus just on the code and reading within RStudio.
Load the notebook if you have not already, following the tip box at the top of the tutorial
Open it by clicking on the .Rmd file in the file browser (bottom right)
The RMarkdown document will appear in the document viewer (top left)
You’re now ready to view the RMarkdown notebook! Each notebook starts with a lot of metadata about how to build the notebook for viewing, but you can ignore this for now and scroll down to the content of the tutorial.
You can switch to the visual mode which is way easier to read - just click on the gear icon and select Use Visual Editor.
You’ll see codeblocks scattered throughout the text, and these are all runnable snippets that appear like this in the document:
And you have a few options for how to run them:
Click the green arrow
ctrl+enter
Using the menu at the top to run all
When you run cells, the output will appear below in the Console. RStudio essentially copies the code from the RMarkdown document, to the console, and runs it, just as if you had typed it out yourself!
One of the best features of RMarkdown documents is that they include a very nice table browser which makes previewing results a lot easier! Instead of needing to use head every time to preview the result, you get an interactive table browser for any step which outputs a table.
Open a Terminal in Jupyter
This tutorial will let you accomplish almost everything from this view, running code in the cells below directly in the training material. You can choose between running the code here, or opening up a terminal tab in which to run it.Here are some instructions for how to do this on various environments.
Jupyter on UseGalaxy.* and MyBinder.org
Use the File → New → Terminal menu to launch a terminal.
Disable “Simple” mode in the bottom left hand corner, if it activated.
Drag one of the terminal or notebook tabs to the side to have the training materials and terminal side-by-side
CoCalc
Use the Split View functionality of cocalc to split your view into two portions.
Change the view of one panel to a terminal
Open interactive tool
Go to Interactive Tools on the Activity Bar on the left
Wait for your interactive tool to be in the running state (Job Info)
Click on the tool name
Clicking on the external-link icon will open it in a new tab
Stop RStudio
When you have finished your R analysis, it’s time to stop RStudio.
First, save your work into Galaxy, to ensure reproducibility:
You can use gx_put("example.csv") to save individual files by supplying the filename
You can use gx_save() to save the entire analysis transcript and any data objects loaded into your environment.
Once you have saved your data, you can proceed in 2 different ways:
Deleting the corresponding history dataset named RStudio and showing a “in progress state”, so yellow, OR
Clicking on the “User” menu at the top and go to “Active InteractiveTools” and locate the RStudio instance you started, selecting the corresponding box, and finally clicking on the “Stop” button at the bottom.
Stop an Interactive Tool
Go to Interactive Tools on the Activity Bar on the left
Click on the stop button stop next to your interactive tool
To cite individual tutorials, please find citation information at the end of the tutorial.
Here is the BibTeX formatted version of those citations:
@article{Hiltemann_2023,
	title        = {Galaxy Training: A powerful framework for teaching!},
	author       = {Hiltemann, Saskia and Rasche, Helena and Gladman, Simon and Hotz, Hans-Rudolf and Larivi\`{e}re, Delphine and Blankenberg, Daniel and Jagtap, Pratik D. and Wollmann, Thomas and Bretaudeau, Anthony and Gou\'{e}, Nadia and Griffin, Timothy J. and Royaux, Coline and Le Bras, Yvan and Mehta, Subina and Syme, Anna and Coppens, Frederik and Droesbeke, Bert and Soranzo, Nicola and Bacon, Wendi and Psomopoulos, Fotis and Gallardo-Alba, Crist\'{o}bal and Davis, John and F\"{o}ll, Melanie Christine and Fahrner, Matthias and Doyle, Maria A. and Serrano-Solano, Beatriz and Fouilloux, Anne Claire and van Heusden, Peter and Maier, Wolfgang and Clements, Dave and Heyl, Florian and Gr\"{u}ning, Bj\"{o}rn and Batut, B\'{e}r\'{e}nice},
	year         = 2023,
	month        = jan,
	journal      = {PLOS Computational Biology},
	publisher    = {Public Library of Science (PLoS)},
	volume       = 19,
	number       = 1,
	pages        = {e1010752},
	doi          = {10.1371/journal.pcbi.1010752},
	issn         = {1553-7358},
	url          = {http://dx.doi.org/10.1371/journal.pcbi.1010752},
	editor       = {Ouellette, Francis},
}
@article{Batut_2018,
	title        = {Community-Driven Data Analysis Training for Biology},
	author       = {Batut, B\'{e}r\'{e}nice and Hiltemann, Saskia and Bagnacani, Andrea and Baker, Dannon and Bhardwaj, Vivek and Blank, Clemens and Bretaudeau, Anthony and Brillet-Gu\'{e}guen, Loraine and \v{C}ech, Martin and Chilton, John and Clements, Dave and Doppelt-Azeroual, Olivia and Erxleben, Anika and Freeberg, Mallory Ann and Gladman, Simon and Hoogstrate, Youri and Hotz, Hans-Rudolf and Houwaart, Torsten and Jagtap, Pratik and Larivi\`{e}re, Delphine and Le Corguill\'{e}, Gildas and Manke, Thomas and Mareuil, Fabien and Ram\'{\i}rez, Fidel and Ryan, Devon and Sigloch, Florian Christoph and Soranzo, Nicola and Wolff, Joachim and Videm, Pavankumar and Wolfien, Markus and Wubuli, Aisanjiang and Yusuf, Dilmurat and Taylor, James and Backofen, Rolf and Nekrutenko, Anton and Gr\"{u}ning, Bj\"{o}rn},
	year         = 2018,
	month        = jun,
	journal      = {Cell Systems},
	publisher    = {Elsevier BV},
	volume       = 6,
	number       = 6,
	pages        = {752--758.e1},
	doi          = {10.1016/j.cels.2018.05.012},
	issn         = {2405-4712},
	url          = {http://dx.doi.org/10.1016/j.cels.2018.05.012},
}
How can I load data?
Load by “browsing” for a local file. Some servers will support load data that is 2 GB or larger. If you are having problems with this method, try FTP.
Load using an HTTP URL or FTP URL.
Load a few lines of plain text.
Load using FTP. Either line command or with a desktop client.
If you get stuck, you can first check your history against an galaxy-history-answer Answer Key history found in the header of (some) tutorials.
First, import the target history.
Open the link to the shared history
Click on the Import this history button on the top left
Enter a title for the new history
Click on Copy History
Next, compare the answer key history with your own history.
You can view multiple Galaxy histories at once. This allows to better understand your analyses and also makes it possible to drag datasets between histories. This is called “History multiview”. The multiview can be enabled either view History menu or via the Activity Bar:
Option 1: Enabling Multiview via History menu is done by first clicking on the galaxy-history-options “History options” drop-down and selecting galaxy-multihistory “Show Histories Side-by-Side option”:
Option 2: Clicking the galaxy-multihistory “History Multiview” button within the Activity Bar:
You can compare there, or if you’re really stuck, you can also click and drag a given dataset to your history to continue the tutorial from there.
There 3 ways to copy datasets between histories
From the original history
Click on the galaxy-gear icon which is on the top of the list of datasets in the history panel
Click on Copy Datasets
Select the desired files
Give a relevant name to the “New history”
Validate by ‘Copy History Items’
Click on the new history name in the green box that have just appear to switch to this history
Using the galaxy-columnsShow Histories Side-by-Side
Click on the galaxy-dropdown dropdown arrow top right of the history panel (History options)
Click on galaxy-columnsShow Histories Side-by-Side
If your target history is not present
Click on ‘Select histories’
Click on your target history
Validate by ‘Change Selected’
Drag the dataset to copy from its original history
Drop it in the target history
From the target history
Click on User in the top bar
Click on Datasets
Search for the dataset to copy
Click on its name
Click on Copy to current History
You can also use our handy troubleshooting guide.
When something goes wrong in Galaxy, there are a number of things you can do to find out what it was. Error messages can help you figure out whether it was a problem with one of the settings of the tool, or with the input data, or maybe there is a bug in the tool itself and the problem should be reported. Below are the steps you can follow to troubleshoot your Galaxy errors.
Expand the red history dataset by clicking on it.
Sometimes you can already see an error message here
View the error message by clicking on the bug icongalaxy-bug
Check the logs. Output (stdout) and error logs (stderr) of the tool are available:
Expand the history item
Click on the details icon
Scroll down to the Job Information section to view the 2 logs:
Having one account at several public Galaxy servers expands your access to distinct data storage and computational resources, plus common and domain-specific analysis tools.
When running your own private Galaxy server for routine analysis, publishing results at a public Galaxy server allows for worldwide access by others when you share your data: Histories, Workflows, and related assets.
Tips:
Teaching with Galaxy We strongly recommend using Galaxy’s Training Infrastructure as a Service (TIaaS) for synchronous class work.
Public Galaxy servers are appropriate for many analysis projects or for when sharing data or results publicly is a goal. These are also a great choice when learning on your own with GTN tutorials.
Private Galaxy servers are more appropriate when working with very large data, time sensitive projects, and ongoing research projects that require more resources than the public Galaxy servers can support. These two options are scientist friendly as they require very little to no server administration.
AnVIL is a single-user choice sponsored by NHGRI and is a pay-for-use Google Cloud platform.
What are the tutorials for?
These tutorials can be used for learning and teaching how to use Galaxy for general data analysis, and for learning/teaching specific domains such as assembly and differential gene expression analysis with RNA-Seq data.
What audiences are the tutorials for?
There are two distinct audiences for these materials.
Self-paced individual learners. These tutorials provide everything you need to learn a topic, from explanations of concepts to detailed hands-on exercises.
Instructors. They are also designed to be used by instructors in teaching/training settings. Slides, and detailed tutorials are provided. Most tutorials also include computational support with the needed tools, data as well as Docker images that can be used to scale the lessons up to many participants.
What is Galaxy?
Galaxy is an open data integration and analysis platform for the life sciences, and it is particularly well-suited for data analysis training in life science research.
What is a Learning Pathway?
We recommend you follow the tutorials in the order presented on this page. They have been selected to fit together and build up your knowledge step by step. If a lesson has both slides and a tutorial, we recommend you start with the slides, then proceed with the tutorial.
What is my.galaxy.training
The my.galaxy.training is part of the GTN. We found that often need to direct our learners to specific pages within Galaxy, but which Galaxy? Should we add three links, one for each of the current bigger UseGalaxy.* servers? That would be really annoying for users who aren’t using one of those servers.
E.g. how do we link to /user, the user preferences page which is available on every Galaxy Instance? This service handles that in a private and user-friendly manner.
(Learners) How to Use It
When you access a my.galaxy.training page you’ll be prompted to select a server, simply select one and you’re good to go!
If you want to enter a private Galaxy instance, perhaps, behind a firewall, that’s also an option! Just select the ‘other’ option and provide your domain. Since the redirection happens in your browser with no servers involved, as long as you can access the server, you’ll get redirected to the right location.
(Tutorial Authors) How to use it
If you want to link to a specific page within Galaxy, simple construct the URL: https://my.galaxy.training/?path=/user where everything after ?path is the location they should be redirected to on Galaxy. That example link will eventually redirect the learner to something like https://usegalaxy.eu/user.
Technical Background
So we took inspiration from Home Assistant which had the same problem, how to redirect users to pages on their own servers. The my.galaxy.training service is a very simple static page which looks in the user’s localStorage for their preferred server. If it’s not set, the user can click one of the common domains, and be redirected. When they access another link, they’ll be prompted to use a button that remembers which server they chose.
Data Privacy
Any domain selected is not tracked nor communicated to any third party. Your preferred server is stored in your browser, and never transmitted to the GTN. That’s why we use localStorage instead of cookies.
What is this website?
This website is a collection of hands-on tutorials that are designed to be interactive and are built around Galaxy:
We go to great lengths to make sure our training platform is completely FAIR. See this FAQ for the details on how we achieve that.. All of our materials have extensive BioSchemas markup ensuring they’re easily accessible to search engines. Our materials are automatically indexed by TeSS, and we are working on a WorkflowHub integration.
Accessible
We regularly test our pages with a thorough suite of accessibility tools, as well as via screen reader.
Not Just Galaxy
Our name can be a bit misleading! While a lot of our tutorials are focused on Galaxy, we have multiple growing topics which are unrelated to Galaxy.
Sometimes cleaning Jekyll’s cache can improve slow (~60s) incremental build times. jekyll clean will do this. If you continue to experience --incremental build (make serve-quick) time issues, please let us know!
If you have questions about this training material, you can reach us using the Gitter chat. You’ll need a GitHub or Twitter account to post questions. If you have questions about Galaxy outside the context of training, see the Galaxy Support page.
How do I use this material?
Many topics include slide decks and if the topic you are interested in has slides then start there. These will introduce the topic and important concepts.
Most of your learning will happen in the next step - the hands-on tutorials. This is where you’ll become familiar with using the Galaxy interface and experiment with different ways to use Galaxy and the tools in Galaxy.
Is there a certification available for the FAIR-by-Design Methodology?
There is no specific certification regarding the implementation of the FAIR-by-Design Methodology when developing learning materials for GTN.
There is, however, the possibility to obtain FAIR-by-Design per stages and overall badge based on the Training of Trainers learning materials prepared by the Skills4EOSC project.
To run the hands-on tutorials you need a Galaxy server to run them on.
Each tutorial is annotated with information about which public Galaxy servers it can be run on. These servers are available to anyone on the world wide web and some may have all the tools that are needed by a specific tutorial.
If your organization/consortia/community has its own Galaxy server, then you may want to run tutorials on that. You will need to confirm that all necessary tools and reference genomes are available on your server and possible install missing tools and data. To learn how to do that, you can follow our dedicated tutorial.
Some topics have a Docker image that can be installed and run on participants’ laptops. These Docker images contain Galaxy instances that include all tools and datasets used in a tutorial, as well as saved analyses and repeatable workflows that are relevant. You will need to install Docker.
Finally, you can also run your tutorials on cloud-based infrastructures. Galaxy is available on many national research infrastructures such as Jetstream (United States), GenAP (Canada), GVL (Australia), CLIMB (United Kingdom), and more. These instances are typically easy to launch, and easy to shut down when you are done.
If you are already familiar with, and have an account on Amazon Web Services then you can also launch a Galaxy server there using CloudLaunch.
Where do I start?
If you are new to Galaxy then start with one of the introductory topics. These introduce you to concepts that are useful in Galaxy, no matter what domain you are doing analysis in.
If you are already familiar with Galaxy basics and want to learn how to use it in a particular domain (for example, ChIP-Seq), then start with one of those topics.
If you are already well informed about bioinformatics data analysis and you just want to get a feel for how it works in Galaxy, then many tutorials include Instructions for the impatient sections.
Is it possible to visualize the RNA STAR bam file using the JBrowse tool?
Yes, that should work.
RNAstar: Why do we set 36 for 'Length of the genomic sequence around annotated junctions'?
RNA STAR is using the gene model to create the database of splice junctions, and that these don’t “need” to have a length longer than the reads (37bp).
Problem: I have a notebook that I’d like to add to the GTN.
Solution: While we do not support directly adding notebooks to the GTN, as all of our notebooks are generated from the tutorial Markdown files, there is an alternative path! Instead you can:
Use it to convert the ipynb file into a Markdown file (jupytext notebook.ipynb --to markdown)
Add this Markdown file to the GTN
Fix any missing header metadata
Then the GTN’s infrastructure will automatically convert that Markdown file directly to a notebook on deployment. This approach has the advantage that Markdown files are more diff-friendly than ipynb, making it much easier to review updates to a tutorial.
This tutorial may not be updated for the latest version of Galaxy.
Galaxy’s Interface may be different to the Galaxy where you are following this tutorial.
✅ All tutorial steps will still be able to be followed (potentially with minor differences for moved buttons or changed icons.)
✅ Tools will all still work
GTN Stats
Statistics over the GTN
529
Tutorials
35
Topics
28
Learning Paths
549
FAQs
358
Workflows
222
Videos (155.1h)
127
News Posts
11.0
Years
Community Stats
534
Contributors
33
Editorial Board Members
46
Events
82
Supporting Organisations
Sustainability of the training-material and metadata
This repository is hosted on GitHub using git as a DVCS. Therefore the community is hosting backups of this repository in a decentralised way. The repository is self-contained and contains all needed content and all metadata. In addition we mirror snapshops of this repo on Zenodo.
Translations within the GTN
The GTN currently supports two forms of translation:
Manual (tutorial_ES.md and slides_ES.html for example)
Automated (via linking through to Google Translate)
We accept manual translations if and only if there is a team that is able to commit to their maintenance. We need to ensure the trainings are kept up to date and high quality, but that requires native speakers of that language to maintain those translations.
Please contact us if you have any questions regarding translations.
Can I use these workflows on datasets generated from our laboratory?
Yes, the workflows can be used on other datasets as well. However, you will need to consider data acquisition and sample preparation methods so that the tool parameters can be adjusted accordingly.
Can I use these workflows on datasets generated from our laboratory?
Yes, the workflows can be used on other datasets as well. However, you will need to consider data acquisition and sample preparation methods so that the tool parameters can be adjusted accordingly.
Can I use these workflows on datasets generated from our laboratory?
Yes, the workflows can be used on other datasets as well. However, you will need to consider data acquisition and sample preparation methods so that the tool parameters can be adjusted accordingly.
Example histories for the proteogenomics tutorials
If you get stuck or would like to see what the results should look like, you can have a look at one of the following public histories:
The workflows contain several Query tabular for text manipulation, is there a tutorial for that?
Query tabular loads a tabular database and creates a sqlite database and tabular file. To learn more about SQL Queries - please look at this documentation.
The help section on the Query Tabular tool provides simple examples of both filtering the input tabular datasets, as well as examples of SQL queries. Query Tabular also incorporates regex functions that can be used queries. The PSM report datasets in these tutorials have fields that are lists of protein IDs.
Query Tabular help shows how to normalize those protein list fields so that we can perform operations by protein ID. See section: Normalizing by Line Filtering into 2 Tables in the tool help (below the tool in Galaxy).
What kind of variants are seen in the output?
From this workflow we can see insertions, deletions, SNVs, or we will know whether it’s an intron, exon, splice junction etc.
What kind of variants are seen in the output?
From this workflow we can see insertions, deletions, SNVs, or we will know whether it’s an intron, exon, splice junction etc.
What kind of variants are seen in the output?
From this workflow we can see insertions, deletions, SNVs, or we will know whether it’s an intron, exon, splice junction etc.
UCSC - I fetched data from a remote website but now I’m logged out of Galaxy and my data is gone?
This is a known bug with Chrome + Galaxy, we’re working on it galaxyproject/galaxy#11374. For now we can recommend using Firefox (known to work) or trying another browser.
A reference genome contains the nucleotide sequence of the chromosomes, scaffolds, transcripts, or contigs for single species. It is representative of a specific genome assembly build or release.
There are two options for reference genomes in Galaxy.
Native
Index provided by the server administrators.
Found on tool forms in a drop down menu.
A database key is automatically assigned. See tip 1.
The database is what links your data to a FASTA index. Example: used with BAM data
Custom
FASTA file uploaded by users.
Input on tool forms then indexed at runtime by the tool.
There are five basic steps to use a Custom Reference Genome, plus one optional.
Obtain a FASTA copy of the target genome. See tip 2.
Upload the genome to Galaxy and to add it as a dataset in your history.
Clean up the format with the tool NormalizeFasta using the options to wrap sequence lines at 80 bases and to trim the title line at the first whitespace.
tip TIP 2: When choosing your reference genome, consider choosing your reference annotation at the same time. Standardize the format of both as a preparation step. Put the files in a dedicated “reference data” history for easy reuse.
Sorting Reference Genome
Certain tools expect that reference genomes are sorted in lexicographical order. These tools are often downstream of the initial mapping tools, which means that a large investment in a project has already been made, before a problem with sorting pops up in conclusion layer tools. How to avoid? Always sort your FASTA reference genome dataset at the beginning of a project. Many sources only provide sorted genomes, but double checking is your own responsibility, and super easy in Galaxy!
Convert Formats -> FASTA-to-Tabular
Filter and Sort -> Sort on column: c1 with flavor: Alphabetical everything in: Ascending order
Convert Formats -> Tabular-to-FASTA
Note: The above sorting method is for most tools, but not all. In particular, GATK tools have a tool-specific sort order requirement.
Troubleshooting Custom Genome fasta
If a custom genome/transcriptome/exome dataset is producing errors, double check the format and that the chromosome identifiers between ALL inputs. Clicking on the bug icon galaxy-bug will often provide a description of the problem. This does not automatically submit a bug report, and it is not always necessary to do so, but it is a good way to get some information about why a job is failing.
Custom genome not assigned as FASTA format
Symptoms include: Dataset not included in custom genome “From history” pull down menu on tool forms.
Solution: Check datatype assigned to dataset and assign fasta format.
How: Click on the dataset’s pencil icon galaxy-pencil to reach the “Edit Attributes” form, and in the Datatypes tab > redetect the datatype.
If fasta is not assigned, there is a format problem to correct.
Incomplete Custom genome file load
Symptoms include: Tool errors result the first time you use the Custom genome.
Solution: Use Text Manipulation → Select last lines from a dataset to check last 10 lines to see if file is truncated.
How: Reload the dataset (switch to FTP if not using already). Check your FTP client logs to make sure the load is complete.
Extra spaces, extra lines, inconsistent line wrapping, or any deviation from strict FASTA format
Symptoms include: RNA-seq tools (Cufflinks, Cuffcompare, Cuffmerge, Cuffdiff) fails with error Error: sequence lines in a FASTA record must have the same length!.
Solution: File tested and corrected locally then re-upload or test/fix within Galaxy, then re-run.
How:
Quick re-formatting Run the tool through the tool NormalizeFasta using the options to wrap sequence lines at 80 bases and to trim the title line at the first whitespace.
Optional Detailed re-formatting Start with FASTA manipulation → FASTA Width formatter with a value between 40-80 (60 is common) to reformat wrapping. Next, use Filter and Sort → Select with “>” to examine identifiers. Use a combination of Convert Formats → FASTA-to-Tabular, Text Manipulation tools, then Tabular-to-FASTA to correct.
With either of the above, finish by using Filter and Sort → Select with ^\w*$ to search for empty lines (use “NOT matching” to remove these lines and output a properly format fasta dataset).
Inconsistent line wrapping, common if merging chromosomes from various Genbank records (e.g. primary chroms with mito)
Symptoms include: Tools (SAMTools, Extract Genomic DNA, but rarely alignment tools) may complain about unexpected line lengths/missing identifiers. Or they may just fail for what appears to be a cluster error.
Solution: File tested and corrected locally then re-upload or test/fix within Galaxy.
How: Use NormalizeFasta using the options to wrap sequence lines at 80 bases and to trim the title line at the first whitespace. Finish by using Filter and Sort → Select with ^\w*$ to search for empty lines (use “NOT matching” to remove these lines and output a properly format fasta dataset).
Unsorted fasta genome file
Symptoms include: Tools such as Extract Genomic DNA report problems with sequence lengths.
Solution: First try sorting and re-formatting in Galaxy then re-run.
How: To sort, follow instructions for Sorting a Custom Genome.
Identifier and Description in “>” title lines used inconsistently by tools in the same analysis
Symptoms include: Will generally manifest as a false genome-mismatch problem.
Solution: Remove the description content and re-run all tools/workflows that used this input. Mapping tools will usually not fail, but downstream tools will. When this comes up, it usually means that an analysis needs to be started over from the mapping step to correct the problems. No one enjoys redoing this work. Avoid the problems by formatting the genome, by double checking that the same reference genome was used for all steps, and by making certain the ‘identifiers’ are a match between all planned inputs (including reference annotation such as GTF data) before using your custom genome.
How: To drop the title line description content, use NormalizeFasta using the options to wrap sequence lines at 80 bases and to trim the title line at the first whitespace. Next, double check that the chromosome identifiers are an exact match between all inputs.
Unassigned database
Symptoms include: Tools report that no build is available for the assigned reference genome.
Solution: This occurs with tools that require an assigned database metadata attribute. SAMTools and Picard often require this assignment.
How: Create a Custom Build and assign it to the dataset.
Enhancing tabular dataset previews in reports/pages
There are lots of fun advanced features!
There are a number of options, specifically for tabular data, that can allow it to render more nicely in your workflow reports and pages and anywhere that GalaxyMarkdown is used.
title to give your table a title
footer allows you to caption your table
show_column_headers=false to hide the column headers
compact=true to make the table show up more inline, hiding that it was embedded from a Galaxy dataset.
The existing history_dataset_display directive displays the dataset name and some useful context at the expense of potentially breaking the flow of the document
The existing history_dataset_embedded directive was implemented to try to inline results more and make the results more readable within a more… curated document. It is dispatches on tabular types and puts the results in a table but the table doesn’t have a lot of options.
The history_dataset_as_table directive mirrors the history_dataset_as_image directive: it tries harder to coerce the data into a table and provides new table—specific options. The first of these is “show_column_headers which defaults to true`.
Figures in general should have titles and legends — so there is the “title” and “footer” options also.
Code In: Galaxy Markdown
```galaxy
history_dataset_as_table(history_dataset_id=1e8ab44153008be8,show_column_headers=false,title='Binding Site Results',footer='Here is a very good figure caption for this table.')
```
Code Out: Example Screenshot
Making an element collapsible in a report
If you have extraneous information you might want to let a user collapse it.
This applies to any GalaxyMarkdown elements, i.e. the things you’ve clicked in the left panel to embed in your Workflow Report or Page
By adding a collapse="" attribute to a markdown element, you can make it collapsible. Whatever you put in the quotes will be the title of the collapsible box.
Flatten a list of list of paired datasets into a list of paired datasets
Sometimes you find yourself with a list:list:paired, i.e. a collection of collection of paired end data, and you really want a list:paired, a flatter collection of paired end data. This is easy to resolve with Apply rules:
Open Apply rules
Select your collection
Click Edit
You’ll now be in the Apply rules editing interface. There are three columns (if it’s a list:list:paired)
The outermost list identifier(s)
The next list identifier(s)
The paired-end indicator
Flattening this top level list, so it’s just a list:paired requires a few changes:
From Column menu select Concatenate Columns
“From Column”: A
“From Column”: B This creates a column with the top list identifier, and the inner list identifier, which will be our new list identifier for the flattened list.
From Rules menu select Add / Modify Column Definitions
Click Add Definition button and select Paired-end Indicator
“Paired-end Indicator”: C
Click Add Definition button and select List Identifier(s)
“List Identifier(s)”: D
Click Apply
Click Save
Click Run Tool
The tool will execute and reshape your list, congratulations!
Illumina MiSeq sequencing is based on sequencing by synthesis. As the name suggests, fluorescent labels are measured for every base that bind at a specific moment at a specific place on a flow cell. These flow cells are covered with oligos (small single strand DNA strands). In the library preparation the DNA strands are cut into small DNA fragments (differs per kit/device) and specific pieces of DNA (adapters) are added, which are complementary to the oligos. Using bridge amplification large amounts of clusters of these DNA fragments are made. The reverse string is washed away, making the clusters single stranded. Fluorescent bases are added one by one, which emit a specific light for different bases when added. This is happening for whole clusters, so this light can be detected and this data is basecalled (translation from light to a nucleotide) to a nucleotide sequence (Read). For every base a quality score is determined and also saved per read. This process is repeated for the reverse strand on the same place on the flow cell, so the forward and reverse reads are from the same DNA strand. The forward and reversed reads are linked together and should always be processed together!
Nanopore sequencing has several properties that make it well-suited for our purposes
Long-read sequencing technology offers simplified and less ambiguous genome assembly
Long-read sequencing gives the ability to span repetitive genomic regions
Long-read sequencing makes it possible to identify large structural variations
When using Oxford Nanopore Technologies (ONT) sequencing, the change in electrical current is measured over the membrane of a flow cell. When nucleotides pass the pores in the flow cell the current change is translated (basecalled) to nucleotides by a basecaller. A schematic overview is given in the picture above.
When sequencing using a MinIT or MinION Mk1C, the basecalling software is present on the devices. With basecalling the electrical signals are translated to bases (A,T,G,C) with a quality score per base. The sequenced DNA strand will be basecalled and this will form one read. Multiple reads will be stored in a fastq file.
If your data is not sensitive (i.e. human patient) but just private (sequencing from other animals/bacteria/etc), then it is absolutely ok to use a public galaxy server like usegalaxy.eu or usegalaxy.org!
Data uploaded is private to your account, it isn’t available to others publicly. No one will scoop your results, if you use a public galaxy server to analyse your data :)
A great benefit of this is then when your paper is being reviewed you can share that history or workflow with reviewers, and when it’s published you can click a button to share those results with the world as well, such that others can reproduce your analysis!
(of course system administrators can see the files on disk but they are not interested and will not be looking at your data. If you file a bug report they may see your data but they are system administrators, not bioinformatics experts that might be interested in your results.)
Contacting Galaxy Administrators
If you suspect there is something wrong with the server, or would like to request a tool to be installed, you should contact the server administrators for the Galaxy you are on.
Other Galaxy servers? Check the homepage for more information.
How can I use the Matrix messaging system for Galaxy Project communication?
When you are directed to use Matrix for a Galaxy working group or for your support question, but you don't know what Matrix or how to access it. Learn what Matrix is, why it is used, and how to use Matrix to connect to us.
Introduction
The Galaxy community uses Matrix – a secure, decentralized, open-source messaging protocol – as its primary chat system. Matrix enables real-time communication across Galaxy contributors, developers, trainers, and users. Common uses include:
Getting help from the community
Discussing tool and workflow development
Organizing training events and materials
Collaborating on Galaxy infrastructure or scientific questions
Matrix provides an open alternative to proprietary platforms like Slack and Microsoft Teams, with broader flexibility and user privacy in mind.
🔰 For Newbies: Getting Started with Matrix
If you are new to messaging systems, here’s how to get started with Galaxy on Matrix:
Step 1: Choose and install a Matrix app
Install a Matrix client app: Download and install a Matrix client:
If you’re using the Element client, click Explore (the compass icon) and search for “Galaxy” – look for a room named Galaxy or Galaxy Lobby (often with an address like #galaxyproject:matrix.org).
Alternatively, you can use a direct Matrix link if provided, which will prompt your app to join the room.
In addition to the Lobby room, join other Matrix rooms via direct links once logged in:
Say hello and ask questions: Once in the Galaxy Lobby, feel free to introduce yourself or ask your question. This Lobby room is a friendly starting point – community members will welcome you, answer basic questions, and guide you to more specific Galaxy channels/rooms if needed. You will be redirected to the right room if needed.
💡 For Experienced Users (Slack/Teams/Discord Users)
If you’ve used tools like Slack, Microsoft Teams, or Discord, Matrix will feel familiar — with a few important differences:
✅ Key Similarities
Rooms ≈ Channels: Rooms are topic-based, like Slack channels.
DMs supported: You can message users privately.
Multiple devices: Stay logged in on phone, tablet, laptop.
❗ Key Differences
Federated, decentralized network: There is no single “Galaxy workspace” to be invited to. Join any Matrix room directly via a public server.
Flexible clients: You can use different Matrix client apps across platforms. They all show the same chats.
Room discovery: Galaxy may provide a Matrix Space to group related rooms to organize communities (e.g. training, user help, development, working groups/wg, infrastructure).
Bridged rooms: Some rooms are connected to Gitter or other services, but behave normally in Matrix. For example:
#galaxyproject_Lobby:gitter.im
This is a Matrix room that also syncs with users on Gitter. You can treat them as normal Matrix rooms; messages are synced across the platforms.
🔐 Security and Privacy
Matrix supports end-to-end encryption (E2EE) in private conversations and invite-only rooms.
However, public Galaxy rooms are not encrypted. This is intentional so people can easily join and search history. Therefore:
🔍 Assume public visibility: Don’t share passwords, private research data, or anything sensitive.
🙈 Use nicknames if preferred: Your Matrix ID is visible in public rooms, but you don’t have to use your real name.
🔐 Private DMs are encrypted by default.
⚠️ Be cautious: Even with encryption, nothing is foolproof. Use common sense.
Matrix is designed for open collaboration. When in doubt, treat public rooms like an open forum.
I get a different number of transcripts with a significant change in gene expression between the G1E and megakaryocyte cellular states. Why?
This is okay! Many aspects of the tutorial can potentially affect the exact results you obtain. For example, the reference genome version used and versions of tools. It’s less important to get the exact results shown in the tutorial, and more important to understand the concepts so you can apply them to your own data.
Where do I get more support?
If you need support for using Galaxy, running your analysis or completing a tutorial, please try one of the following options:
Galaxy Help Forum: You can also have a look at the Galaxy Help Forum. Your question may already have been answered here before. If not, you can post your question here.
Klicken Sie auf param-collectionDatensatzsammlung vor dem Eingabeparameter, dem Sie die Sammlung übergeben wollen.
Wählen Sie die zu verwendende Sammlung aus der Liste aus
Cambiar la versión de la herramienta
Las herramientas se actualizan con frecuencia a nuevas versiones. Su Galaxy puede tener varias versiones disponibles de la misma herramienta. Por defecto, se le mostrará la última versión de la herramienta.
Pasar a otra versión de una herramienta:
Abrir la herramienta
Haga clic en el logo tool-versions versiones arriba a la derecha**
Seleccione la versión deseada en la lista desplegable
Cambiare la versione dello strumento
Gli strumenti vengono aggiornati frequentemente con nuove versioni. Nella vostra Galassia potrebbero essere disponibili più versioni dello stesso strumento. Per impostazione predefinita, viene visualizzata la versione più recente dello strumento.
Passaggio a una versione diversa di uno strumento:
aprire lo strumento
Fare clic sul logo tool-versions versioni in alto a destra
Selezionare la versione desiderata dall’elenco a discesa
Changing the tool version
Tools are frequently updated to new versions. Your Galaxy may have multiple versions of the same tool available. By default, you will be shown the latest version of the tool.
Switching to a different version of a tool:
Open the tool
Click on the tool-versions versions logo at the top right
Select the desired version from the dropdown list
If a Tool is Missing
To use the tools installed and available on the Galaxy server:
At the top of the left tool panel, type in a tool name or datatype into the tool search box.
Shorter keywords find more choices.
Tools can also be directly browsed by category in the tool panel.
If you can’t find a tool you need for a tutorial on Galaxy, please:
Check that you are using a compatible Galaxy server
Navigate to the overview box at the top of the tutorial
Find the “Supporting Materials” section
Check “Available on these Galaxies”
If your server is not listed here, the tutorial is not supported on your Galaxy server
You can create an account on one of the supporting Galaxies
Use the Tutorial mode feature
Open your Galaxy server
Click on the curriculum icon on the top menu, this will open the GTN inside Galaxy.
Navigate to your tutorial
Tool names in tutorials will be blue buttons that open the correct tool for you
Wählen Sie mehrere Dateien aus, indem Sie die Strg (oder COMMAND) Taste gedrückt halten und die gewünschten Dateien anklicken
Multipile similar tools available
Sometimes there are multiple tools with very similar names. If the parameters in the tutorial don’t match with what you see in Galaxy, please try the following:
Use Tutorial Modecurriculum in Galaxy, and click on the blue tool button in the tutorial to automatically open the correct tool and version (not available for all tutorials yet)
Tools are frequently updated to new versions. Your Galaxy may have multiple versions of the same tool available. By default, you will be shown the latest version of the tool. This may NOT be the same tool used in the tutorial you are accessing. Furthermore, if you use a newer tool in one step, and try using an older tool in the next step… this may fail! To ensure you use the same tool versions of a given tutorial, use the Tutorial mode feature.
Open your Galaxy server
Click on the curriculum icon on the top menu, this will open the GTN inside Galaxy.
Navigate to your tutorial
Tool names in tutorials will be blue buttons that open the correct tool for you
Note: this does not work for all tutorials (yet)
You can click anywhere in the grey-ed out area outside of the tutorial box to return back to the Galaxy analytical interface
Warning: Not all browsers work!
We’ve had some issues with Tutorial mode on Safari for Mac users.
Try a different browser if you aren’t seeing the button.
Check that the entire tool name matches what you see in the tutorial.
Multipile ähnliche Werkzeuge verfügbar
Manchmal gibt es mehrere Werkzeuge mit sehr ähnlichen Namen. Wenn die Parameter im Tutorial nicht mit dem übereinstimmen, was Sie in Galaxy sehen, versuchen Sie bitte das Folgende:
Verwenden Sie den Tutorial Modecurriculum in Galaxy, und klicken Sie auf den blauen Tool-Button im Tutorial, um automatisch das richtige Tool und die richtige Version zu öffnen (noch nicht für alle Tutorials verfügbar)
Die Tools werden häufig auf neue Versionen aktualisiert. Auf Ihrem Galaxy sind möglicherweise mehrere Versionen desselben Tools verfügbar. Standardmäßig wird Ihnen die neueste Version des Tools angezeigt. Dies ist möglicherweise NICHT dasselbe Tool, das in dem von Ihnen aufgerufenen Lernprogramm verwendet wird. Wenn Sie in einem Schritt ein neueres Tool verwenden und im nächsten Schritt ein älteres Tool benutzen, kann dies fehlschlagen! Um sicher zu gehen, dass Sie die gleiche Werkzeugversion eines bestimmten Tutorials verwenden, benutzen Sie die Funktion Tutorial mode.
Öffnen Sie Ihren Galaxy-Server
Klicken Sie auf das Symbol curriculum im oberen Menü, um das GTN in Galaxy zu öffnen.
Navigieren Sie zu Ihrem Lernprogramm
Werkzeugnamen in Tutorials sind blaue Schaltflächen, die das richtige Werkzeug für Sie öffnen
Hinweis: dies funktioniert (noch) nicht bei allen Tutorials
Sie können auf eine beliebige Stelle in dem ausgegrauten Bereich außerhalb des Lernprogramms klicken, um zur analytischen Galaxy-Oberfläche zurückzukehren
Warning: Nicht alle Browser funktionieren!
Es gab einige Probleme mit dem Lernprogramm-Modus in Safari für Mac-Benutzer.
Versuchen Sie einen anderen Browser, wenn Sie die Schaltfläche nicht sehen.
Überprüfen Sie, ob der gesamte Werkzeugname mit dem im Tutorial übereinstimmt.
Múltiples herramientas similares disponibles
A veces hay varias herramientas con nombres muy parecidos. Si los parámetros del tutorial no coinciden con lo que ves en Galaxy, prueba lo siguiente:
Utiliza el Modo Tutorialcurriculum en Galaxy, y haz click en el botón azul de la herramienta en el tutorial para abrir automáticamente la herramienta y versión correctas (aún no disponible para todos los tutoriales)
Las herramientas se actualizan constantemente a nuevas versiones. Tu Galaxy puede tener múltiples versiones de la misma herramienta. Por defectos, se te mostrará la última versión de cada una de ellas. Esta puede NO SER la misma herramienta utilizada en el tutorial que estás accedediendo. Además, si utilizaas una herramienta más nueva en el mismo paso… ¡puede fallar! Para asegurarte de que utilizas la misma versión de una herramienta en un tutorial concreto, utiliza el modo Tutorial mode.
Abre tu Galaxy server
Haz click en el icono curriculum en el menú de arriba, esto abrirá el GTN dentro de Galaxy.
Navega hacia tu tutorial
Los nombres de las herramientas serán botones azules que abrirán la herramienta correcta para ti
Nota: Esto no funciona para todos los tutoriales (aún)
Puedes clickar en cualquier parte gris fuera de la ventana del tutorial para volver a la interfície analítica de Galaxy
Warning: ¡No funciona en todos los navegadores!
Hemos tenido algunos problemas con Tutorial mode en Safari para usuarios de Mac.
Prueba un navegador diferente si no ves el botón.
Comprueba que el nombre completo de la herramienta coincide con lo que ves en el tutorial.
Organizing the tool panel
Galaxy servers can have a lot of tools available, which can make it challenging to find the tool you are looking for. To help find your favourite tools, you can:
Keep a list of your favourite tools to find them back easily later.
Adding tools to your favourites
Open a tool
Click on the star icongalaxy-star next to the tool name to add it to your favourites
Viewing your favourite tools
Click on the star icongalaxy-star at the top of the Galaxy tool panel (above the tool search bar)
This will filter the toolbox to show all your starred tools
Change the tool panel view
Click on the galaxy-panelview icon at the top of the Galaxy tool panel (above the tool search bar)
Here you can view the tools by EDAM ontology terms
EDAM Topics (e.g. biology, ecology)
EDAM Operations (e.g. quality control, variant analysis)
You can always get back to the default view by choosing “Full Tool Panel”
Para volver a ejecutar una herramienta
Expande uno de los conjuntos de datos de la salida de la herramienta haciendo clic sobre él
Selecciona volver a ejecutar galaxy-refresh de la herramienta
Esto es de utilidad si quieres volver a correr la herramienta variando ligeramente los valores de los parámetros, o si deseas verificar la configuración de parámetros que utilizaste.
Re-running a tool
Expand one of the output datasets of the tool (by clicking on it)
Click re-run galaxy-refresh the tool
This is useful if you want to run the tool again but with slightly different paramters, or if you just want to check which parameter setting you used.
Regular Expressions 101
Regular expressions are a standardized way of describing patterns in textual data. They can be extremely useful for tasks such as finding and replacing data. They can be a bit tricky to master, but learning even just a few of the basics can help you get the most out of Galaxy.
Finding
Below are just a few examples of basic expressions:
Regular expression
Matches
abc
an occurrence of abc within your data
(abc|def)
abcordef
[abc]
a single character which is either a, b, or c
[^abc]
a character that is NOT a, b, nor c
[a-z]
any lowercase letter
[a-zA-Z]
any letter (upper or lower case)
[0-9]
numbers 0-9
\d
any digit (same as [0-9])
\D
any non-digit character
\w
any alphanumeric character
\W
any non-alphanumeric character
\s
any whitespace
\S
any non-whitespace character
.
any character
\.
literal . (period)
{x,y}
between x and y repetitions
^
the beginning of the line
$
the end of the line
Note: you see that characters such as *, ?, ., + etc have a special meaning in a regular expression. If you want to match on those characters, you can escape them with a backslash. So \? matches the question mark character exactly.
Examples
Regular expression
matches
\d{4}
4 digits (e.g. a year)
chr\d{1,2}
chr followed by 1 or 2 digits
.*abc$
anything with abc at the end of the line
^$
empty line
^>.*
Line starting with > (e.g. Fasta header)
^[^>].*
Line not starting with > (e.g. Fasta sequence)
Replacing
Sometimes you need to capture the exact value you matched on, in order to use it in your replacement, we do this using capture groups (...), which we can refer to using \1, \2 etc for the first and second captured values. If you want to refer to the whole match, use &.
Regular expression
Input
Captures
chr(\d{1,2})
chr14
\1 = 14
(\d{2}) July (\d{4})
24 July 1984
\1 = 24, \2 = 1984
An expression like s/find/replacement/g indicates a replacement expression, this will search (s) for any occurrence of find, and replace it with replacement. It will do this globally (g) which means it doesn’t stop after the first match.
Example: s/chr(\d{1,2})/CHR\1/g will replace chr14 with CHR14 etc.
You can also use replacement modifier such as convert to lower case \L or upper case \U. Example: s/.*/\U&/g will convert the whole text to upper case.
Note: In Galaxy, you are often asked to provide the find and replacement expressions separately, so you don’t have to use the s/../../g structure.
There is a lot more you can do with regular expressions, and there are a few different flavours in different tools/programming languages, but these are the most important basics that will already allow you to do many of the tasks you might need in your analysis.
Tip:RegexOne is a nice interactive tutorial to learn the basics of regular expressions.
Tip:Regex101.com is a great resource for interactively testing and constructing your regular expressions, it even provides an explanation of a regular expression if you provide one.
Tip:Cyrilex is a visual regular expression tester.
Request Galaxy tools on a specific server
To request tools that already exist in the Galaxy toolshed, but not in your server, please raise an issue at:
Selecciona varios archivos manteniendo pulsada la tecla Ctrl (o COMMAND) y haciendo clic en los archivos que te interesen
Selección de una colección de conjuntos de datos como entrada
Haga clic en param-collectionDataset collection delante del parámetro de entrada al que desea suministrar la colección.
Seleccione la colección que desea utilizar de la lista
Select multiple datasets
Click on param-filesMultiple datasets
Select several files by keeping the Ctrl (or COMMAND) key pressed and clicking on the files of interest
Selecting a dataset collection as input
Click on param-collectionDataset collection in front of the input parameter you want to supply the collection to.
Select the collection you want to use from the list
Selezionare più insiemi di dati
Fare clic su param-filesInsiemi di dati multipli
Selezionare diversi file tenendo premuto il tasto Ctrl (o COMMAND) e facendo clic sui file di interesse
Selezione di una raccolta di dati come input
Fare clic su param-collectionCollezione di set di dati davanti al parametro di input a cui si vuole fornire la collezione.
Selezionare la collezione che si desidera utilizzare dall’elenco
Sorting Tools
Sometimes input errors are caused because of non-sorted inputs. Try using these:
Picard SortSam: Sort SAM/BAM by coordinate or queryname.
Samtools Sort: Alternate for SAM/BAM, best when used for coordinate sorting only.
SortBED order the intervals: Best choice for BED/Interval.
Sort data in ascending or descending order: Alternate choice for Tabular/BED/Interval/GTF.
VCFsort: Best choice for VFC.
Tool Form Options for Sorting: Some tools have an option to sort inputs during job execution. Whenever possible, sort inputs before using tools, especially if jobs fail for not having enough memory resources.
Strumenti simili alla compilazione multipla disponibili
A volte ci sono più strumenti con nomi molto simili. Se i parametri indicati nel tutorial non corrispondono a quelli visualizzati in Galaxy, provare con i seguenti:
Usare la modalità Tutorialcurriculum in Galaxy e fare clic sul pulsante blu dello strumento nel tutorial per aprire automaticamente lo strumento e la versione corretti (non ancora disponibile per tutti i tutorial)
Gli strumenti vengono aggiornati frequentemente a nuove versioni. Nella vostra Galassia potrebbero essere disponibili più versioni dello stesso strumento. Per impostazione predefinita, viene visualizzata la versione più recente dello strumento. Questa potrebbe NON essere la stessa utilizzata nell’esercitazione a cui si sta accedendo. Inoltre, se si utilizza uno strumento più recente in un passaggio e si prova a utilizzare uno strumento più vecchio nel passaggio successivo… questo potrebbe fallire! Per assicurarsi di utilizzare le stesse versioni di strumenti di una determinata esercitazione, utilizzare la funzione Modalità esercitazione.
Aprire il server Galaxy
Fare clic sull’icona curriculum nel menu in alto, per aprire il GTN all’interno di Galaxy.
Naviga verso il tuo tutorial
I nomi degli strumenti nelle esercitazioni saranno pulsanti blu che apriranno lo strumento corretto per l’utente
Nota: questo non funziona per tutte le esercitazioni (ancora)
È possibile fare clic in qualsiasi punto dell’area grigia al di fuori del riquadro dell’esercitazione per tornare all’interfaccia analitica di Galaxy
Warning: Non tutti i browser funzionano!
Abbiamo riscontrato alcuni problemi con la modalità Tutorial su Safari per gli utenti Mac.
Prova con un diverso browser se non vedi il pulsante.
Verificare che il nome completo dello strumento corrisponda a quello che si vede nel tutorial.
Tool doesn't recognize input datasets
The expected input datatype assignment is explained on the tool form. Review the input select areas and the help section below the Run Tool button.
Individual datasets and dataset collections are selected differently on tool forms.
To select a collection input on a tool form see this FAQ.
Tutorial-Modus verwenden
Der Tutorial-Modus spart Bildschirmplatz, findet die benötigten Werkzeuge und stellt sicher, dass die richtigen Versionen verwendet werden, damit die Tutorials funktionieren.
Die Tools werden häufig auf neue Versionen aktualisiert. Auf Ihrem Galaxy sind möglicherweise mehrere Versionen desselben Tools verfügbar. Standardmäßig wird Ihnen die neueste Version des Tools angezeigt. Dies ist möglicherweise NICHT dasselbe Tool, das in dem von Ihnen aufgerufenen Lernprogramm verwendet wird. Wenn Sie in einem Schritt ein neueres Tool verwenden und im nächsten Schritt ein älteres Tool benutzen, kann dies fehlschlagen! Um sicher zu gehen, dass Sie die gleiche Werkzeugversion eines bestimmten Tutorials verwenden, benutzen Sie die Funktion Tutorial mode.
Öffnen Sie Ihren Galaxy-Server
Klicken Sie auf das Symbol curriculum im oberen Menü, um das GTN in Galaxy zu öffnen.
Navigieren Sie zu Ihrem Lernprogramm
Werkzeugnamen in Tutorials sind blaue Schaltflächen, die das richtige Werkzeug für Sie öffnen
Hinweis: dies funktioniert (noch) nicht bei allen Tutorials
Sie können auf eine beliebige Stelle in dem ausgegrauten Bereich außerhalb des Lernprogramms klicken, um zur analytischen Galaxy-Oberfläche zurückzukehren
Warning: Nicht alle Browser funktionieren!
Es gab einige Probleme mit dem Lernprogramm-Modus in Safari für Mac-Benutzer.
Versuchen Sie einen anderen Browser, wenn Sie die Schaltfläche nicht sehen.
Using tutorial mode
Tutorial mode saves you screen space, finds the tools you need, and ensures you use the correct versions for the tutorials to run.
Tools are frequently updated to new versions. Your Galaxy may have multiple versions of the same tool available. By default, you will be shown the latest version of the tool. This may NOT be the same tool used in the tutorial you are accessing. Furthermore, if you use a newer tool in one step, and try using an older tool in the next step… this may fail! To ensure you use the same tool versions of a given tutorial, use the Tutorial mode feature.
Open your Galaxy server
Click on the curriculum icon on the top menu, this will open the GTN inside Galaxy.
Navigate to your tutorial
Tool names in tutorials will be blue buttons that open the correct tool for you
Note: this does not work for all tutorials (yet)
You can click anywhere in the grey-ed out area outside of the tutorial box to return back to the Galaxy analytical interface
Warning: Not all browsers work!
We’ve had some issues with Tutorial mode on Safari for Mac users.
Try a different browser if you aren’t seeing the button.
Using tutorial mode and the Case Study suite
Tutorial mode saves you screen space, finds the tools you need, and ensures you use the correct versions for the tutorials to run.
Tools are frequently updated to new versions. Your Galaxy may have multiple versions of the same tool available. By default, you will be shown the latest version of the tool. This may NOT be the same tool used in the tutorial you are accessing. Furthermore, if you use a newer tool in one step, and try using an older tool in the next step… this may fail! To ensure you use the same tool versions of a given tutorial, use the Tutorial mode feature.
Open your Galaxy server
Click on the curriculum icon on the top menu, this will open the GTN inside Galaxy.
Navigate to your tutorial via Single-cell (Underneath the Methodologies section), then Case Study, then Select your tutorial
Tool names in tutorials will be blue buttons that open the correct tool for you
Note: this does not work for all tutorials (yet)
You can click anywhere in the grey-ed out area outside of the tutorial box to return back to the Galaxy analytical interface
Warning: Not all browsers work!
We’ve had some issues with Tutorial mode on Safari for Mac users.
Try a different browser if you aren’t seeing the button.
Utilizar modo tutorial
El modo tutorial te permite usar menos espacio en pantalla, encontrar las herramientas que necesitas y asegurarte de usar las versiones correctas para que los tutoriales funcionen.
Las herramientas se actualizan constantemente a nuevas versiones. Tu Galaxy puede tener múltiples versiones de la misma herramienta. Por defectos, se te mostrará la última versión de cada una de ellas. Esta puede NO SER la misma herramienta utilizada en el tutorial que estás accedediendo. Además, si utilizaas una herramienta más nueva en el mismo paso… ¡puede fallar! Para asegurarte de que utilizas la misma versión de una herramienta en un tutorial concreto, utiliza el modo Tutorial mode.
Abre tu Galaxy server
Haz click en el icono curriculum en el menú de arriba, esto abrirá el GTN dentro de Galaxy.
Navega hacia tu tutorial
Los nombres de las herramientas serán botones azules que abrirán la herramienta correcta para ti
Nota: Esto no funciona para todos los tutoriales (aún)
Puedes clickar en cualquier parte gris fuera de la ventana del tutorial para volver a la interfície analítica de Galaxy
Warning: ¡No funciona en todos los navegadores!
Hemos tenido algunos problemas con Tutorial mode en Safari para usuarios de Mac.
Prueba un navegador diferente si no ves el botón.
Utilizzo della modalità tutorial
La modalità tutorial salva spazio sullo schermo, trova gli strumenti necessari e garantisce l’uso delle versioni corrette per far funzionare i tutorial.
Gli strumenti vengono aggiornati frequentemente a nuove versioni. Nella vostra Galassia potrebbero essere disponibili più versioni dello stesso strumento. Per impostazione predefinita, viene visualizzata la versione più recente dello strumento. Questa potrebbe NON essere la stessa utilizzata nell’esercitazione a cui si sta accedendo. Inoltre, se si utilizza uno strumento più recente in un passaggio e si prova a utilizzare uno strumento più vecchio nel passaggio successivo… questo potrebbe fallire! Per assicurarsi di utilizzare le stesse versioni di strumenti di una determinata esercitazione, utilizzare la funzione Modalità esercitazione.
Aprire il server Galaxy
Fare clic sull’icona curriculum nel menu in alto, per aprire il GTN all’interno di Galaxy.
Naviga verso il tuo tutorial
I nomi degli strumenti nelle esercitazioni saranno pulsanti blu che apriranno lo strumento corretto per l’utente
Nota: questo non funziona per tutte le esercitazioni (ancora)
È possibile fare clic in qualsiasi punto dell’area grigia al di fuori del riquadro dell’esercitazione per tornare all’interfaccia analitica di Galaxy
Warning: Non tutti i browser funzionano!
Abbiamo riscontrato alcuni problemi con la modalità Tutorial su Safari per gli utenti Mac.
Prova con un diverso browser se non vedi il pulsante.
Viewing tool logs (`stdout` and `stderr`)
Most tools create log files as output, which can contain useful information about how the tool ran (stdout, or standard output), and what went wrong (stderr, or standard error).
To view these log files in Galaxy:
Expand one of the outputs of the tool in your history
Click on View detailsdetails
Scroll to the Job Information section
Here you will find links to the log files (stdout and stderr).
Where is the tool help?
Finding tool support
There is documentation available on the tool form itself which mentions the following information:
Parameters
Expected format for input dataset(s)
Links to publications and ToolShed source repositories
Tool and wrapper version(s)
3rd party author web sites and documentation
Scroll down on the tool form to locate:
Information about expected inputs/outputs
Expanded definitions
Sample data
Example use cases
Graphics
Ändern der Werkzeugversion
Werkzeuge werden häufig auf neue Versionen aktualisiert. Auf Ihrem Galaxy können mehrere Versionen desselben Tools verfügbar sein. Standardmäßig wird Ihnen die neueste Version des Tools angezeigt.
Wechseln zu einer anderen Version eines Werkzeugs:
Öffnen Sie das Werkzeug
Klicken Sie auf das tool-versions versions logo oben rechts
Wählen Sie die gewünschte Version aus der Auswahlliste
How to find and correct tool errors related to Metadata?
Finding and Correcting Metadata
Tools can error when the wrong dataset attributes (metadata) are assigned. Some of these wrong assignments may be:
Tool outputs, which are automatically assigned without user action.
Incorrect autodetection of datatypes, which need manual modification.
Undetected attributes, which require user action (example: assigning database to newly uploaded data).
How to notice missing Dataset Metadata:
Dataset will not be downloaded when using the disk icon galaxy-save.
Tools error when using a previously successfully used specific dataset.
Tools error with a message that ends with: OSError: [Errno 2] No such file or directory.
Solution:
Click on the dataset’s pencil icon galaxy-pencil to reach the Edit Attributes forms and do one of the following as applies:
Directly reset metadata
Find the tab for the metadata you want to change, make the change, and save.
Autodetect metadata
Click on the Auto-detect button. The dataset will turn yellow in the history while the job is processing.
Incomplete Dataset Download
In case the dataset downloads incompletely:
Use the Google Chrome web browser. Sometimes Chrome works better at supporting continuous data transfers.
Use the command-line option instead. The data may really be too large to download OR your connection is slower. This can also be a faster way to download multiple datasets plus ensure a complete transfer (small or large data).
Understanding 'canceled by admin' or cluster failure error messages
The initial error message could be:
This job failed because it was cancelled by an administrator.
Please click the bug icon to report this problem if you need help.
Or
job info:
Remote job server indicated a problem running or monitoring this job.
Causes:
Server or cluster error.
Less frequently, input problems are a factor.
Solutions:
Try at least one rerun. Server/cluster errors like this are usually transient.
job info:
This job was terminated because it used more memory than it was allocated.
Please click the bug icon to report this problem if you need help.
Tool-specific formatting requirements for inputs were not met.
Parameters set on a tool form are a mismatch for the input data content or format.
Inputs were in an error state (red) or were putatively successful (green) but are empty.
Inputs do not meet the datatype specification.
Inputs do not contain the exact content that a tool is expecting or that was input in the form.
Annotation files are a mismatch for the selected or assigned reference genome build.
Special case: Some of the data were generated outside of Galaxy, but later a built-in indexed genome build was assigned in Galaxy for use with downstream tools. This scenario can work, but only if those two reference genomes are an exact match.
For most analysis, allowing Galaxy to detect the datatype during Upload is best and adjusting a datatype later should rarely be needed. If a datatype is modified, the change has a specific purpose/reason.
Does your data have headers? Is that in specification for the datatype? Does the tool form have an option to specify if the input has headers or not? Do you need to remove headers first for the correct datatype to be detected? Example GTF.
Large inputs? Consider modifying your inputs to be smaller. Examples: FASTQ and FASTA.
Run quality checks on your data.
Search GTN tutorials with the keyword “qa-qc” for examples.
Search Galaxy Help with the keywords “qa-qc” and your datatype(s) for more help.
Search Galaxy Help with the keywords “gtf” and “gff3” for more help.
Input mismatch tips.
Do the chromosome/sequence identifiers exactly match between all inputs? Search Galaxy Help for more help about how to correct build/version identifier mismatches between inputs.
“Chr1” and “chr1” and “1” do not mean the same thing to a tool.
Custom genome transcriptome exome tips. See FASTA.
Understanding walltime error messages
The full error message will be reported as below, and can be found by clicking on the bug icon for a failed job run (red dataset):
job info:
This job was terminated because it ran longer than the maximum allowed job run time.
Please click the bug icon to report this problem if you need help.
Or sometimes,
job stderr:
slurmstepd: error: *** JOB XXXX ON XXXX CANCELLED AT 2019-XX-XXTXX:XX:XX DUE TO TIME LIMIT ***

job info:
Remote job server indicated a problem running or monitoring this job.
Causes:
The job execution time exceeded the “wall-time” on the cluster node that ran the job.
The server may be undergoing maintenance.
Very often input problems also cause this same error.
Solutions:
Try at least one rerun.
Check the server homepage for banners or notices. Selected servers also post to the Galaxy status page.
Your data may actually be too large to process at a public Galaxy server. Alternatives include setting up a private Galaxy server.
What information should I include when reporting a problem?
Writing bug reports is a good skill to have as bioinformaticians, and a key point is that you should include enough information from the first message to help the process of resolving your issue more efficient and a better experience for everyone.
What to include
Which commands did you run, precisely, we want details. Which flags did you set?
Which server(s) did you run those commands on?
What account/username did you use?
Where did it go wrong?
What were the stdout/stderr of the tool that failed? Include the text.
Did you try any workarounds? What results did those produce?
(If relevant) screenshot(s) that show exactly the problem, if it cannot be described in text. Is there a details panel you could include too?
If there are job IDs, please include them as text so administrators don’t have to manually transcribe the job ID in your picture.
It makes the process of answering ‘bug reports’ much smoother for us, as we will have to ask you these questions anyway. If you provide this information from the start, we can get straight to answering your question!
What does a GOOD bug report look like?
The people who provide support for Galaxy are largely volunteers in this community, so try and provide as much information up front to avoid wasting their time:
I encountered an issue: I was working on (this server> and trying to run (tool)+(version number) but all of the output files were empty. My username is jane-doe.
Here is everything that I know:
The dataset is green, the job did not fail
This is the standard output/error of the tool that I found in the information page (insert it here)
I have read it but I do not understand what X/Y means.
The job ID from the output information page is 123123abdef.
I tried re-running the job and changing parameter Z but it did not change the result.
Could you help me?
What information should I include when reporting a problem?
Writing bug reports is a good skill to have as bioinformaticians, and a key point is that you should include enough information from the first message to help the process of resolving your issue more efficient and a better experience for everyone.
What to include
Which commands did you run, precisely, we want details. Which flags did you set?
Which server(s) did you run those commands on?
What account/username did you use?
Where did it go wrong?
What were the stdout/stderr of the tool that failed? Include the text.
Did you try any workarounds? What results did those produce?
(If relevant) screenshot(s) that show exactly the problem, if it cannot be described in text. Is there a details panel you could include too?
If there are job IDs, please include them as text so administrators don’t have to manually transcribe the job ID in your picture.
It makes the process of answering ‘bug reports’ much smoother for us, as we will have to ask you these questions anyway. If you provide this information from the start, we can get straight to answering your question!
What does a GOOD bug report look like?
The people who provide support for Galaxy are largely volunteers in this community, so try and provide as much information up front to avoid wasting their time:
I encountered an issue: I was working on (this server> and trying to run (tool)+(version number) but all of the output files were empty. My username is jane-doe.
Here is everything that I know:
The dataset is green, the job did not fail
This is the standard output/error of the tool that I found in the information page (insert it here)
I have read it but I do not understand what X/Y means.
The job ID from the output information page is 123123abdef.
I tried re-running the job and changing parameter Z but it did not change the result.
The Galaxy interface has changed a bit recently, “Analyze Data” was always the home button, and now looks like a home icon.
My Galaxy looks different than in the tutorial/video
Galaxy gets frequent updates, different servers will be running different versions. This is nothing to worry about, just let us know if you can’t find how to perform a task in your Galaxy.
Log out of Galaxy, then back in again. This refreshes the disk usage calculation displayed in the Masthead usage (summary) and under User > Preferences (exact).
Note:
Your account usage quota can be found at the bottom of your user preferences page.
Forgot Password
Go to the Galaxy server you are using.
Click on Login or Register.
Enter your email on the Public Name or Email Address entry box.
Click on the link under the password entry box titled Forgot password? Click here to reset your password.
An email will be sent with a password reset link. This email may be in your email Spam or Trash folders, depending on your filters.
Click on the reset link in the email or copy and paste it into a web browser window.
Enter your new password and click on Save new password.
Getting your API key
In your browser, open your Galaxy homepage
Log in, or register a new account, if it’s the first time you’re logging in
Go to User -> Preferences in the top menu bar, then click on Manage API key
If there is no current API key available, click on Create a new key to generate it
Copy your API key to somewhere convenient, you will need it throughout this tutorial
Click on galaxy-pencilEdit Attributes on the top right
Write a description of the workflow in the Annotation box
Add a tag (which will help to search for the workflow) in the Tags section
Creating a new workflow
You can create a Galaxy workflow from scratch in the Galaxy workflow editor.
Click Workflow on the top bar
Click the new workflow galaxy-wf-new button
Give it a clear and memorable name
Clicking Save will take you directly into the workflow editor for that workflow
Need more help? Please see the How to make a workflow subsectionhere
Downloading workflows
Click on Workflowsgalaxy-workflows-activity in the Galaxy Activity Bar.
You will see a list of all your workflows
Click on the Downloaddownload button of the workflow you would like to download
Ensuring Workflows meet Best Practices
When you are editing a workflow, there are a number of additional steps you can take to ensure that it is a Best Practice workflow and will be more reusable.
Open a workflow for editing
In the workflow menu bar, you’ll find the galaxy-wf-optionsWorkflow Options dropdown menu.
Click on it and select galaxy-wf-best-practicesBest Practices from the dropdown menu.
This will take you to a new side panel, which allows you to investigate and correct any issues with your workflow.
publishing the workflow on GitHub, a public GitLab server, or another public version-controlled repository
registering the workflow with a workflow registry such as WorkflowHub or Dockstore
Extracting a workflow from your history
Galaxy can automatically create a workflow based on the analysis you have performed in a history. This means that once you have done an analysis manually once, you can easily extract a workflow to repeat it on different data.
Clean up your history: remove any failed (red) jobs from your history by clicking on the galaxy-delete button.
This will make the creation of the workflow easier.
Click on galaxy-gear (History options) at the top of your history panel and select Extract workflow.
The central panel will show the content of the history in reverse order (oldest on top), and you will be able to choose which steps to include in the workflow.
Replace the Workflow name to something more descriptive.
Rename each workflow input in the boxes at the top of the second column.
If there are any steps that shouldn’t be included in the workflow, you can uncheck them in the first column of boxes.
Click on the Create Workflow button near the top.
You will get a message that the workflow was created.
Extraer un flujo de trabajo de tu historial
Galaxy puede crear automáticamente un flujo de trabajo basado en un análisis almacenado en tu historial. Esto significa que una vez que hayas realizado un análisis manualmente, puedes extraer fácilmente un flujo de trabajo para repetirlo con diferentes datos.
Elimina cualquier trabajo fallido o no deseado de tu historial.
Haz clic en Opciones de historial (icono de engranaje galaxy-gear) en la parte superior del panel de historial.
Selecciona Extraer flujo de trabajo
Verifica los pasos, ingresa un nombre para tu flujo de trabajo y presiona el botón Crear flujo de trabajo.
Get the workflow id
Go to the galaxy-workflows-activityworkflows panel in Galaxy and find the workflow you’ve just created.
Click on galaxy-pencil Edit or history-share Share
The URL in your browser will look something like https://usegalaxy.eu/workflow/editor?id=34d18f081b73cb15. Copy the part after ?id= - this is the workflow ID, in our case: 34d18f081b73cb15
Get the workflow invocation
Go to the workflow invocations page
Before Galaxy 24.0: Go to User > Workflow Invocations
In Galaxy 24.0: Go to Data > Workflow Invocations
Above Galaxy 24.1: Go to Workflow Invocation in the activity bar on the left
Open the most recent item
Find the invocation id:
Below 24.0, you can get it here:
Above Galaxy 24.1 (activity bar), you can find the workflow invocation id from the URL. For example, https://usegalaxy.org/workflows/invocations/be5c48c113145dd5 means that the workflow invocation id is be5c48c113145dd5.
Hiding intermediate steps
When a workflow is executed, the user is usually primarily interested in the final product and not in all intermediate steps. By default all the outputs of a workflow will be shown, but we can explicitly tell Galaxy which outputs to show and which to hide for a given workflow. This behaviour is controlled by clicking on the eye icon on for all dataset that should be hidden:
Import workflows from DockStore
Dockstore is a free and open source platform for sharing reusable and scalable analytical tools and workflows.
Ensure that you are logged in to your Galaxy account.
Click on “Galaxy” dropdown within the “Launch with” panel located in the upper right corner.
Select a galaxy instance you want to launch this workflow with.
You will be redirected to Galaxy and presented with a list of workflow versions.
Click the version you want (usually the latest labelled as “main”)
You are done!
The following short video walks you through this uncomplicated procedure:
Video: Importing from Dockstore
Importing a workflow
Click on galaxy-workflows-activityWorkflows in the Galaxy activity bar (on the left side of the screen, or in the top menu bar of older Galaxy instances). You will see a list of all your workflows
Click on galaxy-uploadImport at the top-right of the screen
Provide your workflow
Option 1: Paste the URL of the workflow into the box labelled “Archived Workflow URL”
Option 2: Upload the workflow file in the box labelled “Archived Workflow File”
Click the Import workflow button
Below is a short video demonstrating how to import a workflow from GitHub using this procedure:
Video: Importing a workflow from URL
Importing a workflow using the Tool Registry Server (TRS) search
Click on galaxy-workflows-activityWorkflows in the Galaxy activity bar (on the left side of the screen, or in the top menu bar of older Galaxy instances). You will see a list of all your workflows
Click on galaxy-uploadImport at the top-right of the screen
On the new page, select the GA4GH servers tab, and configure the GA4GH Tool Registry Server (TRS) Workflow Search interface as follows:
“TRS Server”: the TRS Server you want to search on (Dockstore or workflowhub.eu)
Type in the search query
Expand the correct workflow by clicking on it
Select the version you would like to galaxy-upload import
The workflow will be imported to your list of workflows. Note that it will also carry a little blue-white shield icon next to its name, which indicates that this is an original workflow version imported from a TRS server. If you ever modify the workflow with Galaxy’s workflow editor, it will lose this indicator.
Below is a short video showing the entire uncomplicated procedure:
Ensure the “TRS server” is set to “workflowhub.eu”
Provide your your “TRS ID” (WorkflowHub’s numerical identifier of your workflow that appears in the link to its WorkflowHub page)
Select the workflow version you want to import
Importing and launching a GTN workflow
Find the material you are interested in
View its workflows, which can be found in the metadata box at the top of the tutorial
Click the button on any workflow to run it.
Make a workflow public
Click on galaxy-workflows-activityWorkflows in the Galaxy activity bar (on the left side of the screen, or in the top menu bar of older Galaxy instances). You will see a list of all your workflows
Click on the history-shareShare button of the workflow you would like to publish
Click on Make Workflow accessible. This makes the workflow publicly accessible but unlisted.
To also list the workflow for all users on the Public workflows tab of the galaxy-workflows-activityWorkflows page, click Make Workflow publicly available in Published Workflows
Opening the workflow editor
Click on galaxy-workflows-activityWorkflows in the Galaxy activity bar (on the left side of the screen, or in the top menu bar of older Galaxy instances)
Click on the galaxy-wf-editEdit button of the workflow you would like to edit
Make your desired changes in the workflow editor
Click on the dataset-saveSave icon, which appears next to the workflow title if you have unsaved changes, to save your changes and continue editing, or on dataset-saveSave + Exit in the activity bar to save your changes and leave the workflow editor.
Publish your workflow in IWC
IWC stands for Intergalactic Workflow Commission.
The IWC maintains high-quality Galaxy Workflows. These production workflows target at users that want to analyze their own data. As such, the workflow should be sufficiently generic that users can provide their own data. These workflows usually use workflow parameter explained in this tutorial.
Click on the tool in the workflow to get the details of the tool on the right-hand side of the screen.
Scroll down to the Configure Output section of your desired parameter, and click it to expand it.
Under Rename dataset, give it a meaningful name
Running a workflow
Click on Workflows on the Activity Bar on the left.
At the top of the resulting page you will have the option to switch between the My workflows, Workflows shared with me and Public workflows tabs.
Select the tab you want to see all workflows in that category
Search for your desired workflow.
Click on the workflow name: a pop-up window opens with a preview of the workflow.
To run it directly: click Run (top-right).
Recommended: click Import (left of Run) to make your own local copy under Workflows / My Workflows.
Setting parameters at run-time
Open the workflow editor
Click on the tool in the workflow to get the details of the tool on the right-hand side of the screen.
Scroll down to the parameter you want users to provide every time they run the workflow
Click on the arrow in front of the name workflow-runtime-toggle to toggle to set at runtime
Share
Click on galaxy-workflows-activityWorkflows in the Galaxy activity bar (on the left side of the screen, or in the top menu bar of older Galaxy instances). You will see a list of all your workflows
Click on the history-shareShare button of the workflow you would like to publish
Go to Share Workflow with Individual Users
Enter the email address of the user you want to share the workflow with.
They will be able to find and import your workflow under Workflows shared with me tab in the Workflows section of the Activity bar
Viewing a workflow report
You can find the workflow report from the workflow invocation
Go to User on the top menu bar of Galaxy.
Click on Workflow invocations
Here you will find a list of all the workflows you have run
Click on the name of a workflow invocation to expand it
Click on View Report to go to the workflow report page
Note: The report can also be downloaded in PDF format by clicking on the galaxy-wf-report-download icon.
References
Wood, D. E., and S. L. Salzberg, 2014 Kraken: ultrafast metagenomic sequence classification using exact alignments. Genome Biology 15: R46. 10.1186/gb-2014-15-3-r46
Olm, M. R., C. T. Brown, B. Brooks, and J. F. Banfield, 2017 dRep: a tool for fast and accurate genomic comparisons that enables improved genome recovery from metagenomes through de-replication. The ISME journal 11: 2864–2868. 10.1038/ismej.2017.126
Devenyi, G. A., R. Emonet, R. M. Harris, K. L. Hertweck, D. Irving et al., 2018 Ten simple rules for collaborative lesson development (S. Markel, Ed.). PLOS Computational Biology 14: e1005963. 10.1371/journal.pcbi.1005963
Jain, C., L. M. Rodriguez-R, A. M. Phillippy, K. T. Konstantinidis, and S. Aluru, 2018 High throughput ANI analysis of 90K prokaryotic genomes reveals clear species boundaries. Nature Communications 9: 10.1038/s41467-018-07641-9
Almeida, A., A. L. Mitchell, M. Boland, S. C. Forster, G. B. Gloor et al., 2019 A new genomic blueprint of the human gut microbiota. Nature 568: 499–504. 10.1038/s41586-019-0965-1
Garcia, L., B. Batut, M. L. Burke, M. Kuzak, F. Psomopoulos et al., 2020 Ten simple rules for making training materials FAIR (S. Markel, Ed.). PLOS Computational Biology 16: e1007854. 10.1371/journal.pcbi.1007854
Olm, M. R., A. Crits-Christoph, K. Bouma-Gregson, B. A. Firek, M. J. Morowitz et al., 2021 inStrain profiles population microdiversity from metagenomic data and sensitively detects shared microbial strains. Nature Biotechnology 39: 727–736. 10.1038/s41587-020-00797-0
Chklovski, A., D. H. Parks, B. J. Woodcroft, and G. W. Tyson, 2023 CheckM2: a rapid, scalable and accurate tool for assessing microbial genome quality using machine learning. Nature methods 20: 1203–1212. 10.1101/2022.07.11.499243
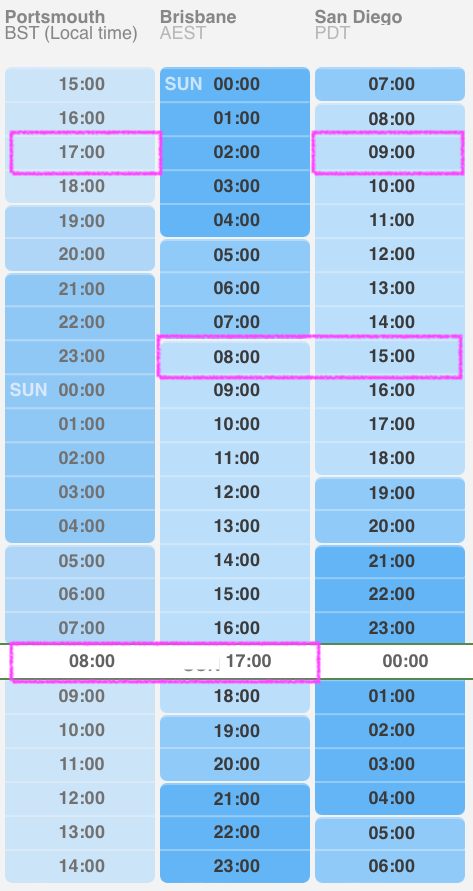

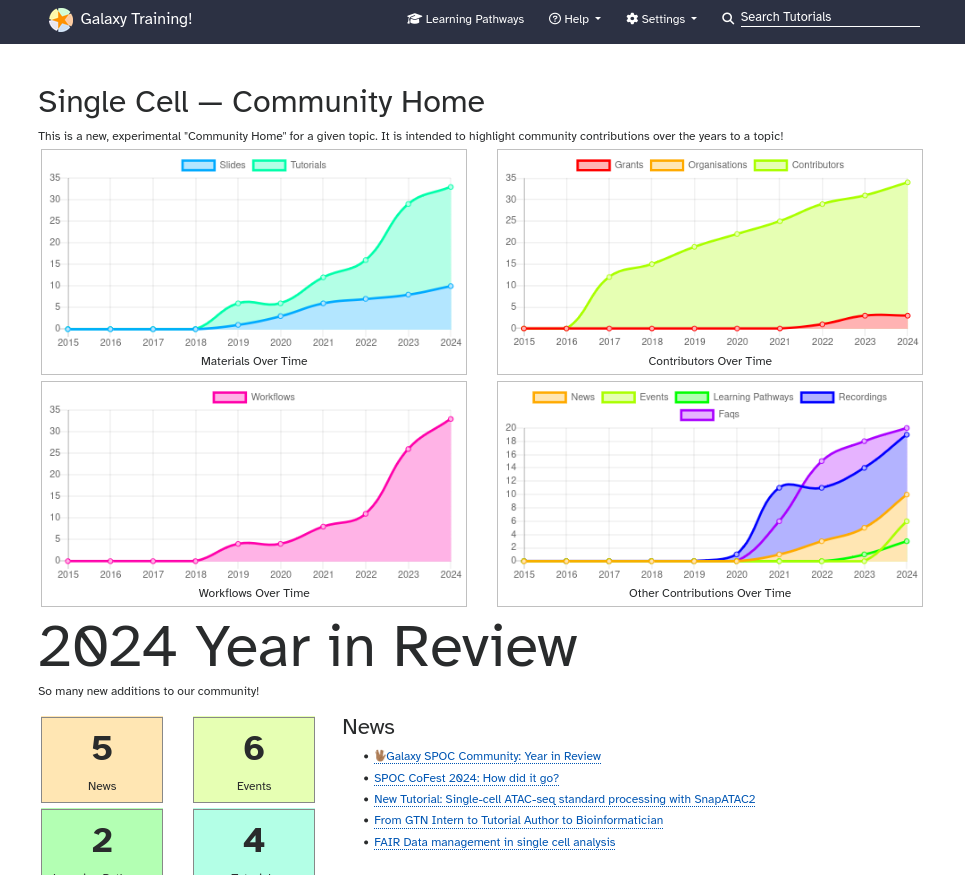
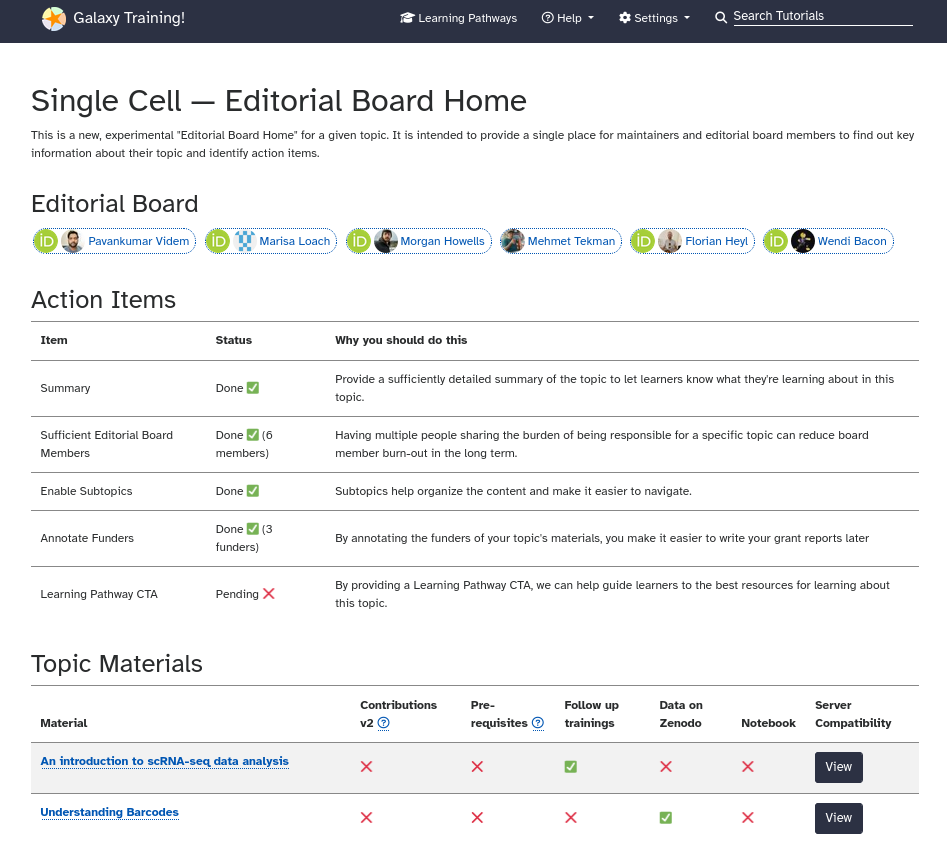


, Mash ANI is severely impacted. Source: <a href='https://drep.readthedocs.io/en/latest/choosing_parameters.html#importance-of-genome-completeness'>dRep documentation</a>")


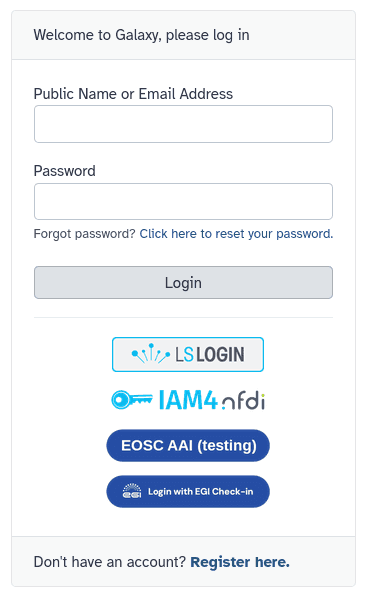
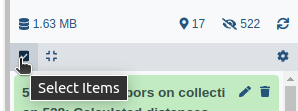
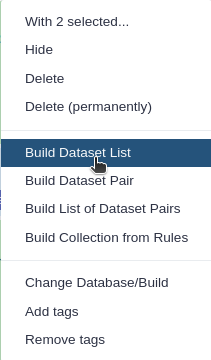


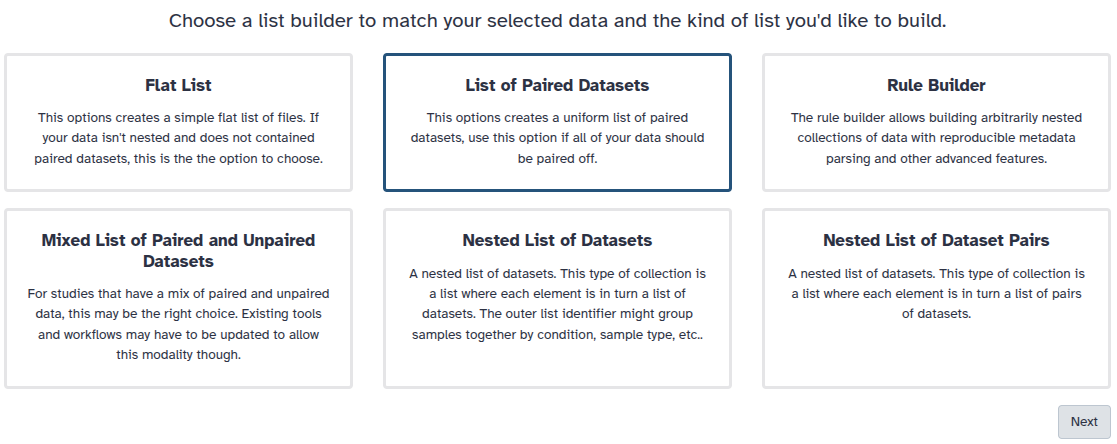
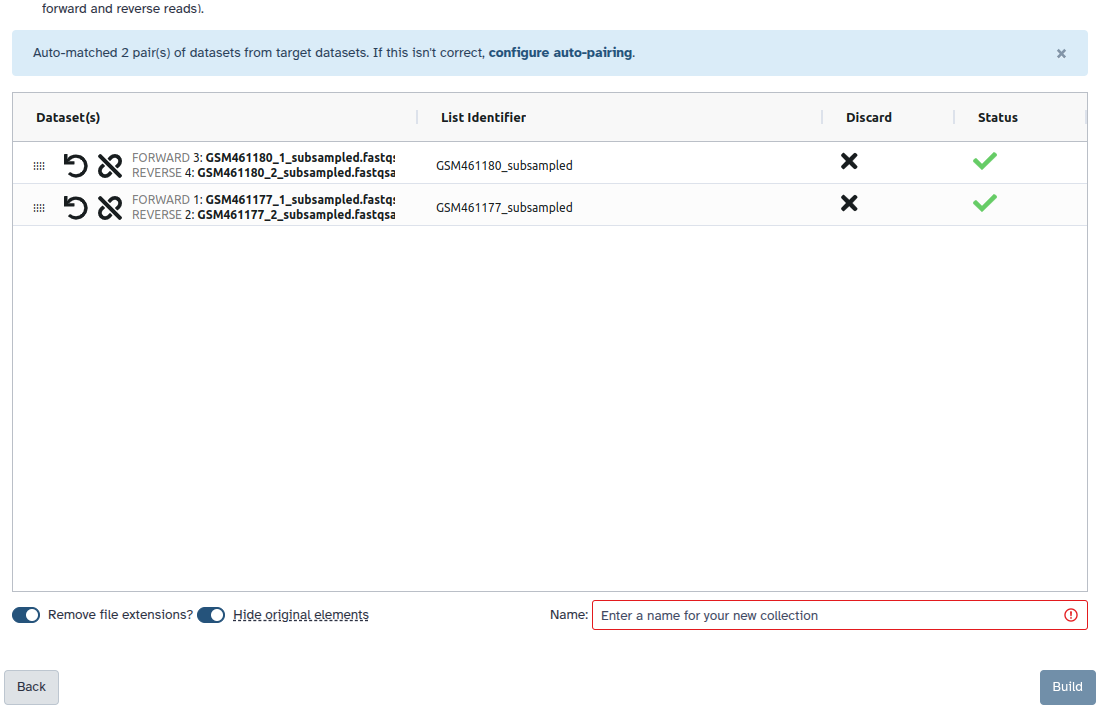


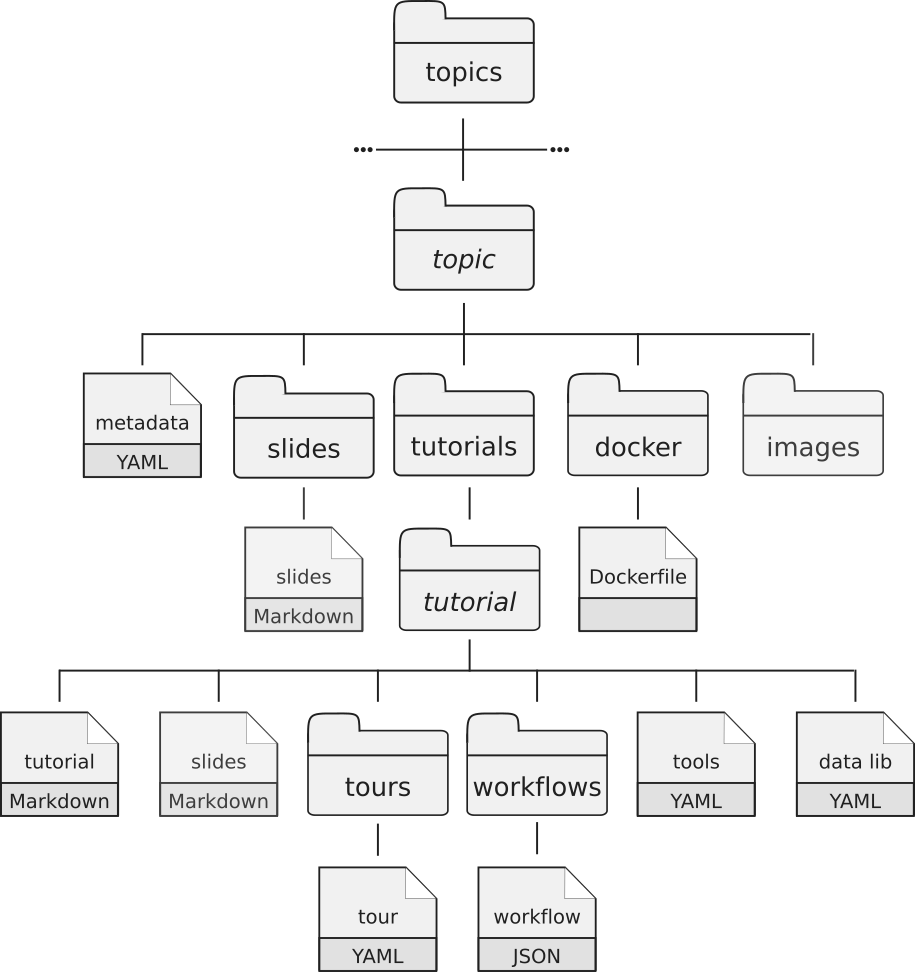
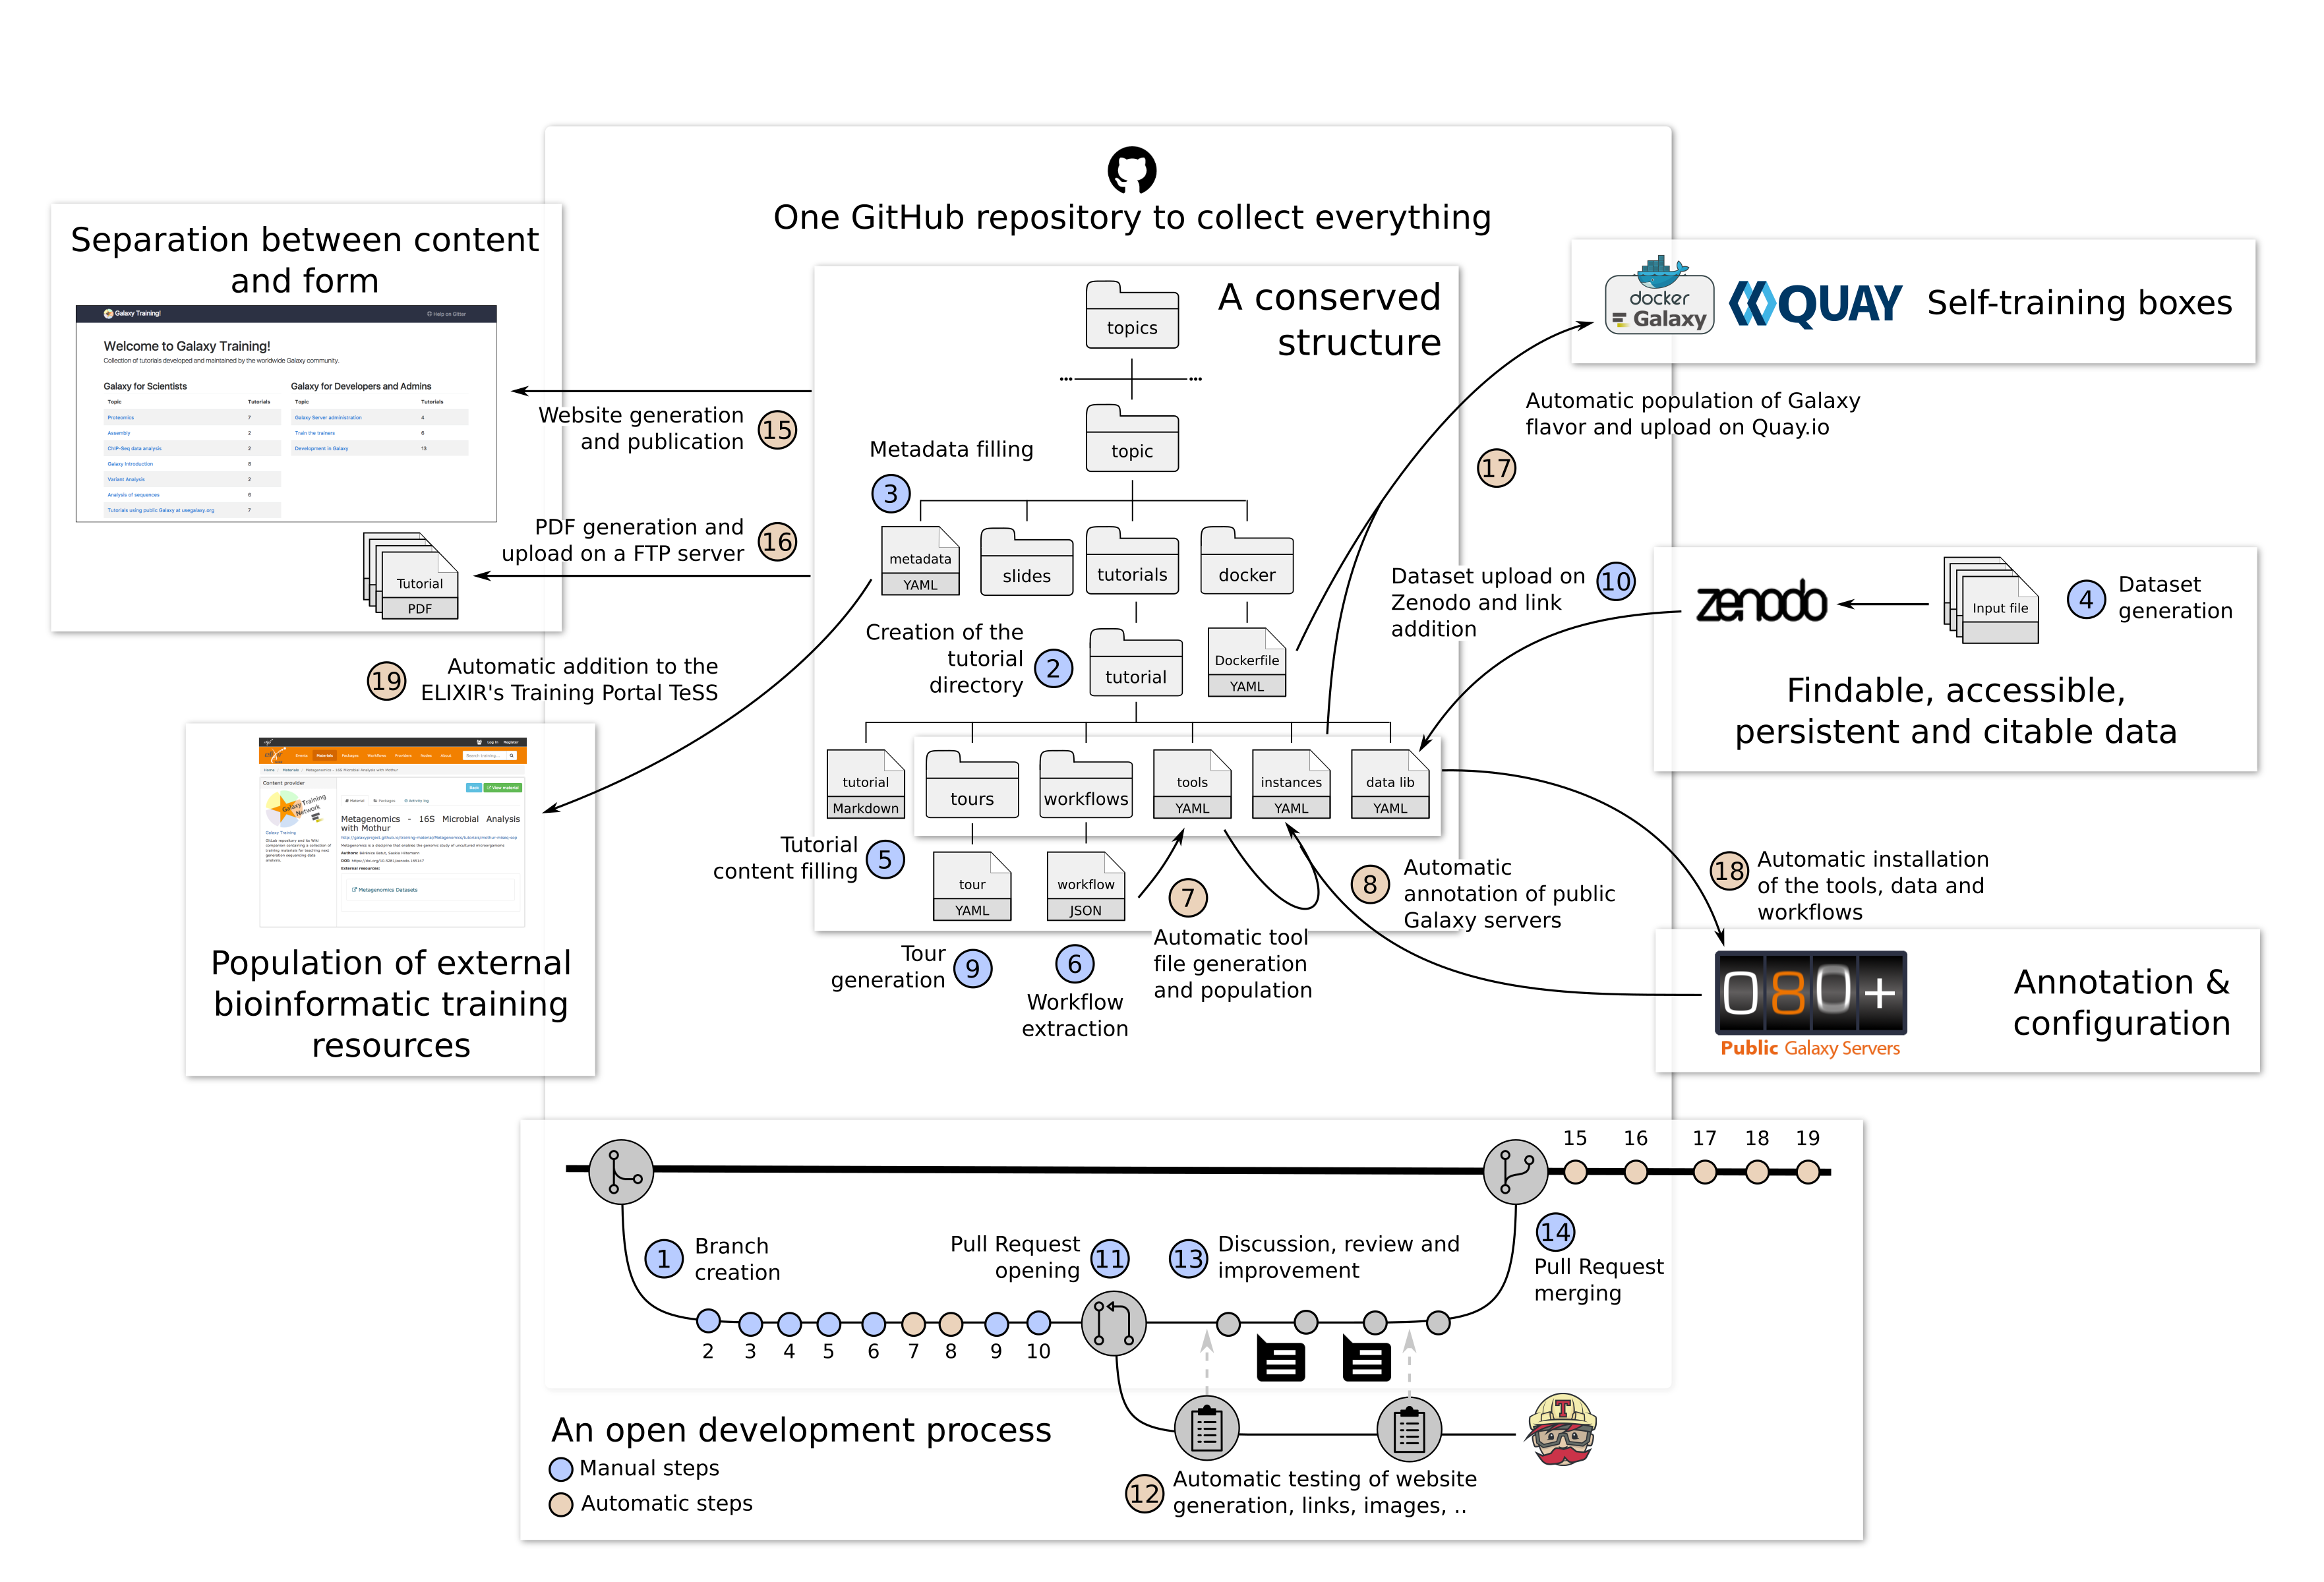


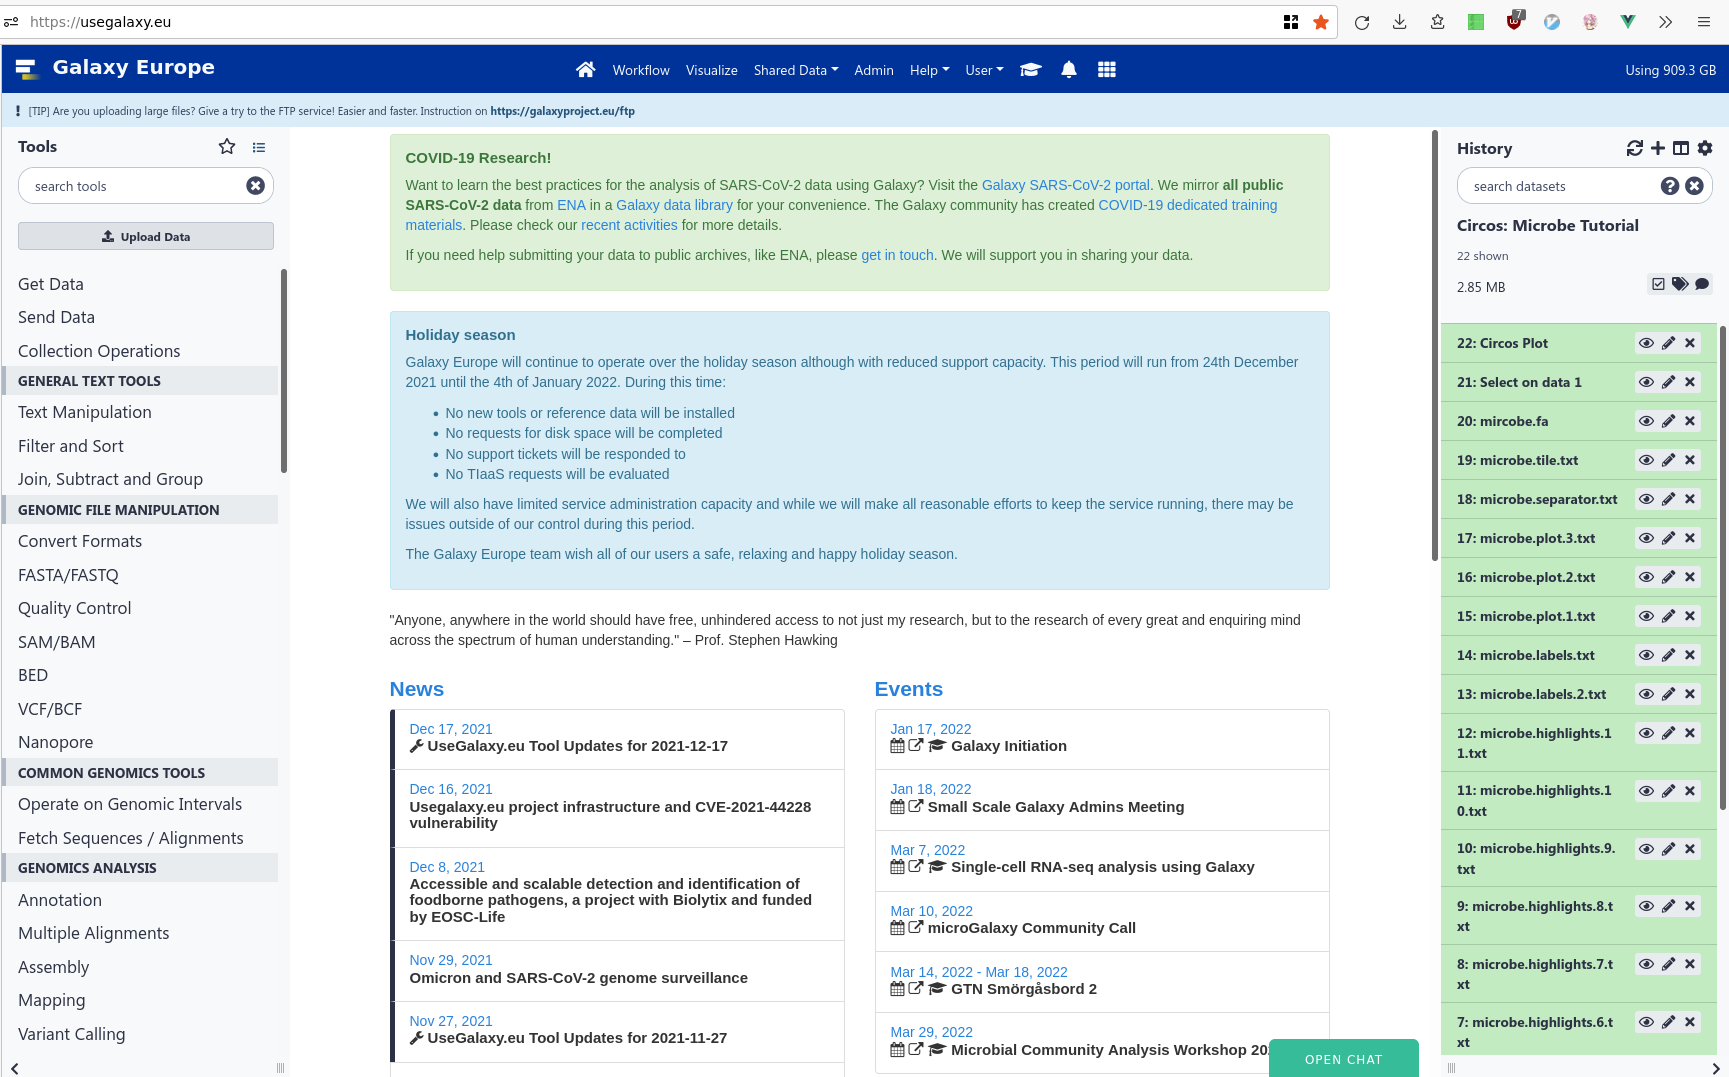
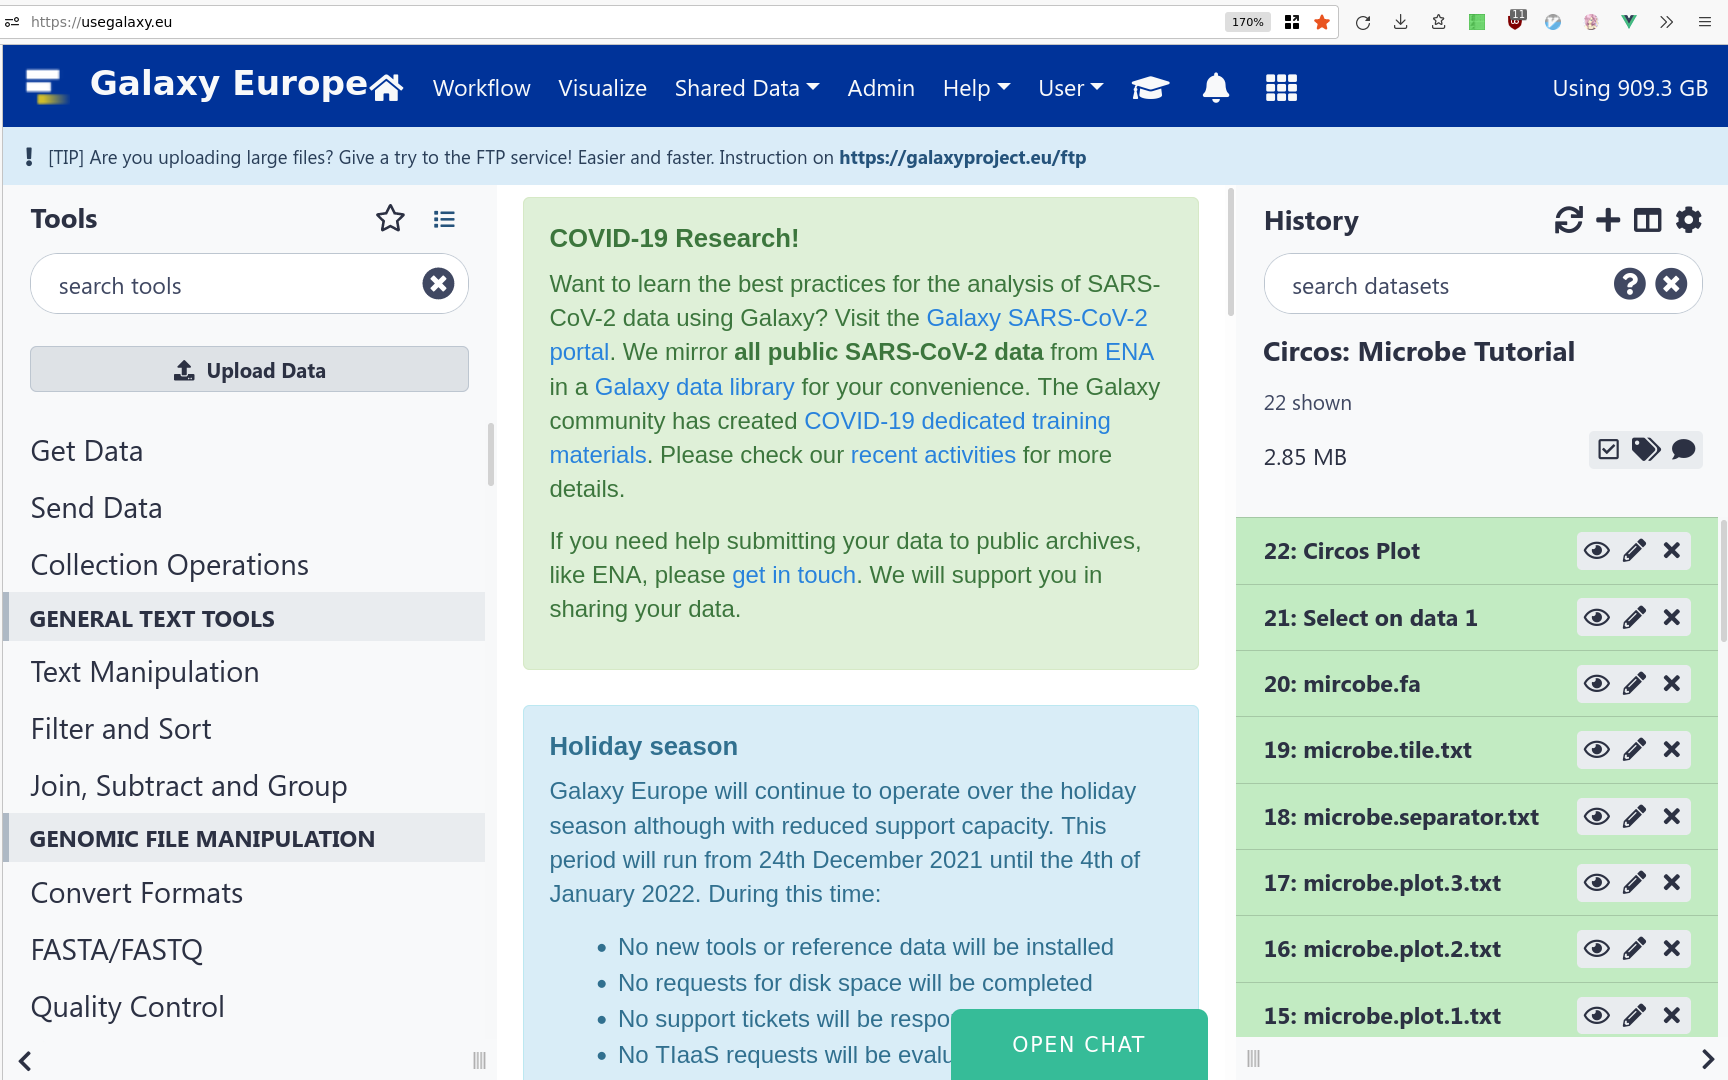

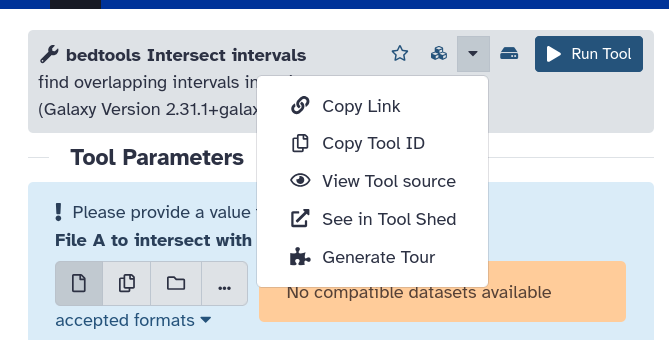

:
Warning: Danger: Make sure you choose corect format!
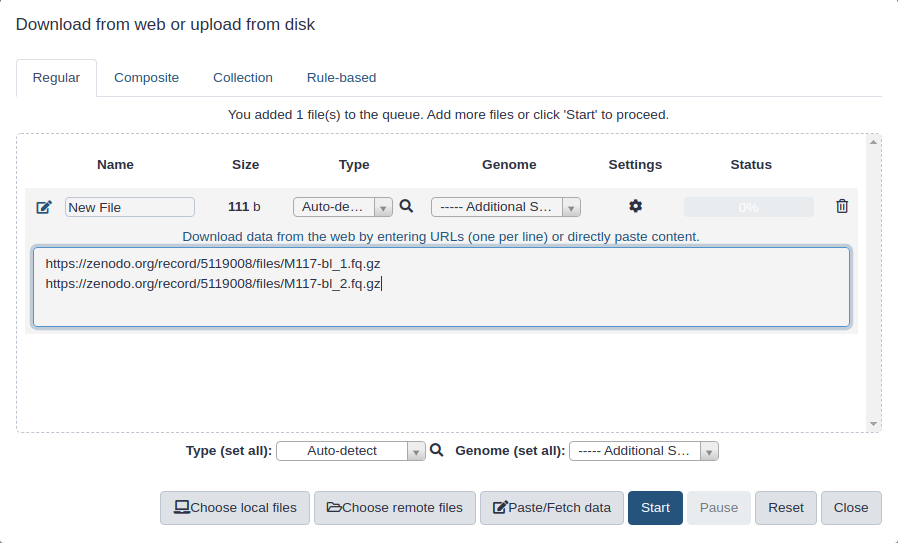


 of the genomes that contain that k-mer in the database. The taxa associated with the sequence's k-mers, as well as the taxa's ancestors, form a pruned subtree of the general taxonomy tree, which is used for classification. In the classification tree, each node has a weight equal to the number of k-mers in the sequence associated with the node's taxon. Each root-to-leaf (RTL) path in the classification tree is scored by adding all weights in the path, and the maximal RTL path in the classification tree is the classification path (nodes highlighted in yellow). The leaf of this classification path (the orange, leftmost leaf in the classification tree) is the classification used for the query sequence. Source: <span class=\"citation\"><a href=\"#Wood2014\">Wood and Salzberg 2014</a></span>")
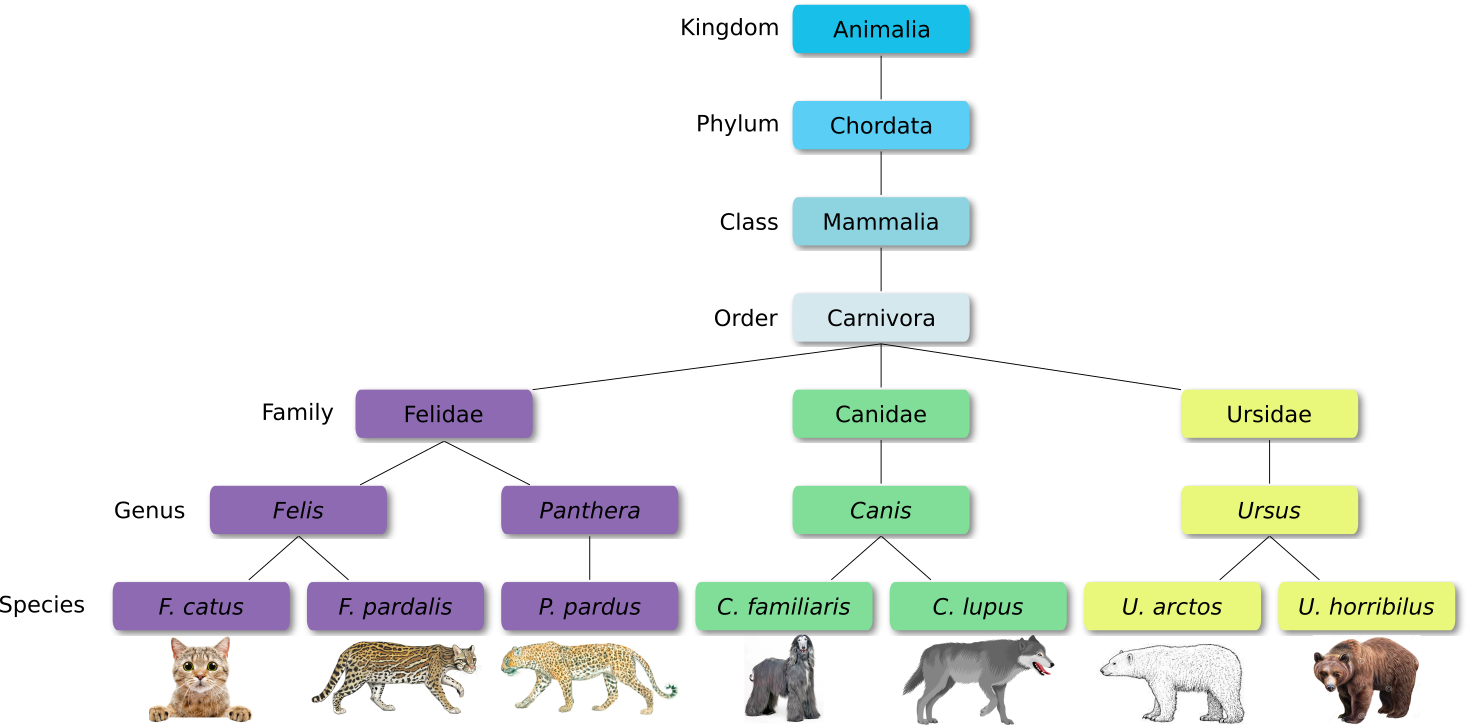

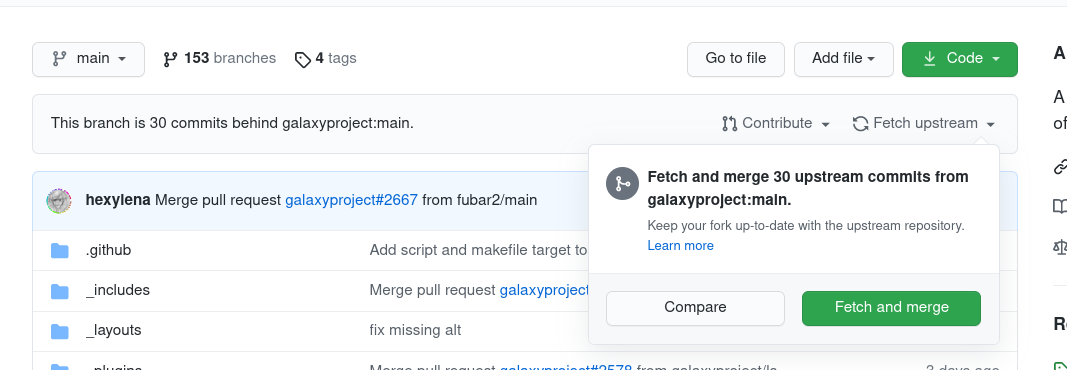


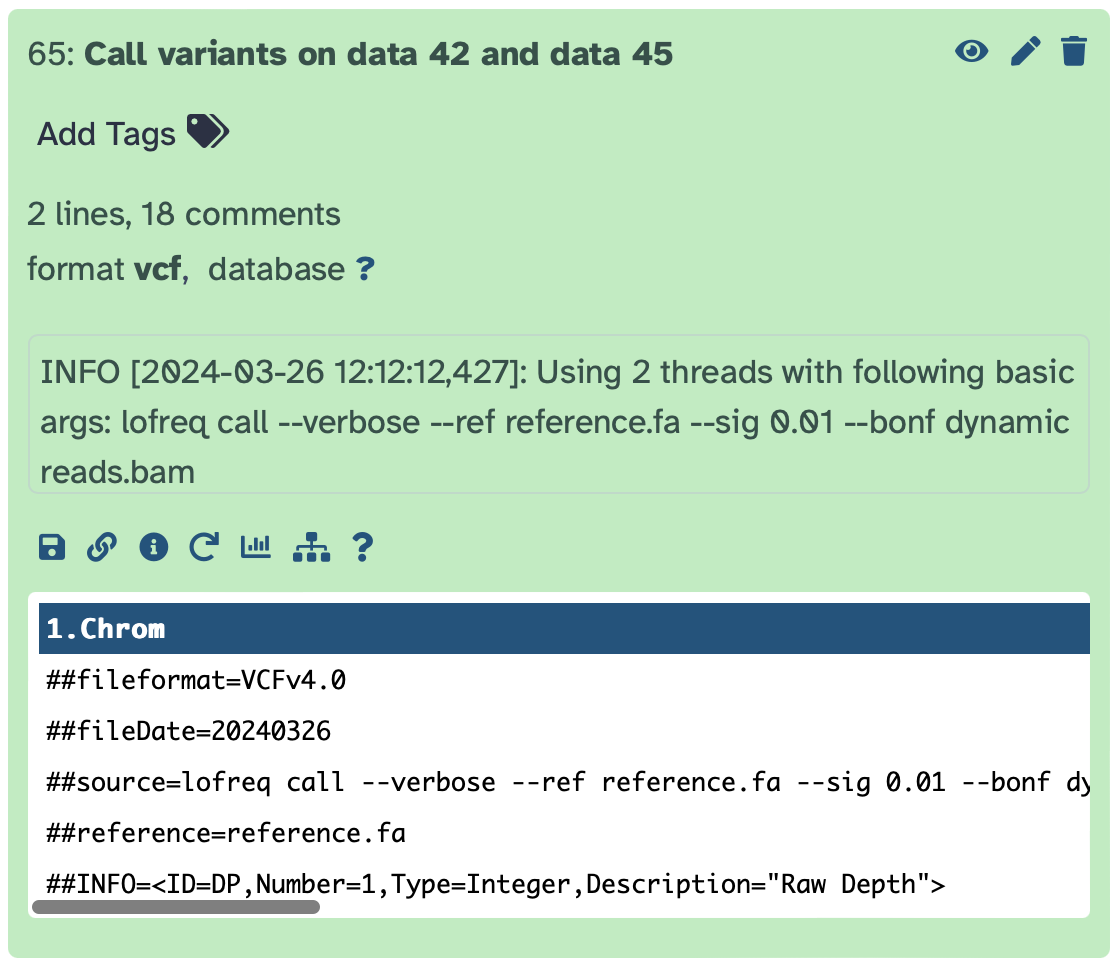
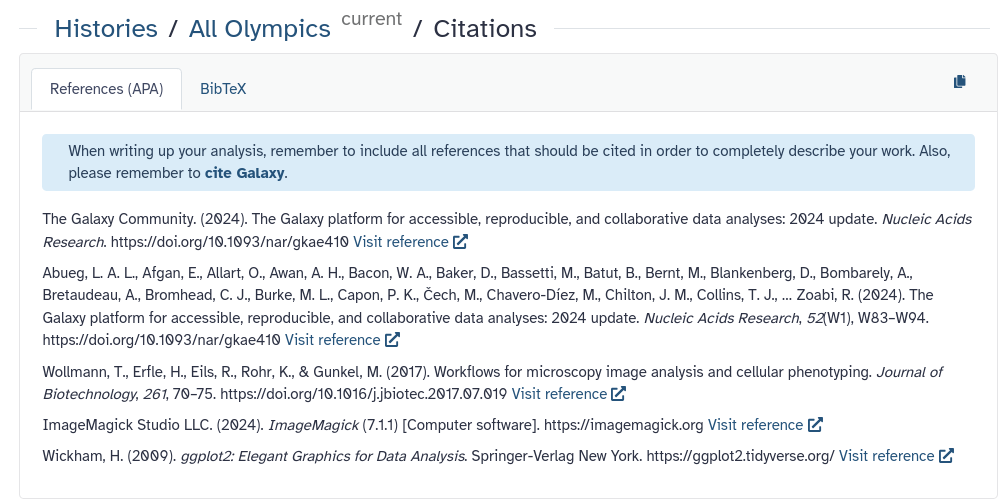
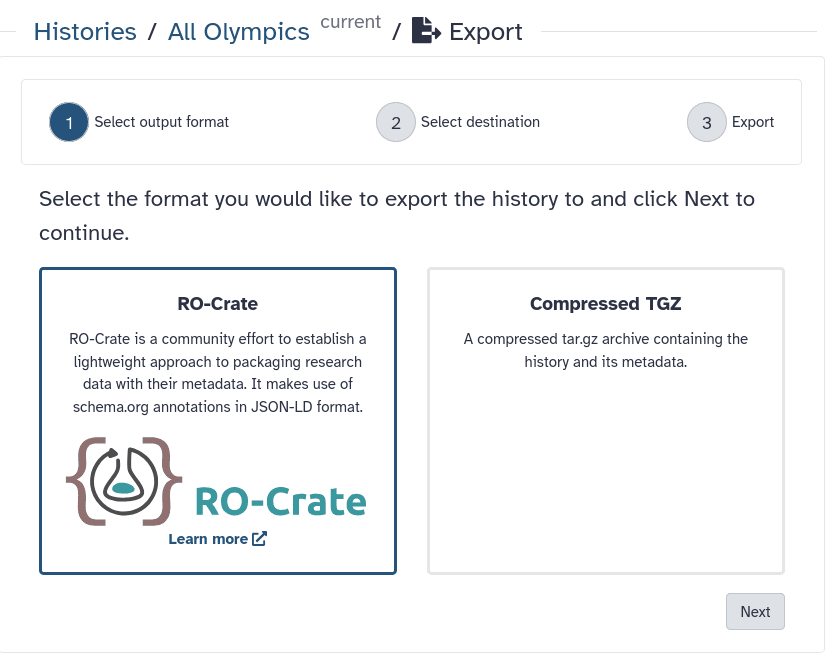
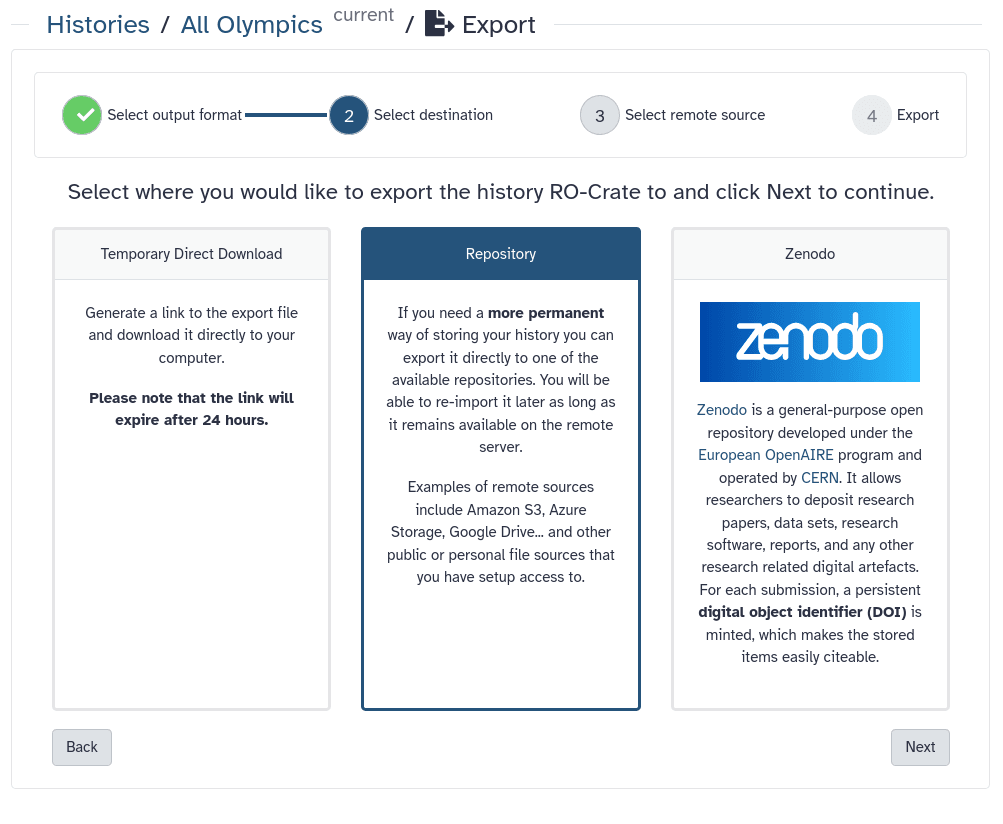


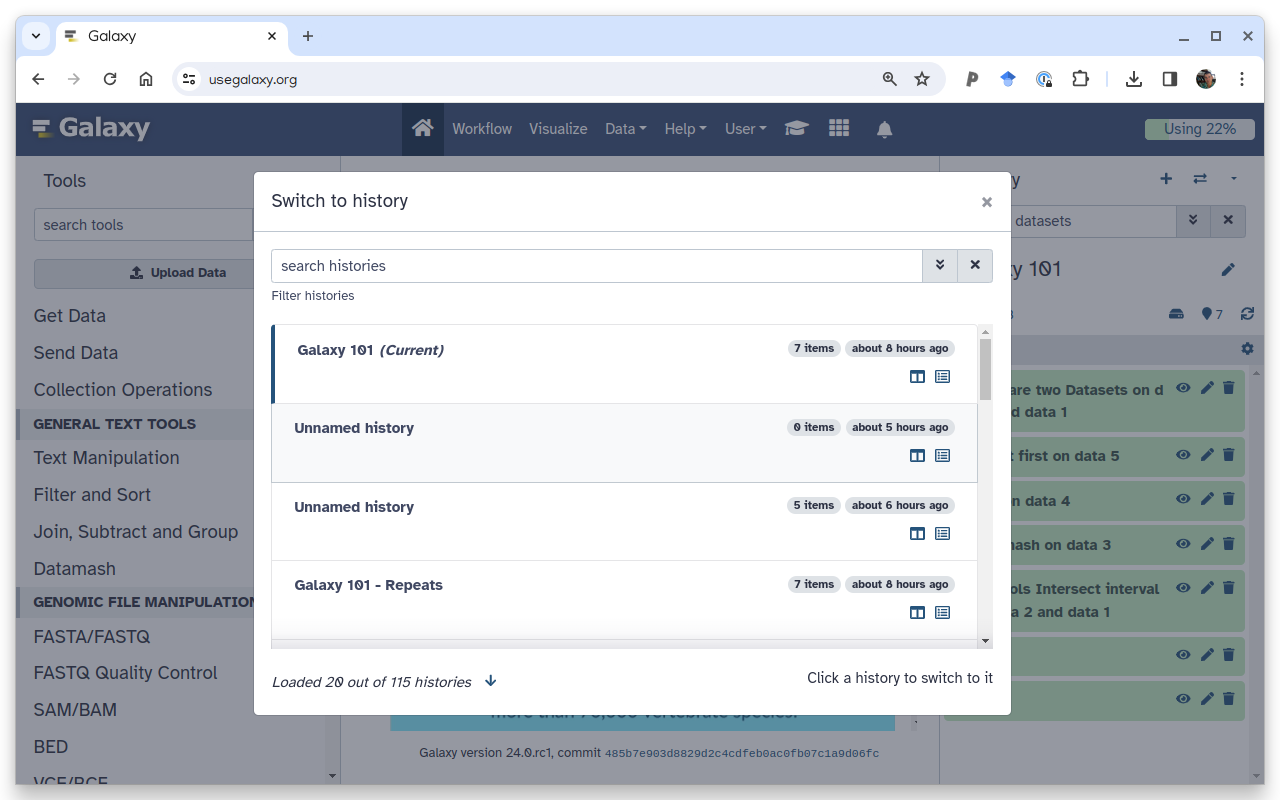


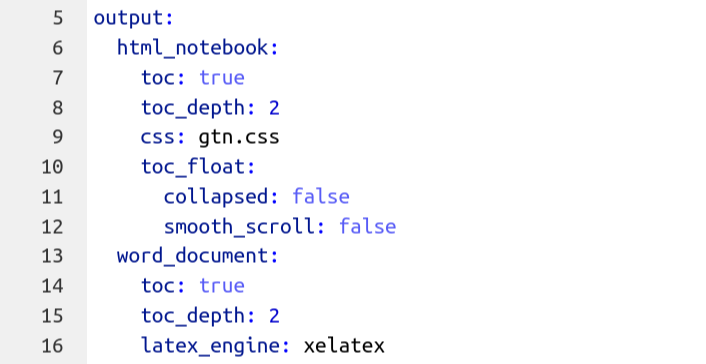
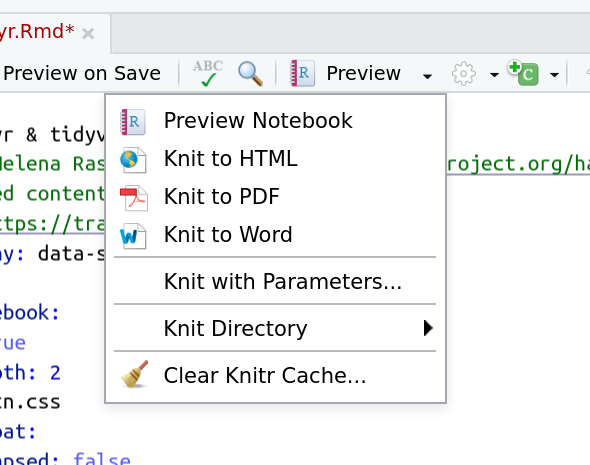
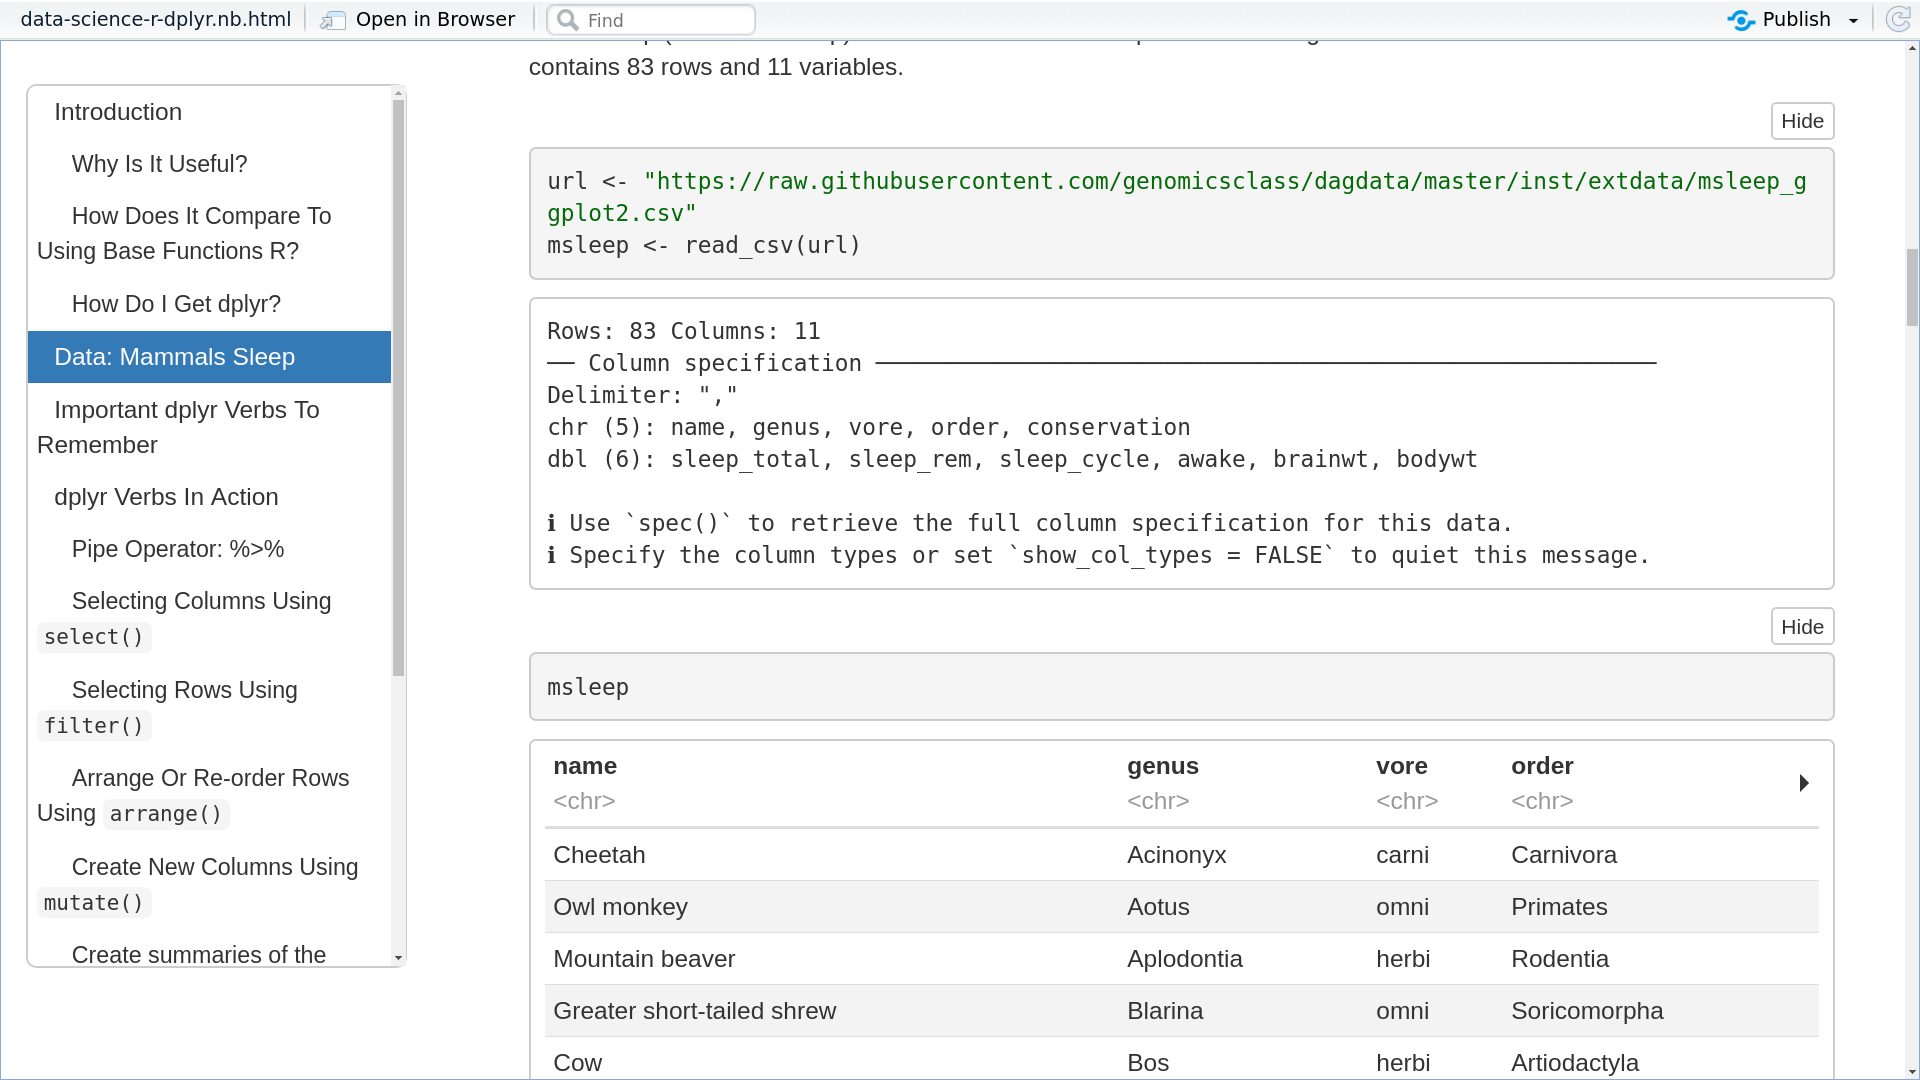
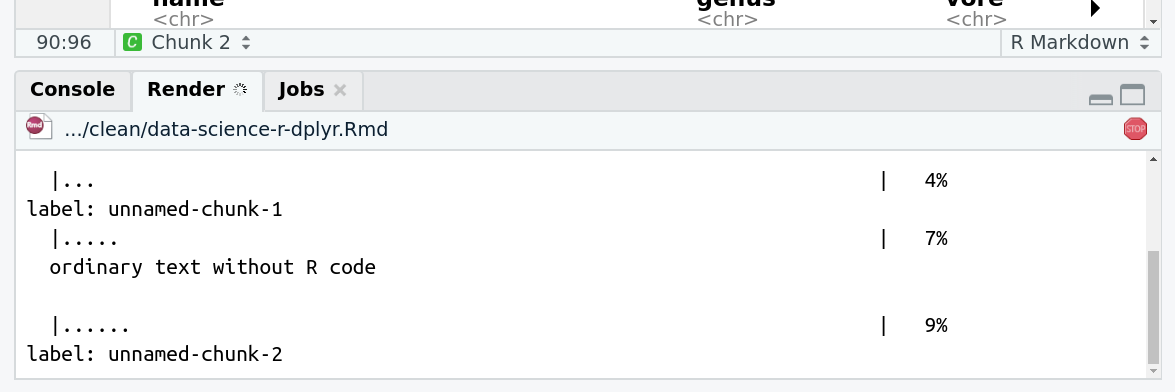
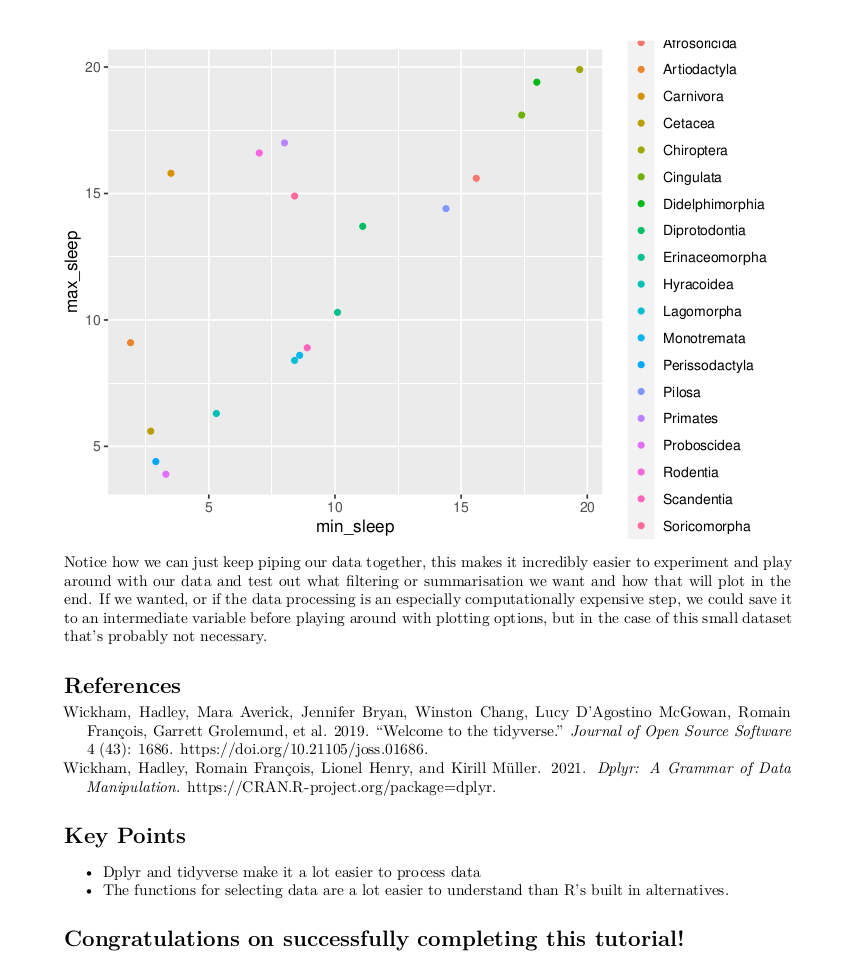
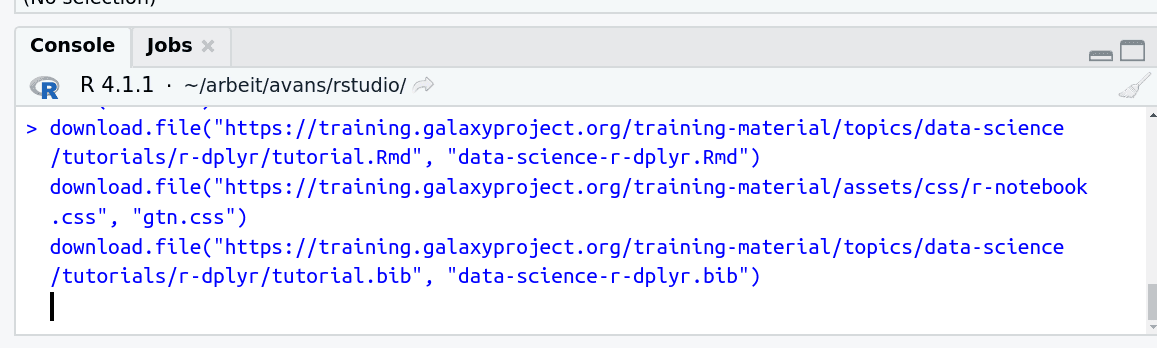
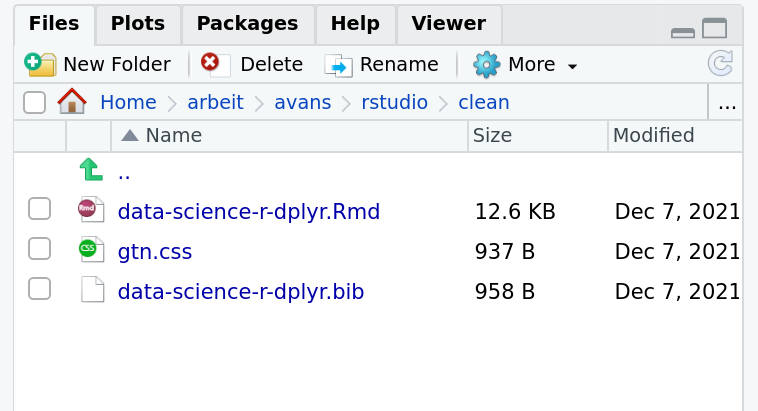
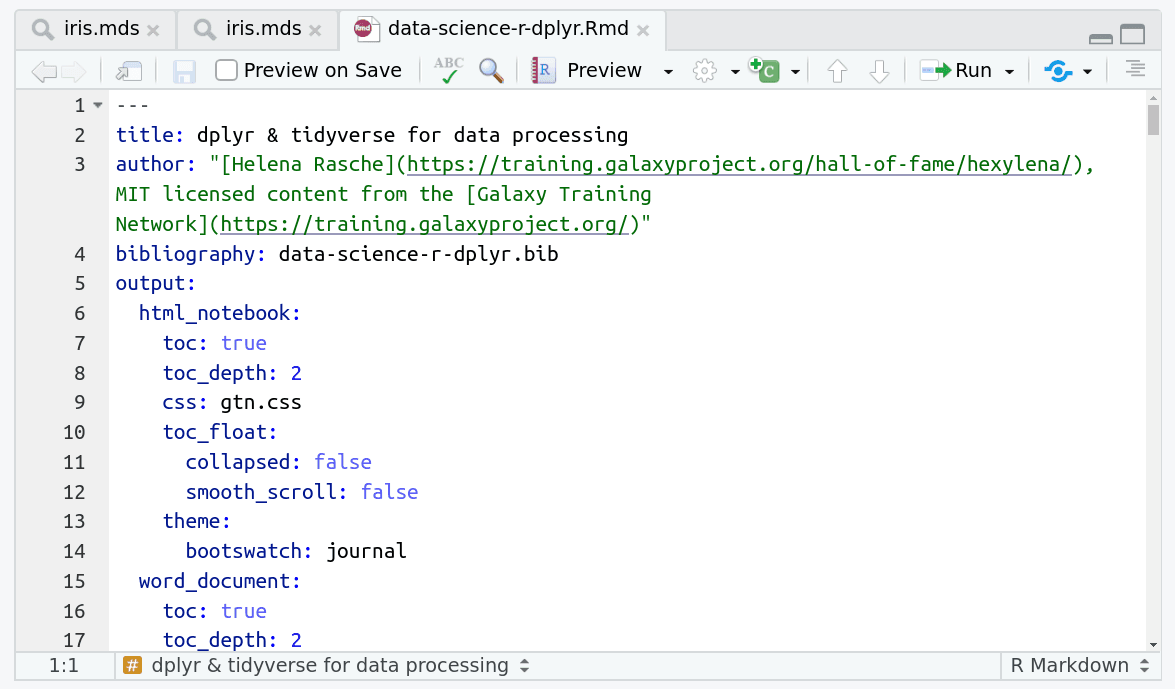
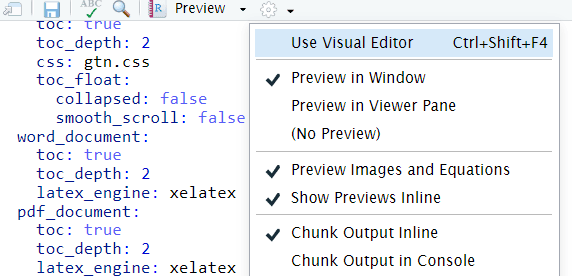
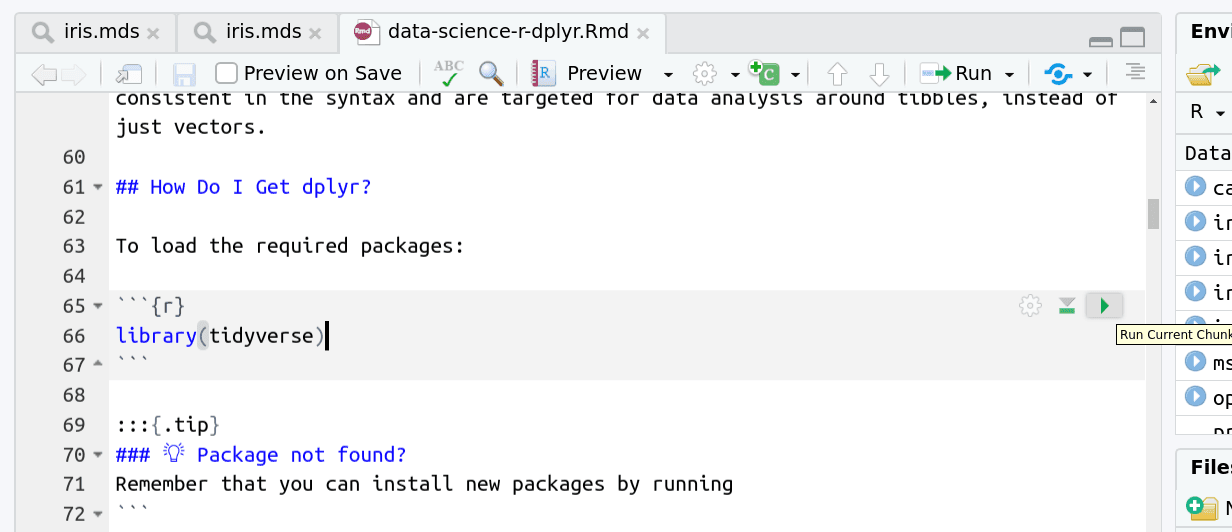
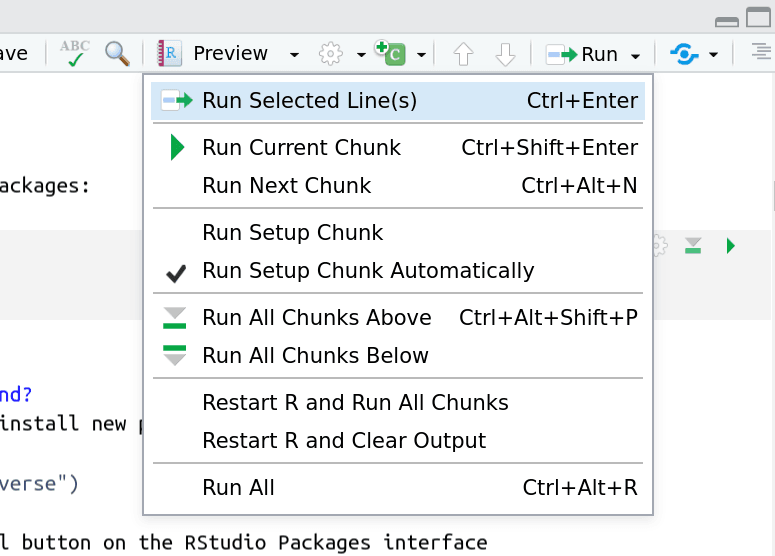
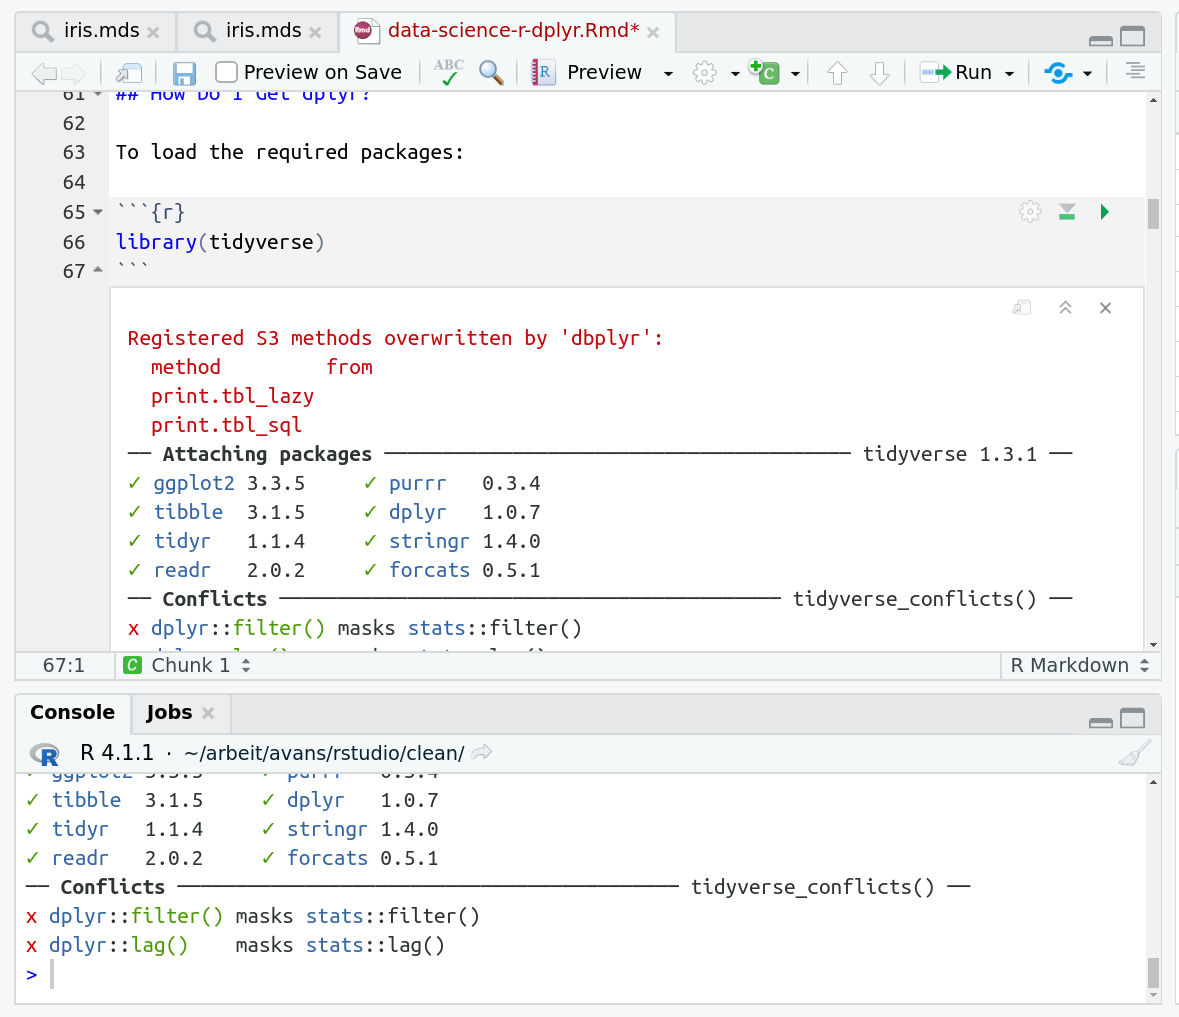
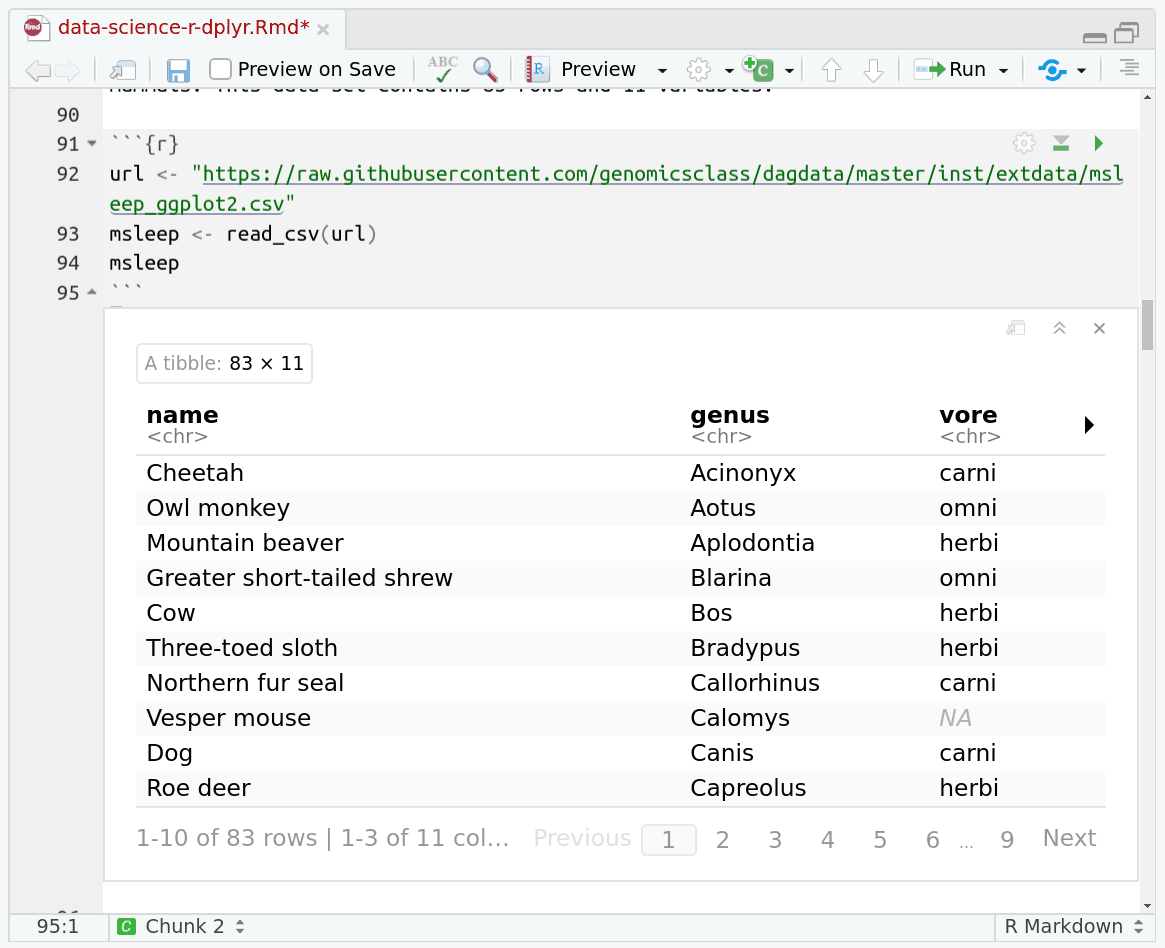
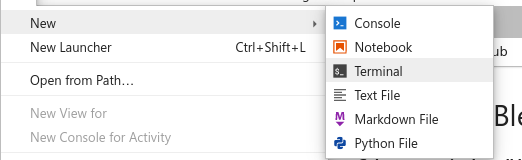
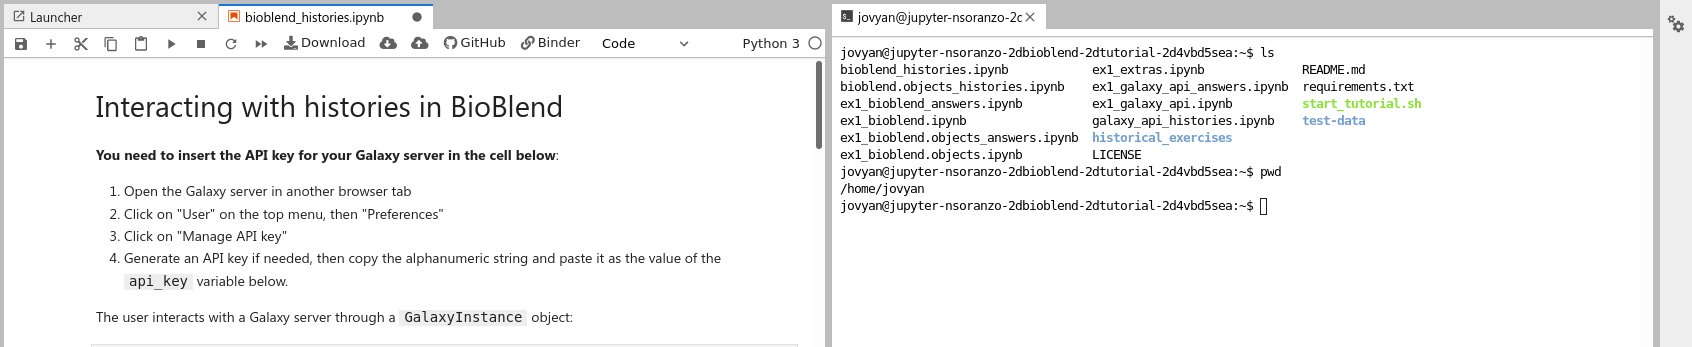
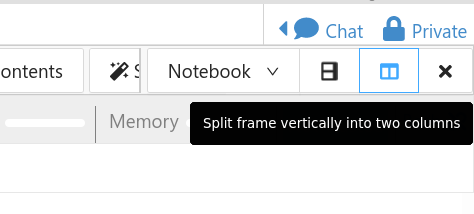
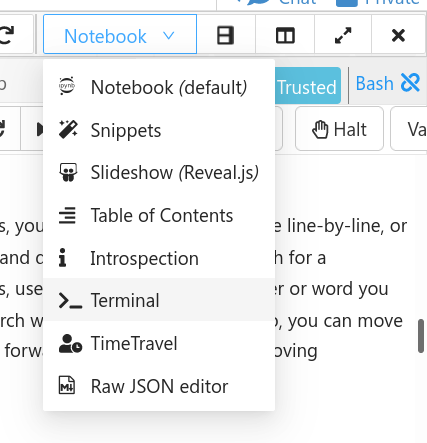
 We recommend you follow the tutorials in the order presented on this page. They have been selected to fit together and build up your knowledge step by step. If a lesson has both slides and a tutorial, we recommend you start with the slides, then proceed with the tutorial.
")