Preview the GTN website as you edit your training material
| Author(s) |
|
| Editor(s) |
|
| Reviewers |
|
OverviewQuestions:
Objectives:
How can I get a preview of the GTN website?
Preview the GTN website
Make changes to the GTN website and preview those changes
Save the changes to your fork of the GTN repo
Create a pull request (PR) based on your changes
Time estimation: 20 minutesSupporting Materials:Published: Mar 14, 2025Last modification: Feb 4, 2026License: Tutorial Content is licensed under Creative Commons Attribution 4.0 International License. The GTN Framework is licensed under MITpurl PURL: https://gxy.io/GTN:T00484rating Rating: 3.0 (1 recent ratings, 1 all time)version Revision: 4
If you are working on training materials, you will likely want to preview your changes as you go! You have a few options on how to do this.
Hands-on: Choose Your Own TutorialThis is a 'Choose Your Own Tutorial' (CYOT) section (also known as 'Choose Your Own Analysis' (CYOA)), where you can select between multiple paths. Click one of the buttons below to select how you want to follow the tutorial
We recommend using Codespaces. We used to use Gitpod, however it loads a bit slower and the interface changed as of spring 2025, so the tutorial may be out of date. CodeSpaces and GitPod are both online methods; only the command-line option requires you to install things on your machine.
If you are working on your own training materials and want preview them online without installing anything on your computer, you can do this using GitHub CodeSpaces! Everybody gets 60 free hours of CodeSpaces per month.
Launching CodeSpaces
Hands On: Setting up Codespaces
Create a fork of the GTN GitHub repository
- Go on the GitHub repository: github.com/galaxyproject/training-material
- Click on the Fork button (top-right corner of the page)
Already have a fork of the GTN? Make sure it is up to date.
If you created your fork a long time ago, the default branch on your fork may still be called master instead of main
- Point your browser to your fork of the GTN repository
- The url will be
https://github.com/<your username>/training-material(replacingwith your GitHub username) Check the default branch that is shown (at top left).
- Does it say
main?
- Congrats, nothing to do, you can skip the rest of these steps
Does it say
master? Then you need to update it, following the instructions below- Go to your fork’s settings (Click on the gear icon called “Settings”)
- Find “Branches” on the left
- If it says master you can click on the ⇆ icon to switch branches.
- Select
main(it may not be present).- If it isn’t present, use the pencil icon to rename
mastertomain.Whenever you want to contribute something new to the GTN, it is important to start with an up-to-date branch. To do this, you should always update the main branch of your fork, before creating a so-called feature branch, a branch where you make your changes.
- Point your browser to your fork of the GTN repository
- The url will be
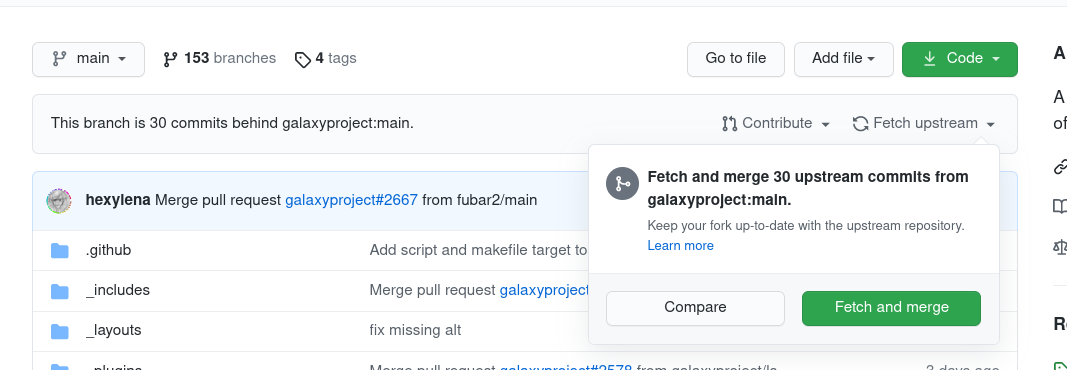
https://github.com/<your username>/training-material(replacing ‘your username’ with your GitHub username)You might see a message like “This branch is 367 commits behind galaxyproject/training-material:main.” as in the screenshot below.
Click the Sync Fork button on your fork to update it to the latest version.
- TIP: never work directly on your main branch, since that will make the sync process more difficult. Always create a new branch before committing your changes.
Navigate to your fork of the GTN
Click on the green Code button
At the top, switch to the CodeSpaces tab
- Click on Create codespace on main
- Note: if you switch to a specific branch in GitHub first, you can create a codespace for that branch
- This will setup a Visual Studio Code environment for you
- It may take a couple minutes to finish setting everything up
- In this environment you can also build the GTN website to preview your changes
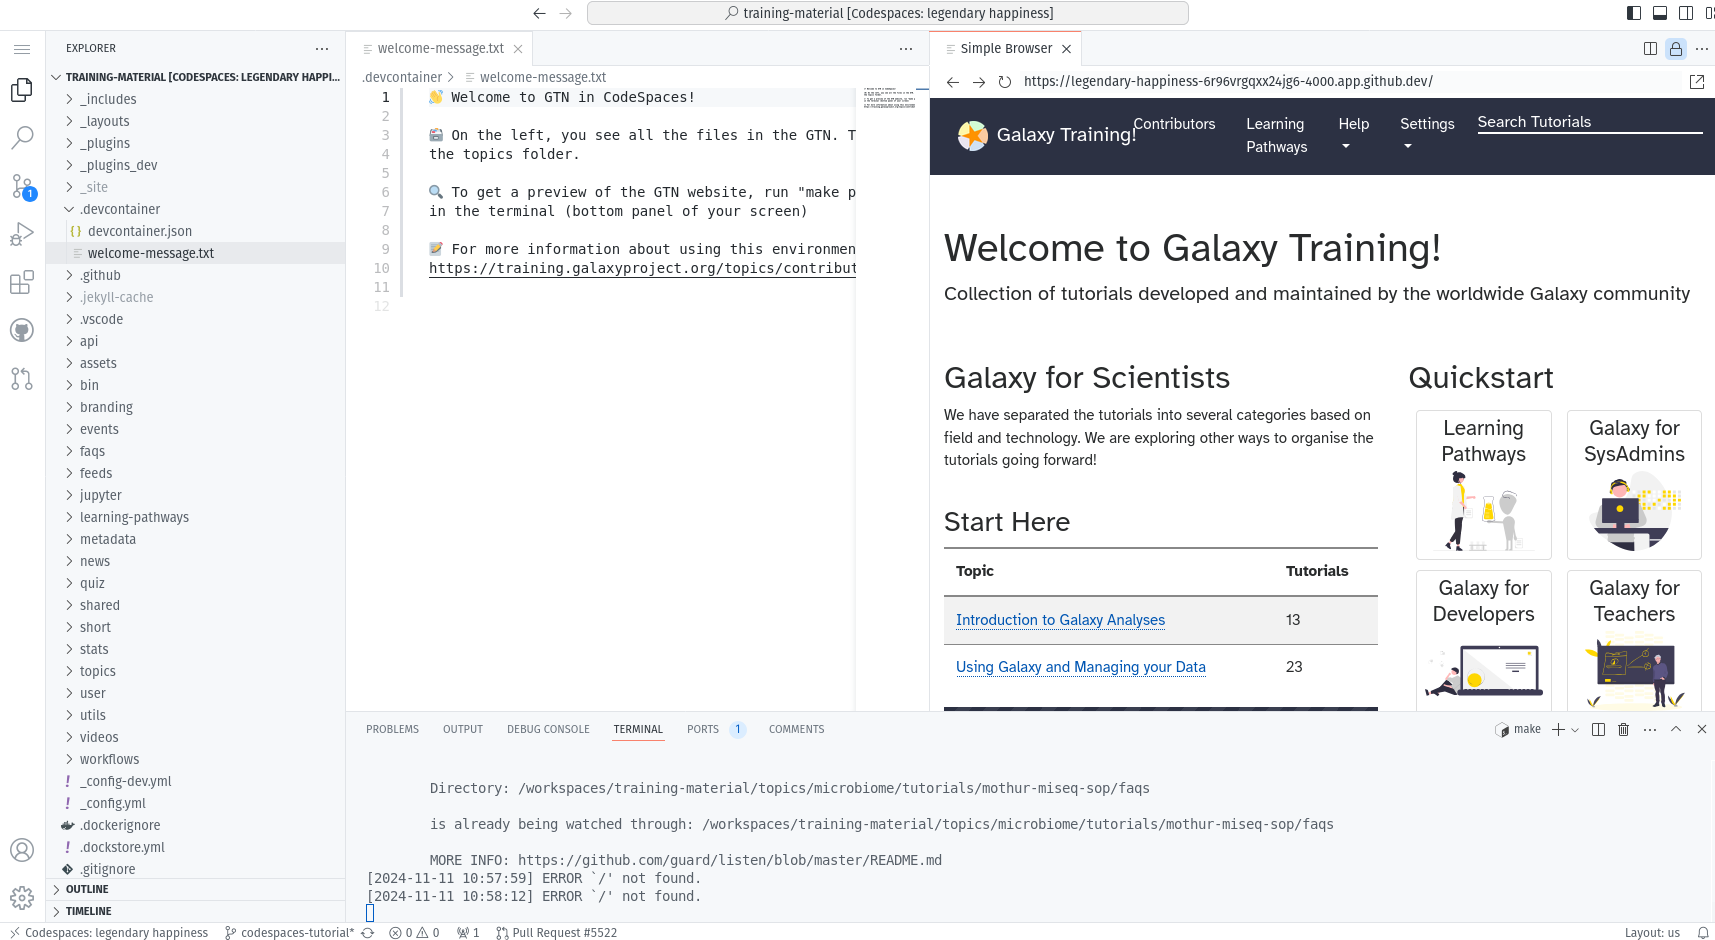
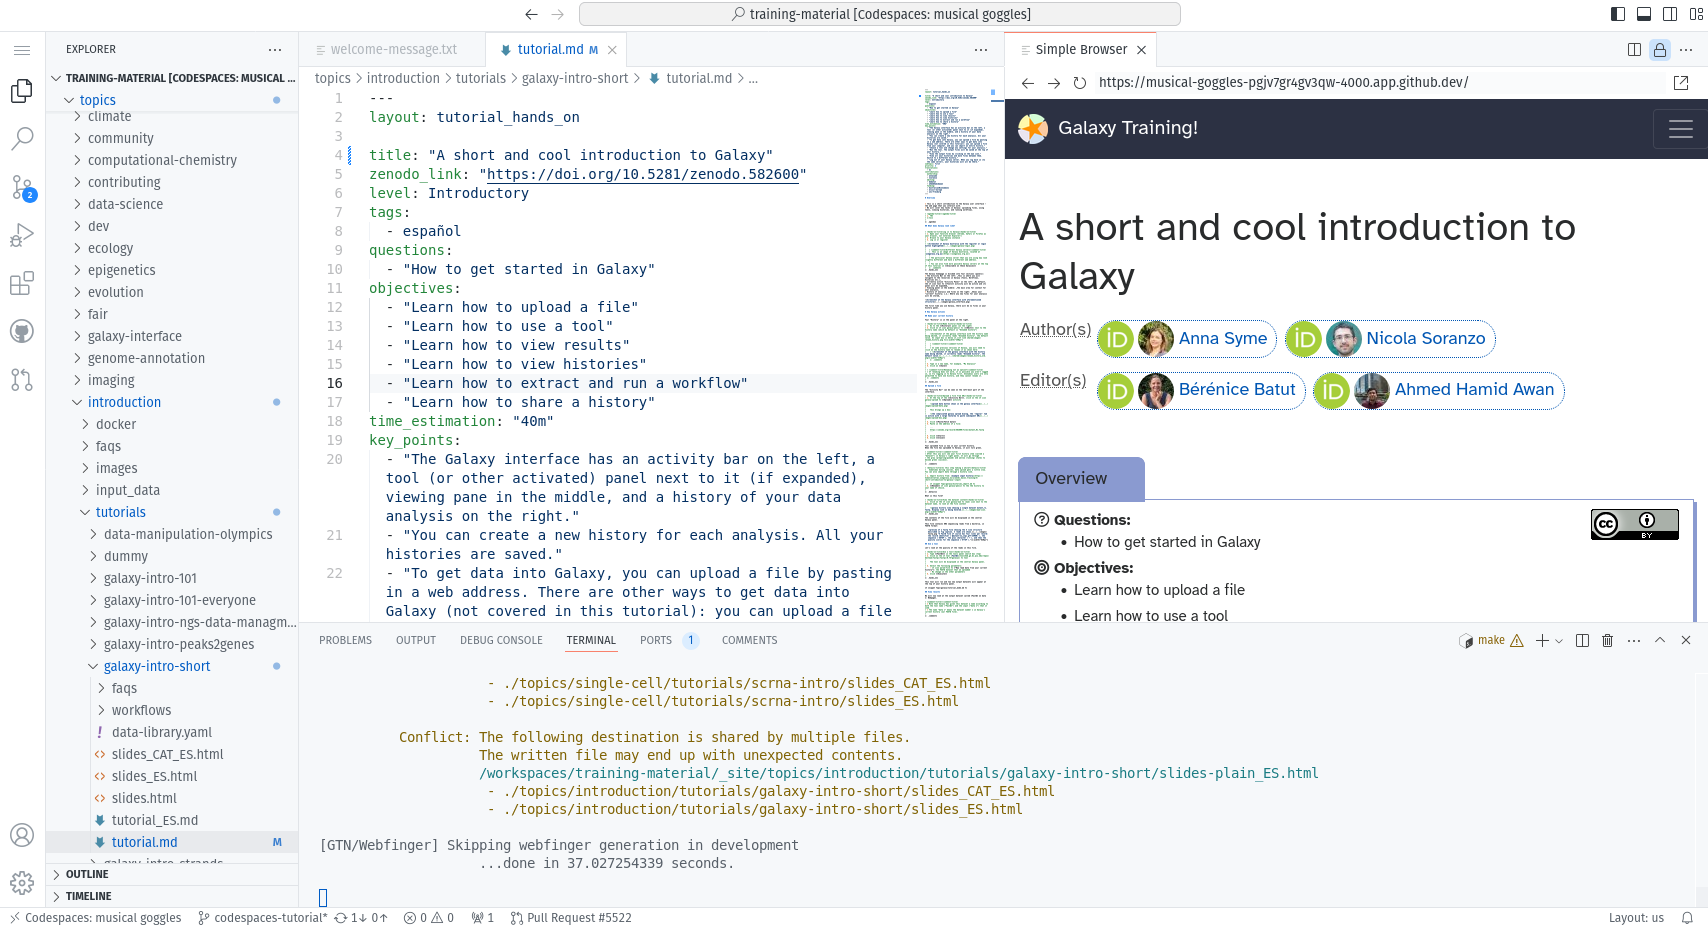
- When everything is ready, you should see something like this:


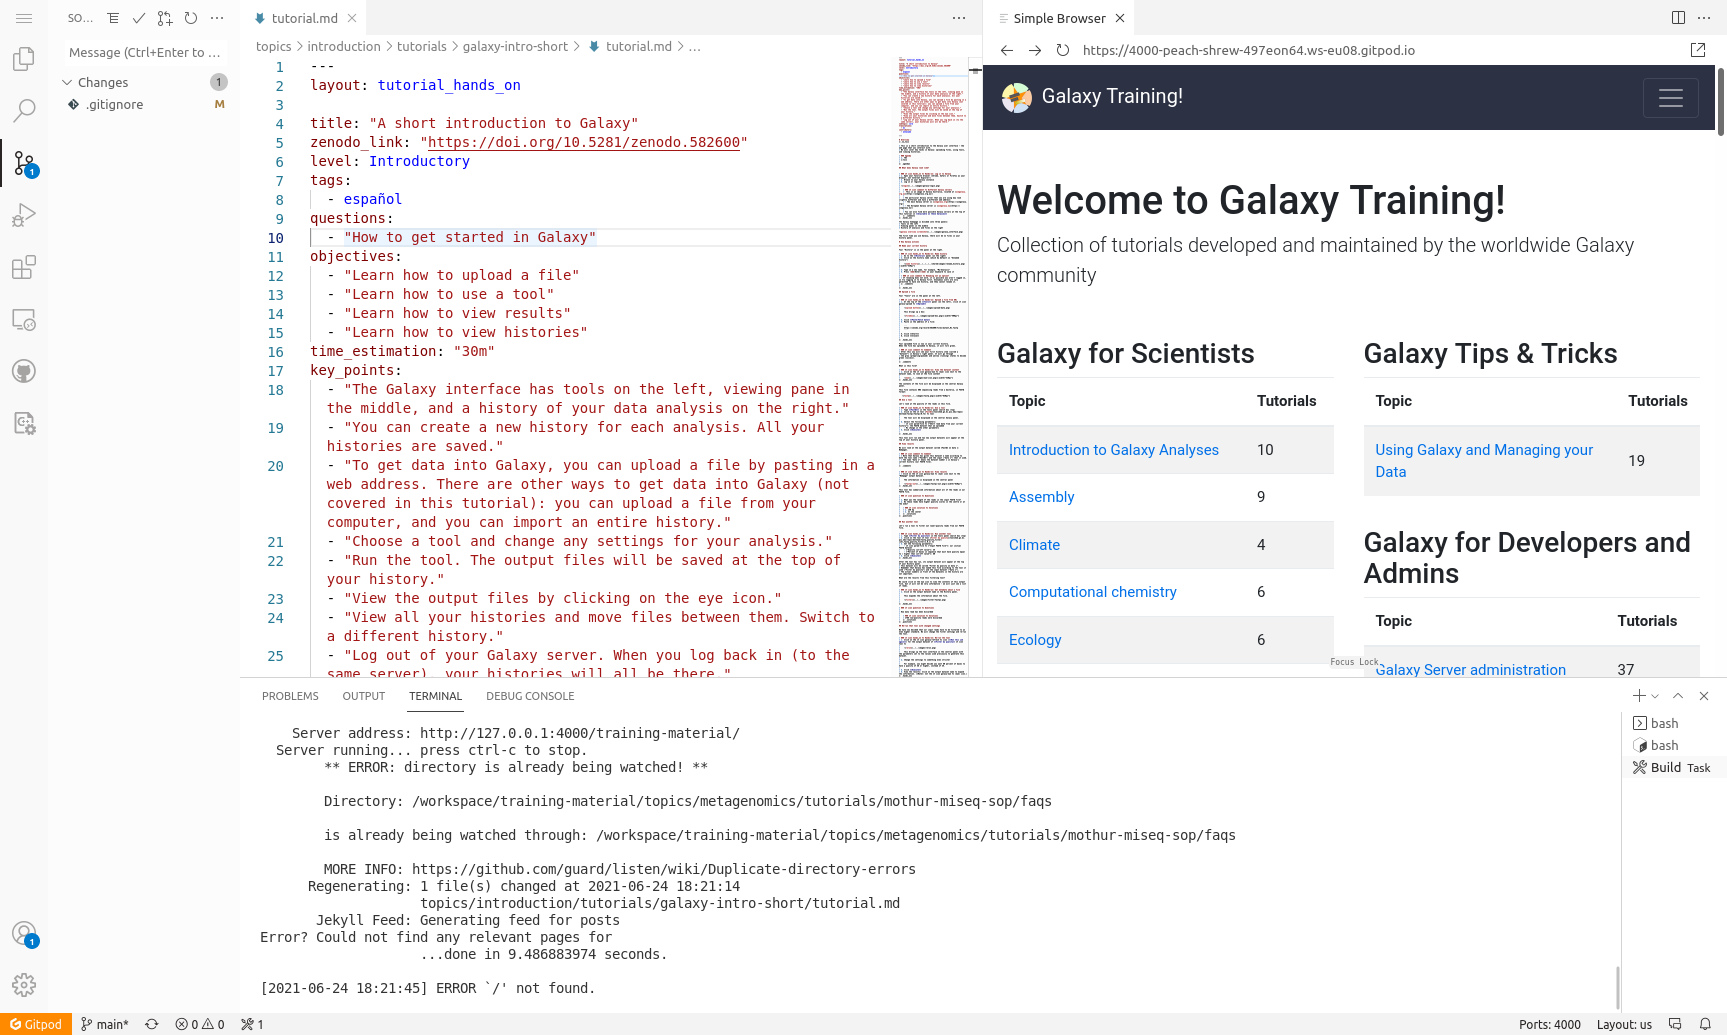
The VScode environment
Let’s have a closer look at your CodeSpaces window:
- Left: Here you see all the files in the GTN repository
- Top: This is the main window where you can view and edit files
- Bottom: Terminal window. Here you can type commands (e.g. to build the website preview) and read output and error messages.

Build and preview the GTN website
Before we start making any changes, let’s build the website and get a live preview.
Hands On: Setting up GitPod
In the terminal window (bottom), type the following command:
make preview
- This will take 2-3 minutes to complete
- When the build process is finished, a preview window will automatically open (at the top right)
- The preview will show the GTN 404 (codespace doesnt know what to show)
- Just click on Return to homepage.
If the preview window doesn’t open for you, or if you close it and want to reopen it, you can always do so as follows:
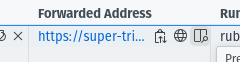
Go to the Ports tab of the bottom panel
Hover over the link in the Forwarded Address column, 3 icons should appear
Click on:
- The world/globe icon to open the GTN preview in a new window, or
- Or, click on the window icon to the right of the globe icon to preview the GTN in a tab inside the codespaces environment
If you opened the GTN preview inside the codespace, your window will now look something like this:
Some browsers block popups by default, you may need to allow CodeSpaces to show popups in your browser.


Editing Training Materials on CodeSpaces
Now that you have the codespace environment working and we have a live preview up, let’s make some changes to the GTN materials and get an instant preview.
Scenario: You have spotted a typo in one of the tutorials, and would like to fix this and see the resulting GTN webpage.
Hands On: Make and view changes
- In the preview of the GTN website, open the following tutorial:
- Topic: “Introduction to Galaxy Analyses” topic
- Tutorial: “A Short Introduction to Galaxy””
- We will edit this tutorial and watch the live preview window for the effects
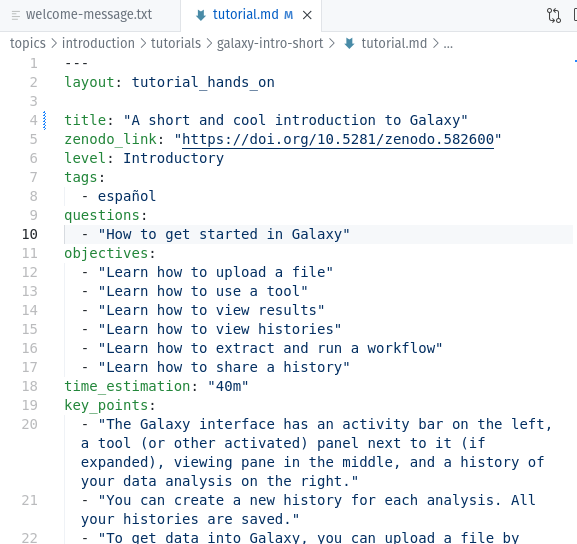
On the file browser on the left, open the following file:
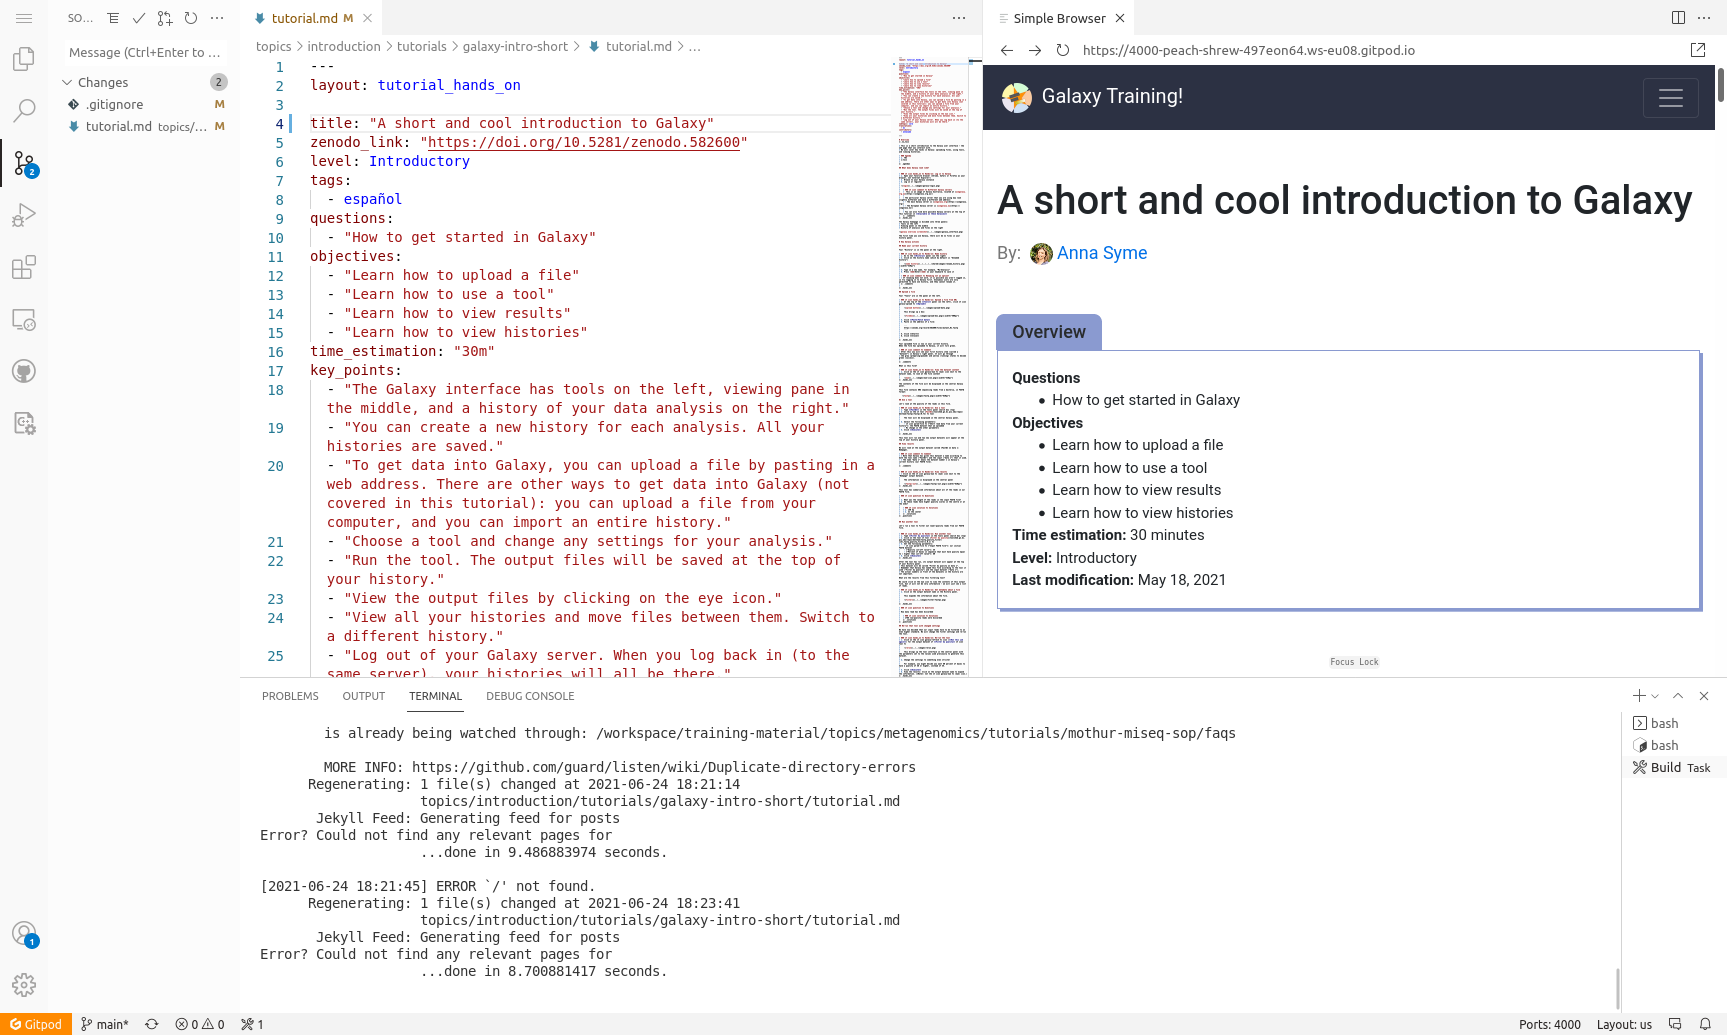
topics/introduction/tutorials/galaxy-intro-short/tutorial.md- Change the title of the tutorial
- From: “A Short Introduction to Galaxy”
- To: “A Short and Cool Introduction to Galaxy”
- Save the file
- CTRL+S to save the file
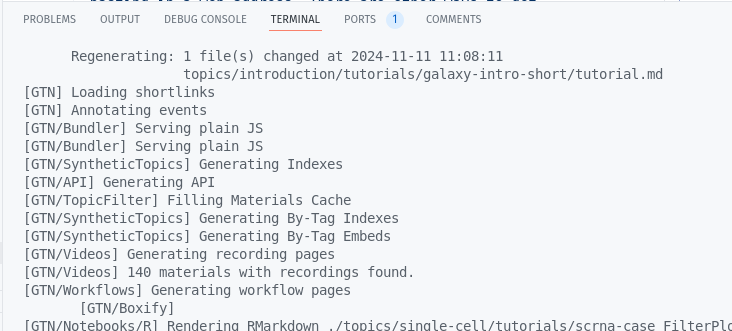
- You should immediately see a message in the terminal saying “regenerating”. CodeSpaces has detected your changes and is rebuilding the website.
- Move to the top right panel where the GTN is previewed and refresh the website
- galaxy-refresh Refresh button in front of the address bar of the preview panel
- You can also open the preview in it’s own brower tab, using the galaxy_instance button at the top-right corner of the preview window. Then you can reload the page the regular way (e.g. F5 or ctrl + r or the reload button in the browser)
It is possible that this reload button gives you the 404 again, in that case there are 2 solutions
- Right-click in the preview panel, and choose
- Chrome: “Reload Frame”
- Firefox: “This Frame -> Reload Frame”
- Open the preview in it’s own browser tab
- Click the galaxy_instance button at the top-right corner of the preview window
You should see the change you made:
In this way you can edit files in the text editor, and see the effects in the website preview.
Saving your changes back to GitHub
When you have finished your changes, it all looks good in the preview, you want to save your changes back to GitHub so that you can either continue later, or make a Pull Request to the GTN to contribute your changes.
Hands On: Comitting changesBefore you can commit your changes you have to create a branch. You have two options to preform this task:
- Option 1: via the terminal
- Hit ctrl+c if your preview was still running to stop it
- Create a new branch, commit your changes, push changes:
git checkout -b fix-title git commit -m "update tutorial title" topics/introduction/tutorials/galaxy-intro-short/tutorial.md git push origin fix-title- Option 2: via the web interface
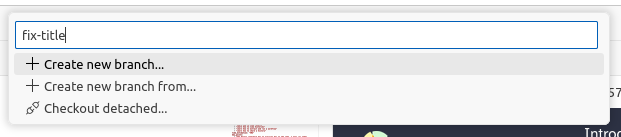
- Create a new branch:
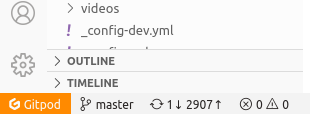
- On the bottom-left, click on the branch logo (probably labelled “main”)
- Enter
fix-titleas the name for your new branch (at top of window)- Choose “+ Create new branch…” from the dropdown
- Commit changes:
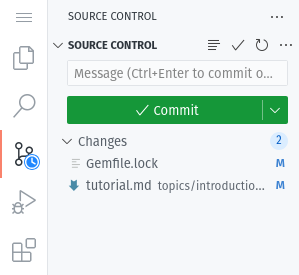
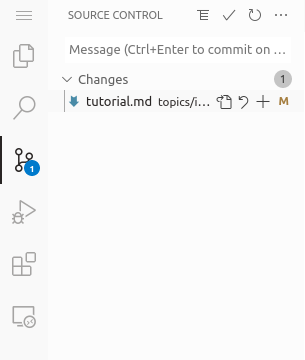
- On the left menu, click on the “changed files” tab
- You should see your changed file (
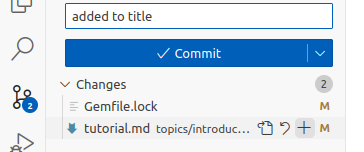
tutorial.md)- Click on the “+” icon next to the file we edited to stage changes
- Enter a commit message (top of window)
- Hit the checkmark icon below the massage to commit the changes - Publish changes
- Click the cloud button at bottom left to publish your changes
Next, we will see these changes to on your branch/fork. We will do this from outside of our codespace.
Hands On: Pushing changes to GitHub
- In your browser (outside of codespaces), navigate to the GTN GitHub page
- GitHub will helpfully show you any recent branches you’ve pushed to your fork
- Click the Compare & pull request button to create a PR for your changes

Closing your CodeSpace
Everybody gets 60 hours per month for free on CodeSpaces. Your codespace will automatically shut down after 30 minutes of inactivity, but it is always a good idea to close your CodeSpace when you are finished with it, to conserve your quotum.
Hands On: Shutting down your CodeSpace
Return to the GTN GitHub page
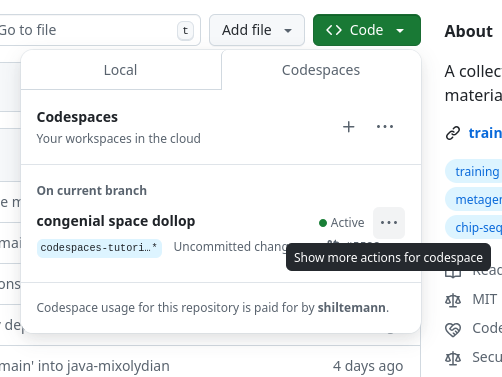
Click on the green Code button again
Under the Codespaces tab, you should see your running codespace
Click on the 3-dots menu to the right of your (randomly generated) codespace name
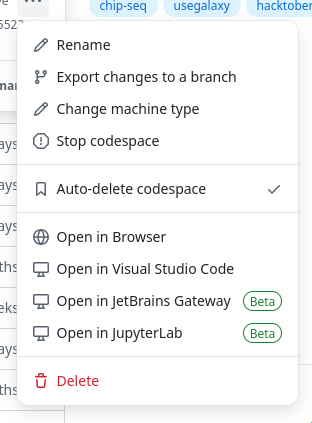
In this menu you can quit your codespace in two ways:
- Stop codespace: your changes will be kept and you can restart the codespace later
Delete your codespace. Any changes you did not commit and push to GitHub are lost.
- In this menu you can also resume a stopped codespace by simply clicking Open in Browswer
Congrats! You learned how to contribute to the GTN by using the CodeSpaces environment!
If you are working on your own training materials and want preview them online without installing anything on your computer, you can do this using GitPod!
Setting up Gitpod
Hands On: Setting up GitPod
Create a fork of the GTN GitHub repository
- Go on the GitHub repository: github.com/galaxyproject/training-material
- Click on the Fork button (top-right corner of the page)
Already have a fork of the GTN? Make sure it is up to date.
If you created your fork a long time ago, the default branch on your fork may still be called master instead of main
- Point your browser to your fork of the GTN repository
- The url will be
https://github.com/<your username>/training-material(replacingwith your GitHub username) Check the default branch that is shown (at top left).
- Does it say
main?
- Congrats, nothing to do, you can skip the rest of these steps
Does it say
master? Then you need to update it, following the instructions below- Go to your fork’s settings (Click on the gear icon called “Settings”)
- Find “Branches” on the left
- If it says master you can click on the ⇆ icon to switch branches.
- Select
main(it may not be present).- If it isn’t present, use the pencil icon to rename
mastertomain.Whenever you want to contribute something new to the GTN, it is important to start with an up-to-date branch. To do this, you should always update the main branch of your fork, before creating a so-called feature branch, a branch where you make your changes.
- Point your browser to your fork of the GTN repository
- The url will be
https://github.com/<your username>/training-material(replacing ‘your username’ with your GitHub username)You might see a message like “This branch is 367 commits behind galaxyproject/training-material:main.” as in the screenshot below.
Click the Sync Fork button on your fork to update it to the latest version.
- TIP: never work directly on your main branch, since that will make the sync process more difficult. Always create a new branch before committing your changes.
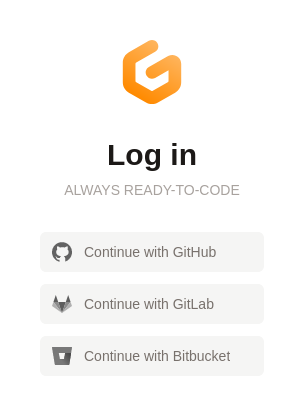
- Open your browser and navigate to gitpod.io/login
- Note: don’t leave the
/loginpart of the URL off, it will lead you to a different flavour of GitPod. We are using Gitpod classic- Log in with GitHub
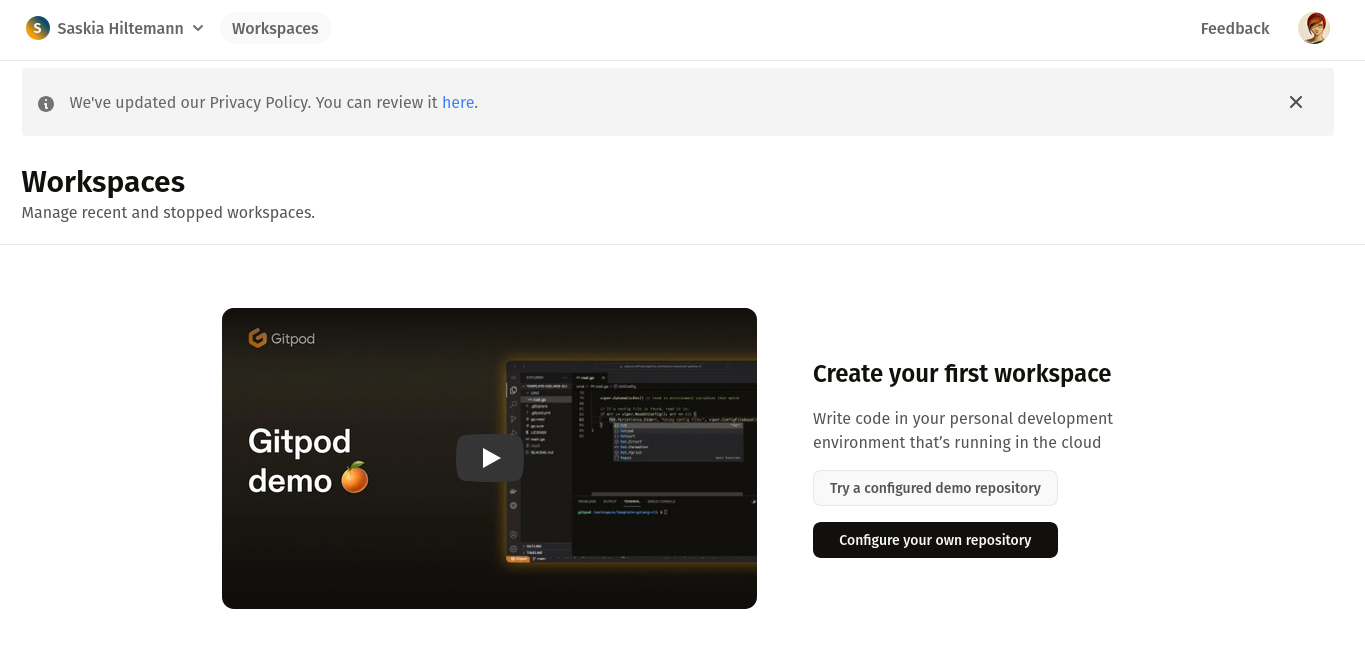
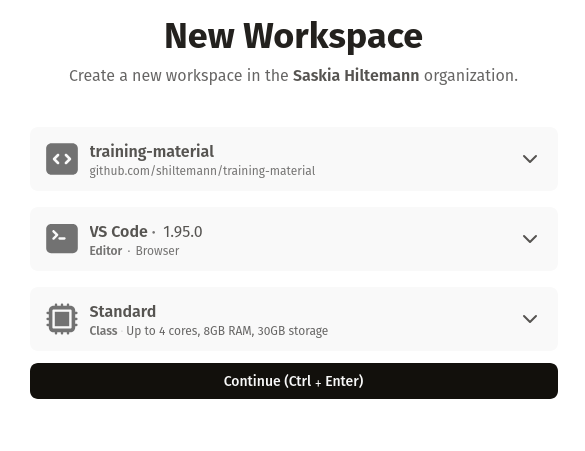
- Click on Configure your own repository under the Workspaces menu
- Under Select a repository choose your fork, e.g.
https://github.com/shiltemann/training-material- Click continue
- This will create an enviroment where you can make changes to the GTN and preview them
- Note: It can take quite some time to start up the first time (15-30 minutes)
- We can make future starts a lot faster using prebuilds (see tip box below), you can configure this now while you wait
Prebuilds can speed up the launch of your GitPod workspace after the first time. When this is enabled, starting a workspace will check if there is a previous build to reuse. This should bring startup times down to 3-5 minutes.
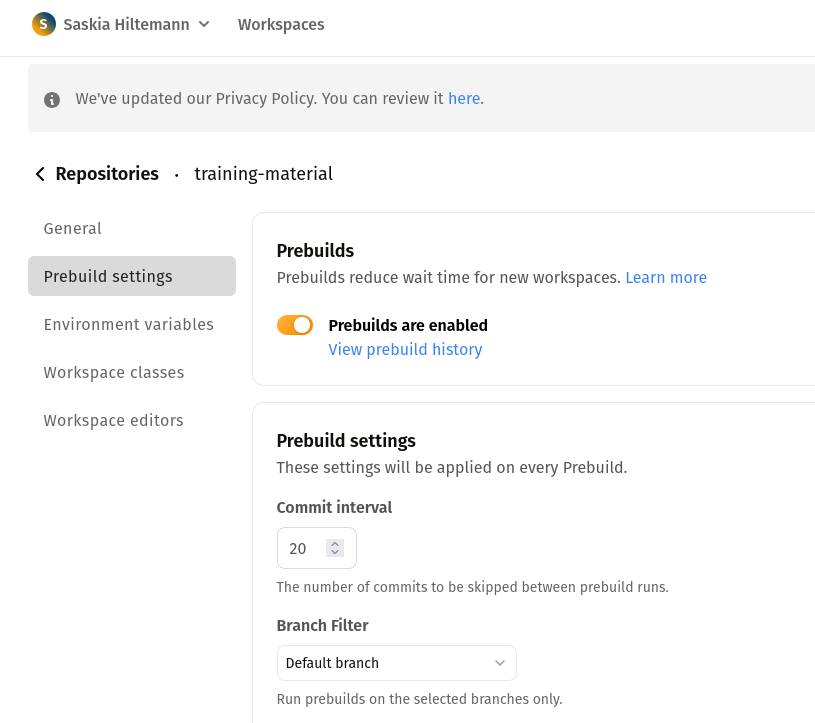
Enable Prebuilds
- On the GitPod website, click on your name in the top left of the screen
- Select Repositories
- Add your fork as a repository
- On the left, click Prebuild settings
- Click the slider in front of Prebuilds are disabled to toggle the setting
- Set Branch Filter to Default Branch
Run a prebuild now
- In GitPod, click on your name in the top left of the screen
- Select Prebuilds
- Click Run a Prebuild
- Select a Repository: your fork
- Click Run Prebuild
- This will also take a bit of time to complete
- In the future, it will automatically refresh this prebuild every 20 commits, so you only have to do this once
Note: Prebuilds expire if you haven’t used them in 7 days, so if you have taken a longer break from GTN you might have to wait longer again the first time. But otherwise it should bring the launch time down to around 3-5 minutes.
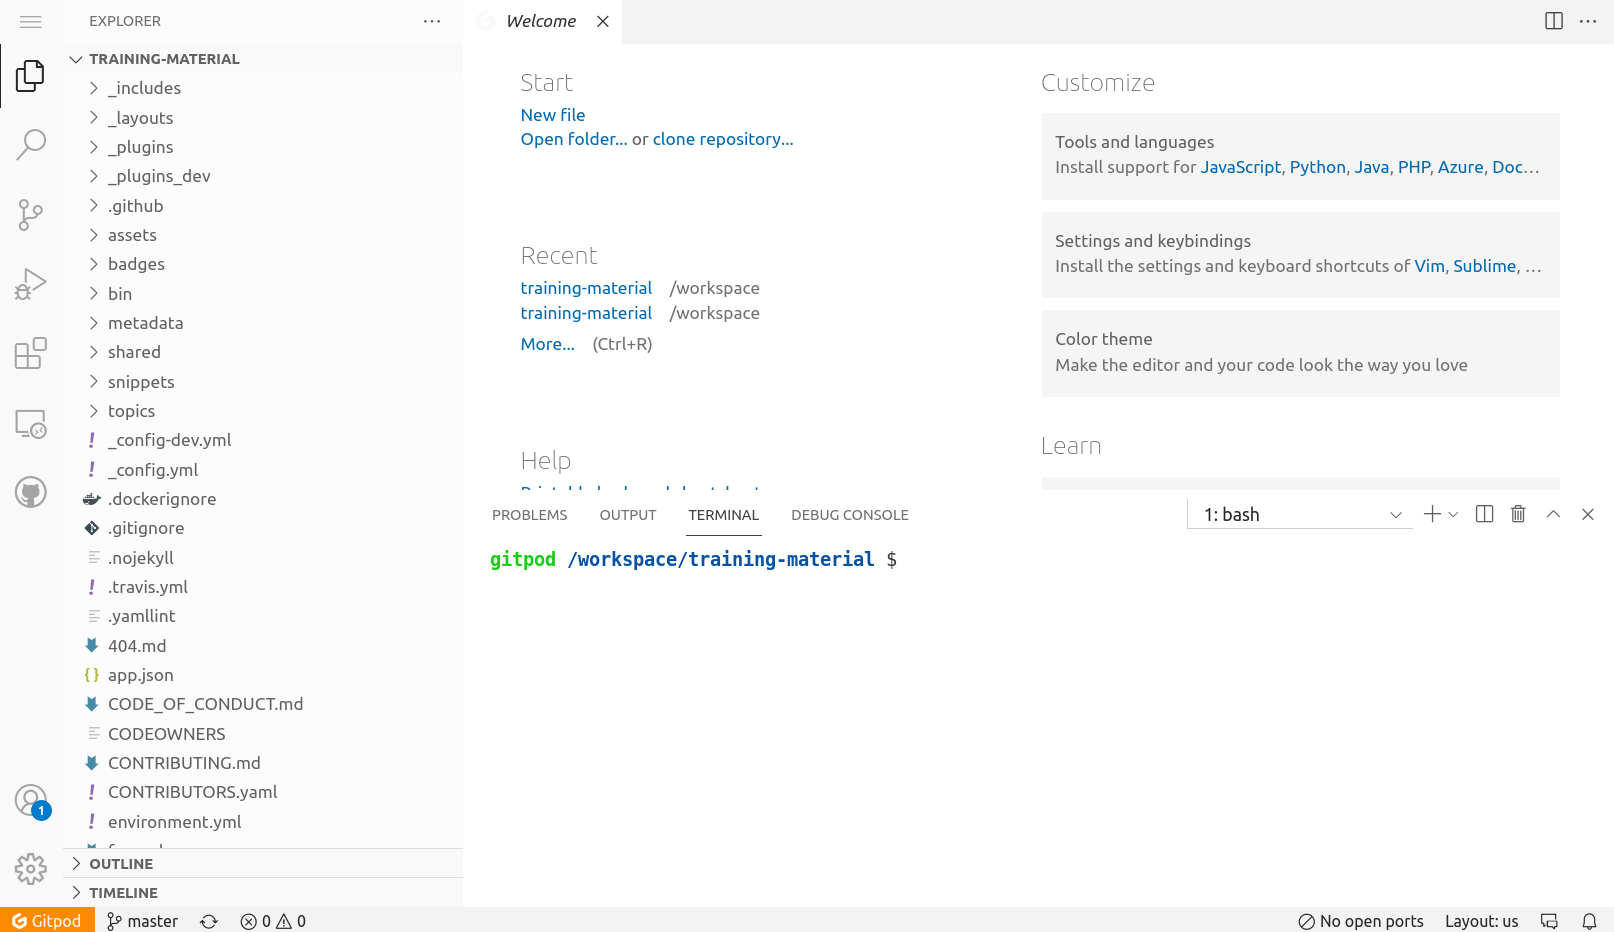
Once the setup is finished, you should see a page something like this:
- To make this even easier, you can install the GitPod browser extension
- Now it is just a single click to open any GitHub repository in GitPod

The GitPod Workspace
Let’s have a closer look at the GitPod workspace:
- Left: Here you see all the files in the GTN repository
- Top: This is the main window where you can view and edit files
- Bottom: Terminal window. Here you can type commands (e.g. to build the website preview) and read output and error messages.
Build and preview the GTN website
Before we start making any changes, let’s build the website and get a live preview.
Hands On: Setting up GitPod
In the terminal window (bottom), type the following command:
make serve-gitpod
- The first time you run this command, it will install some dependencies, so it may take a little bit of time (a few minutes)
- Next times will be a lot faster! (~30 seconds)
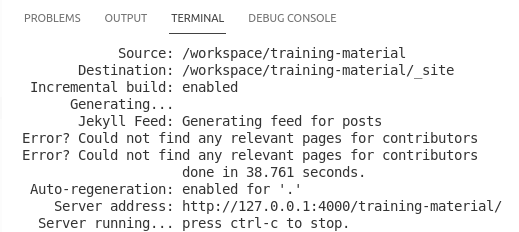
- When the build process is finished, the terminal will show you a link, and a window should popup with a preview on the right.
You may have to click the “Try Again” button if the preview was generated before the site building completed
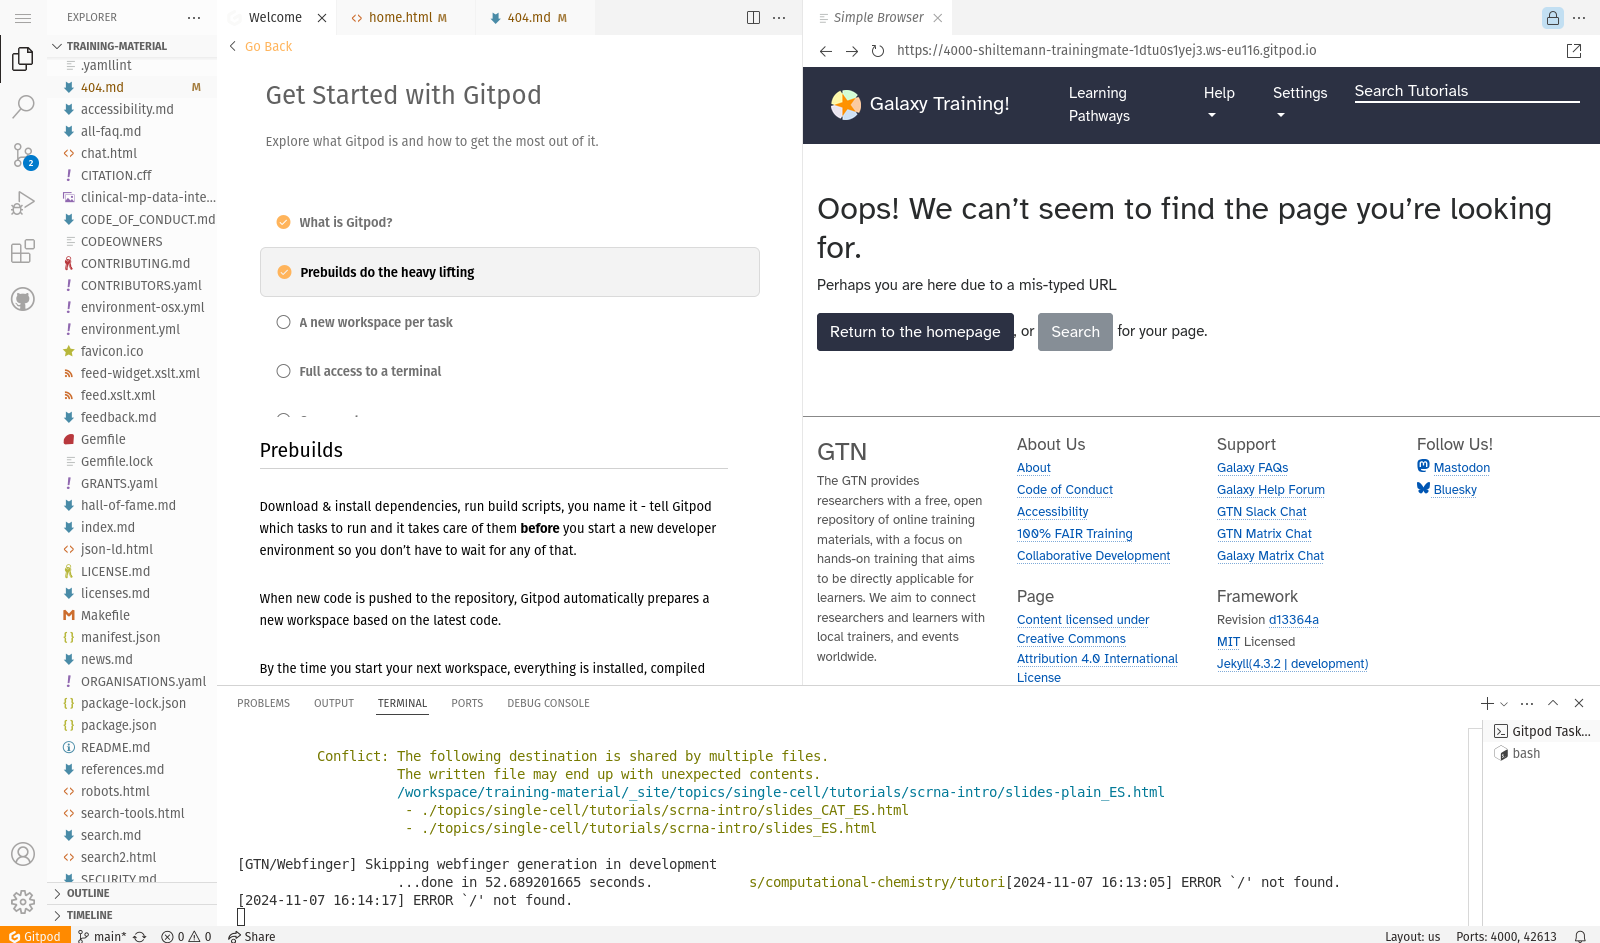
Click on the link in the terminal to see the GTN in full-screen:
Server address: http://127.0.0.1:4000/training-material/
- This will take you to a preview of the GTN website
- Note: It will take you the 404 page because GitPod doesn’t know the location of the GTN homepage, but from here you can just click the homepage button.

Editing Training Materials on GitPod
Now that you have the GitPod environment working and we have a live preview up, let’s make some changes to the GTN materials and get an instant preview.
Scenario: You have spotted a typo in one of the tutorials, and would like to fix this and see the resulting GTN webpage.
Hands On: Make and view changes
- In the preview of the GTN website, open the following tutorial:
- Topic: “Introduction to Galaxy Analyses” topic
- Tutorial: “A Short Introduction to Galaxy””
- We will edit this tutorial and watch the live preview window for the effects
On the file browser on the left, open the following file:
topics/introduction/tutorials/galaxy-intro-short/tutorial.mdYou can use the key combination ctrl-p to launch the file search dialog and simply enter the text
topics/introduction/tutorials/galaxy-intro-short/tutorial.md- Change the title of the tutorial
- From: “A Short Introduction to Galaxy”
- To: “A Short and Cool Introduction to Galaxy”
- You should immediately see a message in the terminal saying “regenerating”. GitPod has detected your changes and is rebuilding the website.
- Move to the top right panel where the GTN is previewed and refresh the frame
- galaxy-refresh Refresh button in front of the address bar of the preview panel
- You can also open the preview in it’s own brower tab, using the galaxy_instance button at the top-right corner of the preview window. Then you can reload the page the regular way (e.g. F5 or ctrl + r or the reload button in the browser)
- You should see the change you made:


In this way you can edit files in the text editor, and see the effects in the website preview.
Saving your changes back to GitHub
When you have finished your changes, it all looks good in the preview, you want to save your changes back to GitHub so that you can either continue later, or make a Pull Request to the GTN to contribute your changes.
Hands On: Save changes
- Option 1: via the terminal
- Hit ctrl+c if your preview was still running to stop it
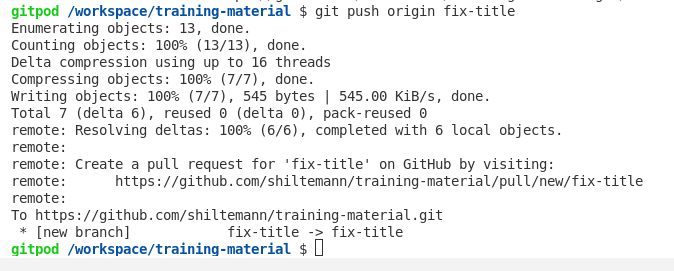
- Create a new branch, commit your changes, push changes:
git checkout -b fix-title git commit -m "update tutorial title" topics/introduction/tutorials/galaxy-intro-short/tutorial.md git push origin fix-title- Option 2: via the web interface
- Create a new branch:
- On the bottom-left, click on the branch logo (probably labelled “main”)
- Enter
fix-titleas the name for your new branch (at top of window)- Choose “+ Create new branch…” from the dropdown
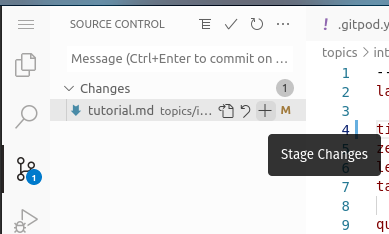
- Commit changes:
- On the left menu, click on the “changed files” tab
- Click on the “+” icon next to the file we edited to stage changes
- Hit the checkmark icon at the top to commit the changes
- Enter a commit message (top of window) - Publish changes
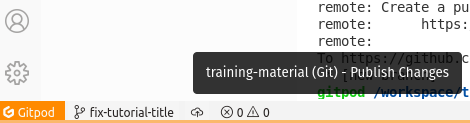
- Click the cloud button at bottom left to publish your changes
- Your changes are now saved to your fork, and you can make a PR via the GitHub interface.
- If you used option 1 and want to do that right away, you can click on the link in the terminal:
If this is your first time using GitPod, you may need to grant permissions to let GitPod push to your GitHub fork
This will take you through a process to authorize GitPod, and set permissions
If it doesn’t take you to GitPod’s permission page because your browser blocks popups, you can set them on this page.
Closing your GitPod Workspace
Everybody gets 50 hours per month for free on GitPod, so it is wise to close your GitPod workspace when you are finished with it, to conserve your quotum.
Hands On: Shutting down your GitPod workspace
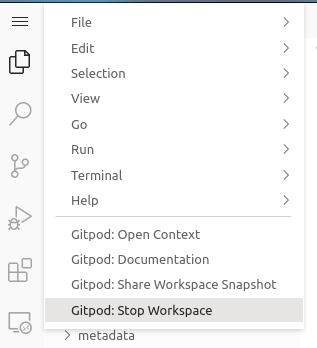
- Click on the menu button at the top left corner of the screen
- Choose “Gitpod: Stop Workspace”
If you want to run the entire GTN material website locally or test your new training material you can do this!
Currently, the website is generated from the metadata and the tutorials using Jekyll, a simple static site builder. We can use Jekyll to run a server to check if the tutorial is correctly added and rendered.
Installation of the requirements
The first step is to install the needed tools inside a conda environment. A conda environment is a directory that contains a specific collection of packages. For example here to run the website, we need ruby, pandas, requests, etc. By creating a conda environment and installing the needed tools there, we do not affect your main installation.
This step has to be done once.
We also need to make sure that a couple of other utilities and build requirements are present: git, curl & make. The easiest way to install these is with your package manager of choice - i.e. yum, apt, brew etc.
Hands On: Install the requirements
- Open a Terminal
Use your package manager to install
git,curlandmake
- For Debian/Ubuntu:
sudo apt update && sudo apt install git curl make- For Fedora/CentOs/RedHat:
sudo yum install git curl make- Clone the training material GitHub repository:
git clone --depth 1 --branch main https://github.com/galaxyproject/training-material.git- Note: The GTN repo is quite large, therefore we recommend to use the
--depth 1 --branch mainflags here. This will clone only the main branch, and only the most recent revision, rather than the full history.- Navigate to the the cloned repository
cd training-materialSet up the conda environment (see tip box below for an method without conda)
It will install some needed tools (ruby, nodejs, etc) in a protected environment, without interfering with the existing tools or versions.
- Install conda (if not already installed):
make install-conda- (You may need to exit the terminal and re-open for conda to be recognised. Navigate back to the same place.)
- Create the
galaxy_training_materialconda environment:make create-env- Install Jekyll and related modules into the conda environment:
make installIf you encounter an error about libxml2 on Linux, please try to install
libxml2-dev(executingsudo apt install libxml2-dev) if on Debian/Ubuntu orlibxml2-devel(executingsudo yum install libxml2-devel) if on Fedora/RedHat/CentOS, and re-runmake install.
If you do not want to use conda, you can also run jekyll directly using Ruby and RVM:
- Install RVM (Ruby Version Manager) on your system (instructions)
- For Ubuntu:
sudo apt-get install software-properties-common sudo apt-add-repository -y ppa:rael-gc/rvm sudo apt-get update sudo apt-get install rvm sudo usermod -a -G rvm $USER- Install a Ruby version
rvm install ruby-3.2.4- Create ruby GTN environment
rvm use 3.2.4@gtn --create- Install dependencies
bundle install- Run the GTN
- Always make sure your ruby environment is activated
rvm use 3.2.4@gtnand up-to-datebundle install- Get a GTN preview
bundle exec jekyll serve --incremental- Quicker build preview (but certain features are disabled)
bundle exec jekyll serve --strict_front_matter -d _site/training-material --incremental --config _config.yml,_config-dev.yml- Changes now showing?
- Stop the preview, run
make clean,bundle install, and rebuild it
Checking the website generation
Once Jekyll and its modules are installed in our conda environment, we can check the generation of the website locally:
Hands On: Checking the website generation locally
- Run a local Jekyll server with
make serve-quick(if you use a Macbook, trymake serve-quick HOST=127.0.0.1for forcing Jekyll to use the standard local loopback address.)- Visualize at http://localhost:4000/training-material/
- Edit one of the tutorials:
- For example, open
topics/introduction/tutorials/galaxy-intro-peaks2genes/tutorial.mdin a text editor of your choice.- Make some changes to the Introduction paragraph, and save the file.
- Refresh the tutorial page in your browser until you can see the changes you made.
- this may take a little bit of time; in the terminal you can monitor when the regeneration is complete
With make serve-quick, a local Jekyll server will run in background. It will check the changes and regenerate the website accordingly. You may need to reload the page to see the changes (and sometimes to wait 1-2 minutes).
Use
make serveinstead ofmake serve-quickto get all plugins, but also configure the post, host and pass additional flags. This however can be quite slow.Need to speed up the cloning step? You coud fetch only the latest commit of the main branch:
$ git clone https://github.com/galaxyproject/training-material.git --depth 1 --branch mainRunning on a VM or remote machine?
If you are not running this on your local machine, but e.g. on a VM, you may need to configure a webserver to serve the website.
Below is an example NGINX configuration (e.g. in
/etc/nginx/sites-enabled/default)location /training-material/ { root /home/ubuntu/training-material/_site/; }Change the
rootpath above to wherever you cloned the training material folder
Stopping the server
Once you are done, you can stop the server and clean your repository.
Hands On: Stopping the server
- Stop the server with CTRL-C
- Clean the repository:
make clean
Conclusion
Using the container-based method, you can edit and preview GTN Training Material locally on you computer.
Prerequisites
You will need the GTN Training Material source code and a container platform. If you wish to contribute your changes, you will also need git. The exact installation steps vary a little depending on your operating system.
For this tutorial, Docker will be used as container platform, as it is easy to use and available for all major operating systems.
Other container platforms should work as well. Beware with rootless container platform installations, you have to pay special attention to the user namespace mode and thus to the UID and GID configuration in order to preserve correct file ownership information.
For Linux users
Docker
I recommend to install only Docker Engine (not Docker Desktop) for Linux users. Just follow the official setup documentation for your specific distribution.
An common practise is to assign your current user to the docker group. Please do not! This implies inherent security concerns, as it basically gives your current user unrestricted root access. Learn more: https://docs.docker.com/engine/security/#docker-daemon-attack-surface.
Git
Use the package manager of your specific distribution in order to install git. All major linux distributions do have git in their official package sources. Please consult your distros documentation for help with package installation.
Examples
# For Debian based distros, using apt:
sudo apt install git

# For Fedora based distros, using yum:
sudo yum install git

# For Fedora based distros, using dnf:
sudo dnf install git

# For Arch based distros, using pacman
sudo pacman -S git
For Windows users
On windows you have multiple virtualization options in order to run linux containers. You should use the WSL2 method for various reasons. This tutorial is only tested for the WSL2 method only.
Additionally, to work with source code located within WSL2, I recommend installing VS Code.
WSL2
Please follow the official setup documentation for installing WSL2.
TL;DR
Open PowerShell by right-clicking on the windows logo in taskbar and run:
wsl --install
Docker
Please follow the official setup documentation for installing Docker Desktop on Windows.
Git
With the installation of Docker, an Ubuntu image has been installed on your system, which already includes git. No additional steps needed.
VS Code
Please follow the official setup documentation for installing VS Code. This is useful for windows users as it is one of the simplest methods to work with files located in the WSL2 (linux) file system.
For MacOS users
Docker
Please follow the official setup documentation for installing Docker Desktop on MacOS.
Git
Run a terminal and type a git command, e.g. git --version. If git is not installed on your system yet, MacOS will automatically prompt you to install it through Xcode. Just follow the on-screen instructions.
Preparation
Command line utilities
All following commands are meant to be entered in a shell. For Linux and MacOS, e.g. you can use a terminal application.
Windows users must not use the PowerShell, but the Ubuntu app that was automatically installed alongside WSL2 and Docker. If you are running it the first time, create a username and a password. Beware that files created in the Ubuntu app are located on a separate file system. If you need to access them from windows, you may open the explorer and choose the “Linux” Bookmark in the left sidebar. However, usually you should not need to access any of these files through windows.
Git basics
In order to be able to contribute, you will need to have a Github account and you will need to create a fork of the GTN Training Material Repository. This can be simply done via Browser on the GTN Training Material Github page.
You will need to create a SSH key pair or provide other authentication vectors in order to push changes to your fork. Read more about this in the official documentation.
If this is your first time using git, please read the Github contribution guide.
Clone the GTN Training Material Repository
For Linux and MacOS users, open your favorite terminal application. For Windows users, open the Ubuntu app which provides you with a terminal, as well. Run:
# You may want to replace the address with your forks address
# You may want to use SSH based clone if you want to contribute
git clone --depth 1 --branch main https://github.com/galaxyproject/training-material.git
Configure environment
Switch into the cloned repository:
# "training-material" is the default name. If you have changed your forks name or if you provided a directory to clone into, please edit accordingly.
cd training-material
For Linux and MacOS users, you may open the directory in your favorite IDE.
For Windows users, if you have installed VS Code prior, run following command to open the directory in VS Code:
# For windows users
code .
Create a .env file. In this file, you may add several environment variables:
| Key | Description | Default |
|---|---|---|
| COMPOSE_PROJECT_NAME | The project name to be used for composition, should be unique | gtn-dev |
| GTN_RUBY_TAG | The Ruby Tag to be used for the container | 3-bookworm |
| GTN_UID | The effective UID to use within the container, should match your current UID | 1000 |
| GTN_GID | The effective GID to use within the container, should match your current GID | 1000 |
| GTN_PORT | The Port on which GTN will be accessible, should not be already bound | 4000 |
| GTN_RELOAD_PORT | The Port on which the reload server will listen, should not be already bound | 4001 |
If you don’t know your current UID and GID you may run:
# To find out your UID
id -u

# To find out your GID
id -g
Your .env should have a form like:
# KEY=VALUE
# e.g.:
COMPOSE_PROJECT_NAME=galaxytraining
Using the composition
I recommend using the command line, but you can also do lifecycle operations via docker desktop after you have run the composition the first time.
Beware, the first time the composition is starting, it may take some time until everything is setup entirely.
When the composition has started, you may access the GTN Training Material on the port you provided, per default this is 4000: http://localhost:4000/training-material/.
Starting
If you are done configuring, you may start the composition
# To start it with attached terminal
sudo docker compose up

# To start it with detached terminal
sudo docker compose up -d
If you have started the composition detached, you may retrieve the logs via
# -f will follow the logs, if you want to disconnect, press CTRL+C
sudo docker compose logs -f
Stopping
If you have started the composition with attached terminal, just press CTRL+C.
If you have started the composition detached, you may run:
sudo docker compose stop
Removing
If you want to remove associated containers and resources, you may run:
sudo docker compose down
If you have volumes involved, you may run this command with the -v flag in order to remove the volumes as well.
You've Finished the Tutorial
Key points
GitHub CodeSpaces can be used to change and preview the GTN training materials without installing anything on your machine
Everybody gets 60 free hours per month on CodeSpaces
GitPod can be used to serve the GTN training materials
Checking the GTN website can also be done locally
Frequently Asked Questions
Have questions about this tutorial? Have a look at the available FAQ pages and support channelsFeedback
Did you use this material as an instructor? Feel free to give us feedback on how it went.
Did you use this material as a learner or student? Click the form below to leave feedback.

Citing this Tutorial
- Saskia Hiltemann, Bérénice Batut, Björn Grüning, Preview the GTN website as you edit your training material (Galaxy Training Materials). https://training.galaxyproject.org/training-material/topics/contributing/tutorials/rendering_gtn/tutorial.html Online; accessed TODAY
- Hiltemann, Saskia, Rasche, Helena et al., 2023 Galaxy Training: A Powerful Framework for Teaching! PLOS Computational Biology 10.1371/journal.pcbi.1010752
- Batut et al., 2018 Community-Driven Data Analysis Training for Biology Cell Systems 10.1016/j.cels.2018.05.012
@misc{contributing-rendering_gtn,
author = "Saskia Hiltemann and Bérénice Batut and Björn Grüning",
	title = "Preview the GTN website as you edit your training material (Galaxy Training Materials)",
	year = "",
	month = "",
	day = "",
	url = "\url{https://training.galaxyproject.org/training-material/topics/contributing/tutorials/rendering_gtn/tutorial.html}",
	note = "[Online; accessed TODAY]"
}
@article{Hiltemann_2023,
	doi = {10.1371/journal.pcbi.1010752},
	url = {https://doi.org/10.1371%2Fjournal.pcbi.1010752},
	year = 2023,
	month = {jan},
	publisher = {Public Library of Science ({PLoS})},
	volume = {19},
	number = {1},
	pages = {e1010752},
	author = {Saskia Hiltemann and Helena Rasche and Simon Gladman and Hans-Rudolf Hotz and Delphine Larivi{\`{e}}re and Daniel Blankenberg and Pratik D. Jagtap and Thomas Wollmann and Anthony Bretaudeau and Nadia Gou{\'{e}} and Timothy J. Griffin and Coline Royaux and Yvan Le Bras and Subina Mehta and Anna Syme and Frederik Coppens and Bert Droesbeke and Nicola Soranzo and Wendi Bacon and Fotis Psomopoulos and Crist{\'{o}}bal Gallardo-Alba and John Davis and Melanie Christine Föll and Matthias Fahrner and Maria A. Doyle and Beatriz Serrano-Solano and Anne Claire Fouilloux and Peter van Heusden and Wolfgang Maier and Dave Clements and Florian Heyl and Björn Grüning and B{\'{e}}r{\'{e}}nice Batut and},
	editor = {Francis Ouellette},
	title = {Galaxy Training: A powerful framework for teaching!},
	journal = {PLoS Comput Biol}
}
Funding
These individuals or organisations provided funding support for the development of this resource
Congratulations on successfully completing this tutorial!


Developing GTN training materialThis tutorial is part of a series to develop GTN training material, feel free to also look at:
- Contributing to the Galaxy Training Network with GitHub
- Overview of the Galaxy Training Material
- Contributing with GitHub via its interface
- Generating PDF artefacts of the website
- GTN Metadata
- Teaching Python
- Principles of learning and how they apply to training and teaching
- Adding Quizzes to your Tutorial
- Adding auto-generated video to your slides
- Preview the GTN website as you edit your training material
- Including a new topic
- Updating diffs in admin training
- Tools, Data, and Workflows for tutorials
- Creating Interactive Galaxy Tours
- Design and plan session, course, materials
- Creating a new tutorial
- Single Cell Publication - Data Analysis
- Single Cell Publication - Data Plotting
- FAIR Galaxy Training Material
- Creating content in Markdown
- Creating Slides
- Updating tool versions in a tutorial