External Authentication
| Author(s) |
|
| Reviewers |
|
OverviewQuestions:
Objectives:
How can I connect Galaxy with CAS, SAML, etc.
Requirements:
be familiar with configuring Galaxy to use an upstream (proxy) authentication provider
be able to log in to your Galaxy server with a file-configured user.
- slides Slides: Ansible
- tutorial Hands-on: Ansible
- slides Slides: Galaxy Installation with Ansible
- tutorial Hands-on: Galaxy Installation with Ansible
Time estimation: 30 minutesSupporting Materials:Published: Jan 29, 2019Last modification: Oct 18, 2022License: Tutorial Content is licensed under Creative Commons Attribution 4.0 International License. The GTN Framework is licensed under MITpurl PURL: https://gxy.io/GTN:T00007version Revision: 14
Overview
For this exercise we will use a basic password file method for authenticating - this is probably not a very useful method in production, but it demonstrates how the proxy server can be configured to provide the correct header to Galaxy, and how Galaxy integrates with upstream authentication providers. This same method can be used with NGINX and Apache modules for CAS or SAML authentication.
Agenda
Configuring Authentication
Hands On: Configuring everything
- Edit the galaxy.j2 template file in the templates/nginx directory and update the main location block defined for serving galaxy. Add the parameters:
auth_basic galaxy;auth_basic_user_file /etc/nginx/passwd;proxy_set_header HTTP_REMOTE_USER $remote_user;proxy_set_header HTTP_GX_SECRET SOME_SECRET_STRING;It should look like:
@@ -14,6 +14,10 @@ + auth_basic galaxy; + auth_basic_user_file /etc/nginx/passwd; + proxy_set_header HTTP_REMOTE_USER $remote_user; + proxy_set_header HTTP_GX_SECRET SOME_SECRET_STRING; } # Static files can be more efficiently served by Nginx. Why send theIf you haven’t worked with diffs before, this can be something quite new or different.
If we have two files, let’s say a grocery list, in two files. We’ll call them ‘a’ and ‘b’.
Code In: Old$ cat old
🍎
🍐
🍊
🍋
🍒
🥑Code Out: New$ cat new
🍎
🍐
🍊
🍋
🍍
🥑We can see that they have some different entries. We’ve removed 🍒 because they’re awful, and replaced them with an 🍍
Diff lets us compare these files
$ diff old new
5c5
< 🍒
---
> 🍍
Here we see that 🍒 is only in a, and 🍍 is only in b. But otherwise the files are identical.
There are a couple different formats to diffs, one is the ‘unified diff’
$ diff -U2 old new
--- old	2022-02-16 14:06:19.697132568 +0100
+++ new	2022-02-16 14:06:36.340962616 +0100
@@ -3,4 +3,4 @@
 🍊
 🍋
-🍒
+🍍
 🥑
This is basically what you see in the training materials which gives you a lot of context about the changes:
--- oldis the ‘old’ file in our view+++ newis the ‘new’ file- @@ these lines tell us where the change occurs and how many lines are added or removed.
- Lines starting with a - are removed from our ‘new’ file
- Lines with a + have been added.
So when you go to apply these diffs to your files in the training:
- Ignore the header
- Remove lines starting with - from your file
- Add lines starting with + to your file
The other lines (🍊/🍋 and 🥑) above just provide “context”, they help you know where a change belongs in a file, but should not be edited when you’re making the above change. Given the above diff, you would find a line with a 🍒, and replace it with a 🍍
Added & Removed Lines
Removals are very easy to spot, we just have removed lines
--- old	2022-02-16 14:06:19.697132568 +0100
+++ new	2022-02-16 14:10:14.370722802 +0100
@@ -4,3 +4,2 @@
 🍋
 🍒
-🥑
And additions likewise are very easy, just add a new line, between the other lines in your file.
--- old	2022-02-16 14:06:19.697132568 +0100
+++ new	2022-02-16 14:11:11.422135393 +0100
@@ -1,3 +1,4 @@
 🍎
+🍍
 🍐
 🍊
Completely new files
Completely new files look a bit different, there the “old” file is
/dev/null, the empty file in a Linux machine.$ diff -U2 /dev/null old
--- /dev/null 2022-02-15 11:47:16.100000270 +0100
+++ old 2022-02-16 14:06:19.697132568 +0100
@@ -0,0 +1,6 @@
+🍎
+🍐
+🍊
+🍋
+🍒
+🥑And removed files are similar, except with the new file being /dev/null
--- old	2022-02-16 14:06:19.697132568 +0100
+++ /dev/null	2022-02-15 11:47:16.100000270 +0100
@@ -1,6 +0,0 @@
-🍎
-🍐
-🍊
-🍋
-🍒
-🥑Add the
auth_basicandauth_basic_user_filelines to yourlocation /reports/
auth_basicenables validation of username and password using the “HTTP Basic Authentication” protocol. Its valuegalaxyis used as a realm name to be displayed to the user when prompting for credentials.auth_basic_user_filespecifies the file that keeps usernames and passwords.proxy_set_headeraddsHTTP_REMOTE_USERto the special variables passed by nginx to Galaxy, with value$remote_user, which is a nginx embedded variable containing the username supplied with the Basic authentication.
GX_SECRETis added as a header for security purposes, to prevent any other users on the system impersonating nginx and sending requests to Galaxy. NGINX and other webservers like Apache will strip any user-sentREMOTE_USERheaders, as that header defines the authenticated user. If you can talk directly to Galaxy (e.g. via curl) and provide theREMOTE_USERheader, you can impersonate any other use. While having Galaxy listen on127.0.0.1prevents any requests from outside of the system reaching Galaxy, anyone on the system can still send requests to that port. Here you can choose to switch to a unix socket with permissions only permitting Galaxy and Nginx to connect.GX_SECRETadds additional security as it needs to matchremote_user_secretin your galaxy configutation.Users can bypass the authentication only if they can talk directly to the gunicorn processes (if you have socket/http: 0.0.0.0, or if it is directly responsible for serving galaxy, and there is no proxy.) This can happen mostly when some users have command line access to the Galaxy server, which is considered a bad practice.
Add a pre_task using the
pipmodule which installs the librarypasslib, which is required forhtpasswd.Add a pre_task using the
htpasswdmodule which sets up a password file in/etc/nginx/passwd, with owner and group set to root, and a name and password, and a mode of 0640.QuestionHow does your final configuration look?
@@ -7,6 +7,15 @@
         name: galaxy
         state: restarted
   pre_tasks:
+    - pip:
+        name: passlib
+    - htpasswd:
+        path: /etc/nginx/passwd
+        name: user1        # Pick a username
+        password: changeme # and a password
+        owner: www-data    # nginx on centos
+        group: root
+        mode: 0640
     - name: Install Dependencies
       package:
         name: ['git', 'make', 'python3-psycopg2', 'virtualenv']
Galaxy needs to be instructed to expect authentication to come from the upstream proxy. In order to do this, set the following two options in your Galaxy group variables:
... galaxy_config: galaxy: ... use_remote_user: true remote_user_maildomain: "{{ inventory_hostname }}" remote_user_secret: SOME_SECRET_STRINGYou don’t need to make the above changes for Galaxy then.
Set the
remote_user_maildomainoption to the appropriate domain name for your site.- Run the playbook
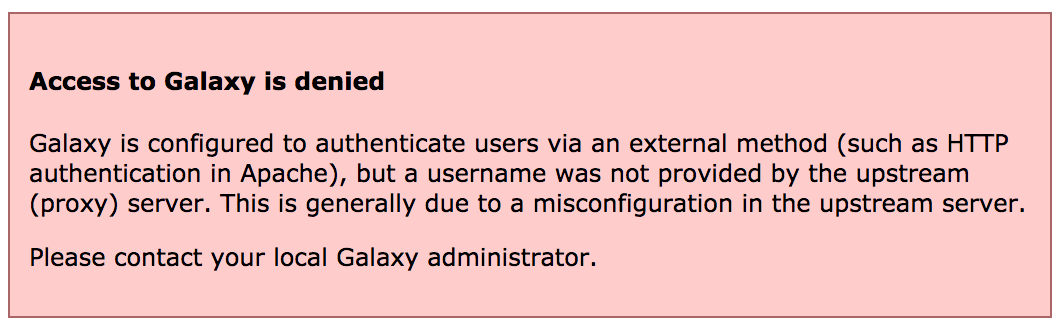
Comment: Access deniedIf you see this message, it is because nginx is not correctly sending the
REMOTE_USERor theGX_SECRETvalues.
Testing
You should now be presented with a password dialog when attempting to load the Galaxy UI.
Hands On: Testing
Log in using the username and password you provided when creating the
passwdfile. If your username and the value ofremote_user_maildomainmatch an existing user, you will be logged in to that account. If not, a new account will be created for that user.Click on the “User” menu at the top, to see how the username appears.
Note that some user features are not available when remote user support is enabled.
Try logging out by selecting User -> Logout. You will discover that when returning to the user interface, you are still logged in. This is because Galaxy has no way of logging you out of the proxy’s authentication system. Instead, you should set
remote_user_logout_hrefingalaxy.ymlto point to the URL of your authentication system’s logout page.
API access
If you wish your Galaxy to be accessible to command line clients (e.g. bioblend, blend4j, parsec), you will need to add an exception for authentication on the API. Galaxy will still be secure and protected, but non-browser access will be permitted with an API key.
location /api/ {
    satisfy any;
    allow all;
}
There is no built-in way to be notified if users are registered, with external authentication or built-in. However, you could automate this easily. There is a gxadmin command we use called
gxadmin query latest-userswhich Björn uses often. Other sites have other methods, e.g. Nicola’s cron script which runs daily on his server, to add new users to a group according to their email domain name.
Reverting
We don’t want to leave Galaxy this way for the rest of our workshop.
Hands On: Reverting the changes
Edit your group variables file and comment out:
- the NGINX changes
use_remote_user: trueRun the playbook
You've Finished the Tutorial
Key points
Remote auth is not complex to set up and can help you meet institutional requirements
Frequently Asked Questions
Have questions about this tutorial? Have a look at the available FAQ pages and support channelsFeedback
Did you use this material as an instructor? Feel free to give us feedback on how it went.
Did you use this material as a learner or student? Click the form below to leave feedback.

Citing this Tutorial
- Nate Coraor, Nicola Soranzo, Helena Rasche, External Authentication (Galaxy Training Materials). https://training.galaxyproject.org/training-material/topics/admin/tutorials/external-auth/tutorial.html Online; accessed TODAY
- Hiltemann, Saskia, Rasche, Helena et al., 2023 Galaxy Training: A Powerful Framework for Teaching! PLOS Computational Biology 10.1371/journal.pcbi.1010752
- Batut et al., 2018 Community-Driven Data Analysis Training for Biology Cell Systems 10.1016/j.cels.2018.05.012
Congratulations on successfully completing this tutorial!@misc{admin-external-auth, author = "Nate Coraor and Nicola Soranzo and Helena Rasche", title = "External Authentication (Galaxy Training Materials)", year = "", month = "", day = "", url = "\url{https://training.galaxyproject.org/training-material/topics/admin/tutorials/external-auth/tutorial.html}", note = "[Online; accessed TODAY]" } @article{Hiltemann_2023, doi = {10.1371/journal.pcbi.1010752}, url = {https://doi.org/10.1371%2Fjournal.pcbi.1010752}, year = 2023, month = {jan}, publisher = {Public Library of Science ({PLoS})}, volume = {19}, number = {1}, pages = {e1010752}, author = {Saskia Hiltemann and Helena Rasche and Simon Gladman and Hans-Rudolf Hotz and Delphine Larivi{\`{e}}re and Daniel Blankenberg and Pratik D. Jagtap and Thomas Wollmann and Anthony Bretaudeau and Nadia Gou{\'{e}} and Timothy J. Griffin and Coline Royaux and Yvan Le Bras and Subina Mehta and Anna Syme and Frederik Coppens and Bert Droesbeke and Nicola Soranzo and Wendi Bacon and Fotis Psomopoulos and Crist{\'{o}}bal Gallardo-Alba and John Davis and Melanie Christine Föll and Matthias Fahrner and Maria A. Doyle and Beatriz Serrano-Solano and Anne Claire Fouilloux and Peter van Heusden and Wolfgang Maier and Dave Clements and Florian Heyl and Björn Grüning and B{\'{e}}r{\'{e}}nice Batut and}, editor = {Francis Ouellette}, title = {Galaxy Training: A powerful framework for teaching!}, journal = {PLoS Comput Biol} }