Working with Beacon V2: A Comprehensive Guide to Creating, Uploading, and Searching for Variants with Beacons
| Author(s) |
|
| Reviewers |
|
OverviewQuestions:
Objectives:
What does the term “Beacon” refer to?
How can MongoDB be employed to establish a Beacon tailored for your institution?
In what manner can variant data and metadata be readied into a format compatible with Beacons?
What are the steps involved in importing data into a Beacon seamlessly?
How does one perform queries on a Beacon to retrieve information about variants?
Requirements:
Comprehend the fundamental concepts and applications of Beacons
Apply skills in utilizing MongoDB to construct and manage Beacons
Analyze and transform variants and metadata into structures compatible with Beacon requirements
Execute a step-by-step process to import data into Beacons
Develop the ability to query Beacons for variants
- Introduction to Galaxy Analyses
- slides Slides: Quality Control
- tutorial Hands-on: Quality Control
- slides Slides: Mapping
- tutorial Hands-on: Mapping
- The Unix Shell
- Version Control with Git
- tutorial Hands-on: Querying the University of Bradford GDC Beacon Database for Copy Number Variants (CNVs)
Time estimation: 2 hoursLevel: Advanced AdvancedSupporting Materials:Published: Aug 6, 2024Last modification: Jan 12, 2026License: Tutorial Content is licensed under Creative Commons Attribution 4.0 International License. The GTN Framework is licensed under MITpurl PURL: https://gxy.io/GTN:T00449rating Rating: 5.0 (0 recent ratings, 1 all time)version Revision: 4
Beacon v2 is a data query protocol and API that allows the researcher to seek information about specific genomic variants of biomedical research and clinical applications from the data providers (Beacon provider) without accessing the original or the whole dataset Rambla et al. 2022. The protocol was developed by the Global Alliance for Genomics and Health (GA4GH) in 2021 as an update for the former Beacon v1. The second version of Beacon comes with additional features that provide users with more detailed information about the queried variants. Unlike the previous version, which only returned a Yes or No response indicating the presence of variants, Beacon v2 presents comprehensive results about the variants being searched. Rueda et al. 2022.
The Beacon v2 comprises two main parts, the framework and the models. The framework specifies how the requests and responses should be formatted, while the models determine the organization of the biological data response Rueda et al. 2022.
MongoDB is a versatile, document-oriented NoSQL database that provides flexibility and scalability for modern applications, allowing developers to efficiently manage and query unstructured data.
MongoDB databases are created with different security levels. This controls accessing the Beacon through the import and query processes. There are three security levels for Beacon. Public, registered and controlled, in our import and query tools, we have classified them into public and authenticated.
| Security Level | Description |
|---|---|
| Public | Beacon can be accessed by any request |
| Registered | Only known users can access the data |
| Controlled | Only specifically granted users can access the data |
The Beacon data is divided into two parts: the Metadata and Genomic variants. The metadata is initially saved in different formats like Excel, CSV, etc., while the Genomic variations are kept in VCF files. So, before creating a Beacon database for them, the Beacon providers must prepare the data in JSON, also known as Beacon-friendly format (BFF). This can be done by extracting the required information from those files following the Beacon schemas. The Beacon providers can use already developed tools such as the B2RI tools or develop their own tools.
For this tutorial, we will show the steps to create a Beacon and query it for the HG00096 biosample structural variants VCF file obtained from the 1000 Genome project using scripts created by The University of Bradford Computational and Data-Driven Science research team.
AgendaIn this tutorial, we will cover:
Create Beacon protocol using MongoDB
The institution that provides the Beacon creates a customized Beacon according to its specific requirements. The Beacon can be made open access or private. For this training, we will create a private access Beacon. This Beacon will have administrative user rights to modify it, and an additional account dedicated solely to querying the database.
We will use docker and docker-compose for this step. If you don’t have it installed, please follow this documentation to install it
Hands On: Create Beacon Database on MongoDB
- Create a directory in your local environment and name it as
beaconmkdir beacon- Change your location to the created directory
cd beacon- Use any text editor you are comfortable with to create a new YAML file and name it
docker-compose.yamlnano docker-compose.yaml- Copy the text below into the
docker-compose.yamlfileversion: '3.6' services: mongo-client: image: mongo:3.6 restart: unless-stopped volumes: - ./mongo/db:/data/db - ./mongo-init:/docker-entrypoint-initdb.d ports: - "27017:27017" environment: MONGO_INITDB_ROOT_USERNAME: root MONGO_INITDB_ROOT_PASSWORD: example mongo-express: image: mongo-express restart: unless-stopped environment: - ME_CONFIG_MONGODB_SERVER=mongo-client - ME_CONFIG_MONGODB_PORT=27017 - ME_CONFIG_BASICAUTH_USERNAME=root - ME_CONFIG_BASICAUTH_PASSWORD=example ports: - "8081:8081" mongo-init: image: mongo:3.6 restart: "no" depends_on: - mongo-client environment: - MONGO_INITDB_DATABASE=admin - MONGO_INITDB_ROOT_USERNAME=root - MONGO_INITDB_ROOT_PASSWORD=example volumes: - ./mongo-init:/docker-entrypoint-initdb.d- Create the path
mongo/dbin your directory using$mkdirtoolmkdir mongo mkdir mongo/dbYou can change the name of that bath, but you have to change that also from the docker-compose.yaml file. We have everything ready for creating the MongoDB server hosted in the docker container. This will create a Beacon database with admin access. Next, we will add users.
- Create another directory in your mongo-init directory and name it as
mongo-initmkdir mongo-init- Change your location to the created directory
cd mongo-init- Use any text editor you are comfortable with to create a new JS file and name it
create-user.jsnano create-user.js- Copy the text below into the
create-user.jsfile// create_user.js // Connect to the admin database var adminDB = db.getSiblingDB("admin"); // Create a new user with read-only access to all databases adminDB.createUser({ user: "query_user", pwd: "querypassword", roles: [ { role: "read", db: "admin" }, { role: "read", db: "Beacon" }, // Adjust this for your needs // Add additional read roles as needed ] });This will add a user (user name:
query_userand password:querypassword) account with read-only permission to the Beacon database. This is important to avoid unwanted modifications to the Beacon database. To know more about MongoDB, please read the MongoDB documentation.- Run the command
$docker-composein the directory containing thedocker-compose.yamlfile with the specified parameters.docker-compose up -dThis will create an empty MongoDB server where we can add the Beacon database or any additional databases.
- Check the created docker containers and test if the created docker container is running
docker psThis will generate a message similar to the text below
CONTAINER ID IMAGE COMMAND CREATED STATUS PORTS NAMES 96d7886f9cdb mongo:3.6 "docker-entrypoint.s…" 5 weeks ago Up 5 weeks 27017/tcp mongo-init_mongo-init_1 1bb520888fbf mongo:3.6 "docker-entrypoint.s…" 5 weeks ago Up 5 weeks 0.0.0.0:27017->27017/tcp, :::27017->27017/tcp mongo-init_mongo-client_1 a148fb3db385 mongo-express "/sbin/tini -- /dock…" 5 weeks ago Restarting (1) 9 seconds ago mongo-init_mongo-express_1- Test docker to see if it is running by using
$docker execcommanddocker exec -it <mongo-client> bash #If the docker image for the Mongo was installed with a different name, Change the name in <mongo-client>This will take lunsh the docker container. Use
ctrl + dto quit.
Comment: Create B2RI V2 Beacon ProtocoleClone to the beacon2-ri-tools-v2 GitHub repository and follow the instructions to build the beacon protocols, and use additional tools needed for preprocessing the data and metadata
Data Preparation
Upload the data into Galaxy and prepare it to be imported into the Beacon database. The datasets were obtained from 1000genomes-dragen.
| Name | Format | Data size (MB) |
|---|---|---|
| HG00096.cnv.vcf | vcf | HG00096.cnv.vcf KB |
| igsr-1000-genomes-30x-on-grch38.tsv | tsv | 405.7 KB |
Get data
Hands On: Data upload
For this tutorial, make a new history.
To create a new history simply click the new-history icon at the top of the history panel:
- Click on galaxy-pencil (Edit) next to the history name (which by default is “Unnamed history”)
- Type the new name
- Click on Save
- To cancel renaming, click the galaxy-undo “Cancel” button
If you do not have the galaxy-pencil (Edit) next to the history name (which can be the case if you are using an older version of Galaxy) do the following:
- Click on Unnamed history (or the current name of the history) (Click to rename history) at the top of your history panel
- Type the new name
- Press Enter
Import the data files from Zenodo:
https://zenodo.org/records/10658688/files/HG00096.cnv.vcf
https://zenodo.org/records/10658688/files/igsr-1000-genomes-30x-on-grch38.tsv
This will download the structural variant and the metadata file.
In some cases, the same datasets are available in the Galaxy shared data library. Please consult the instructor for further details.
Alternatively, the datasets can be downloaded from local storage.
- Copy the link location
Click galaxy-upload Upload at the top of the activity panel
- Select galaxy-wf-edit Paste/Fetch Data
Paste the link(s) into the text field
Change Type (set all): from “Auto-detect” to
json/tabularPress Start
- Close the window
As an alternative to uploading the data from a URL or your computer, the files may also have been made available from a shared data library:
- Go into Libraries (left panel)
- Navigate to the correct folder as indicated by your instructor.
- On most Galaxies tutorial data will be provided in a folder named GTN - Material –> Topic Name -> Tutorial Name.
- Select the desired files
- Click on Add to History galaxy-dropdown near the top and select as Datasets from the dropdown menu
In the pop-up window, choose
- “Select history”: the history you want to import the data to (or create a new one)
- Click on Import
Provide meaningful names for the data (HG00096 for VCF file and Metadata to igsr-1000-genomes-30x-on-grch38.tsv) and tags to facilitate analysis.
When uploading data from a link, Galaxy names the files after the link address. It might be useful to change or modify the name to something more meaningful.
- Click on the galaxy-pencil pencil icon for the dataset to edit its attributes
- In the central panel, change the Name field
- Click the Save button
To track the data in the history, it is recommended to tag the datasets by attaching a meaningful tag ‘#’ to them. The tagging will automatically be attached to any file generated from the original tagged dataset. e.g.,
#genomicVariationsfor structural variants VCF file and e.g.,#individualsmetadata tsv file.Datasets can be tagged. This simplifies the tracking of datasets across the Galaxy interface. Tags can contain any combination of letters or numbers but cannot contain spaces.
To tag a dataset:
- Click on the dataset to expand it
- Click on Add Tags galaxy-tags
- Add tag text. Tags starting with
#will be automatically propagated to the outputs of tools using this dataset (see below).- Press Enter
- Check that the tag appears below the dataset name
Tags beginning with
#are special!They are called Name tags. The unique feature of these tags is that they propagate: if a dataset is labelled with a name tag, all derivatives (children) of this dataset will automatically inherit this tag (see below). The figure below explains why this is so useful. Consider the following analysis (numbers in parenthesis correspond to dataset numbers in the figure below):
- a set of forward and reverse reads (datasets 1 and 2) is mapped against a reference using Bowtie2 generating dataset 3;
- dataset 3 is used to calculate read coverage using BedTools Genome Coverage separately for
+and-strands. This generates two datasets (4 and 5 for plus and minus, respectively);- datasets 4 and 5 are used as inputs to Macs2 broadCall datasets generating datasets 6 and 8;
- datasets 6 and 8 are intersected with coordinates of genes (dataset 9) using BedTools Intersect generating datasets 10 and 11.
Now consider that this analysis is done without name tags. This is shown on the left side of the figure. It is hard to trace which datasets contain “plus” data versus “minus” data. For example, does dataset 10 contain “plus” data or “minus” data? Probably “minus” but are you sure? In the case of a small history like the one shown here, it is possible to trace this manually but as the size of a history grows it will become very challenging.
The right side of the figure shows exactly the same analysis, but using name tags. When the analysis was conducted datasets 4 and 5 were tagged with
#plusand#minus, respectively. When they were used as inputs to Macs2 resulting datasets 6 and 8 automatically inherited them and so on… As a result it is straightforward to trace both branches (plus and minus) of this analysis.More information is in a dedicated #nametag tutorial.


Convert the Genomic Variants VCF file into JSON
This step is to preprocess the genomic variant data and convert it from VCF to JSON.
Hands On: Convert the Genomic Variants VCF file into JSON
- Run CNV VCF2JSON ( Galaxy version 1.1.0+galaxy0.1) on the structural variants VCF file
- param-files “CNV VCF file”:
HG00096fileInspect the JSON output produced by the tool
QuestionIn the inspected JSON file, what are the key variables and why are they important for genomic analysis?
biosampleId: This variable represents the unique identifier for the biological sample being analyzed. Understanding the biosample allows researchers to trace the origins of the genetic data and contextualize its relevance within a specific study or experiment.
assemblyId: The assemblyId denotes the reference genome assembly against which the genetic variants are aligned. This is crucial for ensuring consistency and accuracy in genomic analyses, as different assemblies may produce varying results.
variantInternalId: This identifier specifies the genomic location and type of the variant, providing a standardized format for referencing genetic variations. It enables researchers to precisely locate and identify specific genetic alterations within the genome.
variantType: The variantType indicates the type of genetic variant being described, such as deletion (DEL), insertion (INS), or substitution (SNP). Understanding the variant type is essential for interpreting its potential impact on gene function and phenotype.
variantId: This variable serves as a unique identifier for the variant, often referencing external databases or ontologies. It facilitates data integration and interoperability across different genomic datasets and analysis platforms.
start and end: These values specify the genomic coordinates of the variant, delineating its precise location within the reference genome. Knowing the start and end positions is crucial for accurately defining the boundaries of the variant and assessing its potential functional consequences.
referenceName: The referenceName indicates the chromosome or genomic contig on which the variant is located. It provides crucial contextual information for interpreting the genomic coordinates and understanding the genetic context of the variant.
info: This section contains additional information related to the variant, such as legacy identifiers, copy number counts (cnCount), and copy number values (cnValue). These supplementary details can provide insights into the structural and functional implications of the variant within the genome.
Understanding these key variables is essential for conducting effective genomic analyses, as they provide critical information about the genetic variants under investigation and enable researchers to interpret their biological significance accurately.
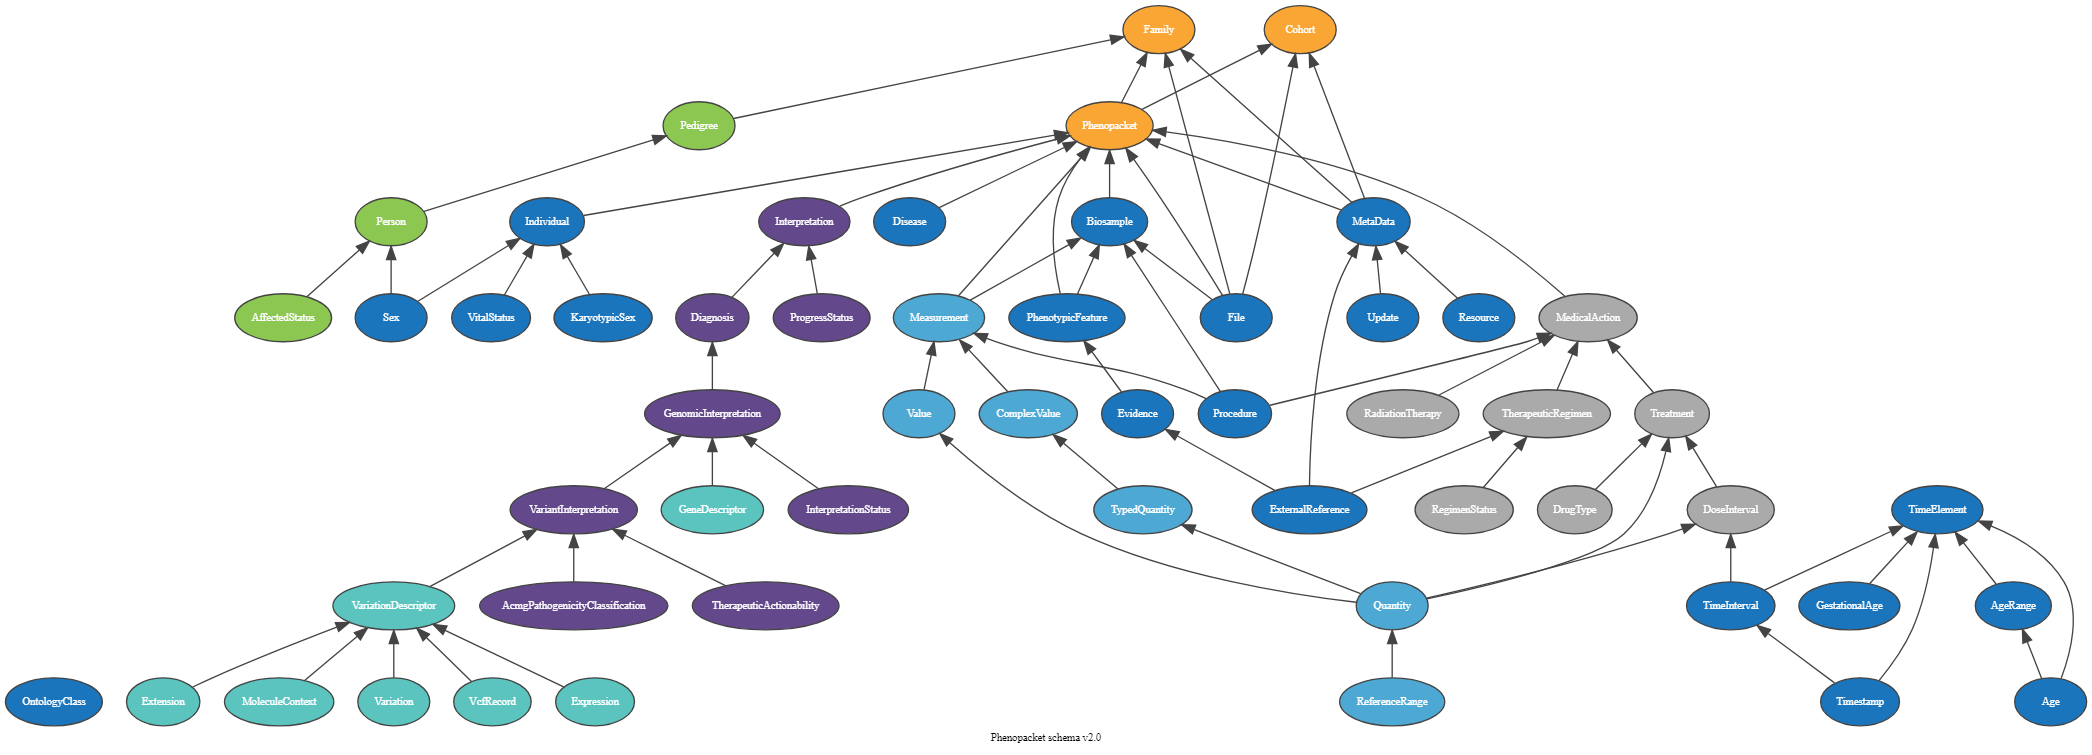
Phenopacket Schema
The Phenopacket Schema is an open standard for exchanging disease and phenotypic data. It helps us understand, diagnose, and treat both common and unusual diseases. By using Phenopackets, physicians, biologists, and researchers can build more comprehensive disease models, connecting comprehensive phenotype descriptions with patient, disease, and genetic data. This enables better study of disease and drugs.
We are using the Biosamples phenopacket. A biological material unit from which the substrate molecules (genomic DNA, RNA, proteins, etc.) are extracted for molecular analyses (mass spectrometry, array hybridization, sequencing, etc.). Tissue biopsies, single cells from cultures used for single-cell genome sequencing, and protein fractions from gradient centrifugations are a few examples. The same Biosample may be referred to by many instances (e.g., technical replicates) or types of research (e.g., both RNA-seq and genomic array experiments).
 Open image in new tab
Hands On: Create Phenopacket Schema JSON file from Metadata
- Run CNV Phenopacket ( Galaxy version 1.0.2+galaxy0) on the structural variants VCF file
- param-files “Metadata file”:
MetadatafileInspect the JSON output produced by the tool
QuestionIn the inspected JSON file, what are the key variables and why are they important for genomic analysis?
id: The id field serves as a unique identifier for the individual described in the Phenopacket. This Identifier allows researchers to track and reference specific individuals across different datasets and analyses.
individualId: This variable represents the individual’s unique identifier within the dataset or study. It helps maintain data integrity and consistency by ensuring accurate identification of the individual across various analyses and datasets.
sex: The sex field specifies the biological sex of the individual, providing important demographic information for genomic analyses. Understanding the individual’s sex is crucial for interpreting genetic variations and assessing their potential relevance to sex-specific traits or diseases.
description: This field provides additional information about the individual, such as their participation in specific genomic projects or studies. It offers context for the individual’s genomic data and helps researchers understand the sources and potential biases of the data.
procedure: The procedure field contains information about the procedures or protocols used to generate the genomic data associated with the individual. This includes codes or identifiers that reference specific methodologies or experimental protocols, ensuring transparency and reproducibility in genomic analyses.
files: This section contains details about the genomic data files associated with the individual. It includes information such as file identifiers and attributes like the data format (htsFormat) and genome assembly (genomeAssembly). Understanding these file attributes is essential for accessing and interpreting the individual’s genomic data effectively.
htsFormat: The htsFormat field specifies the format of the genomic data files, such as Variant Call Format (VCF). Knowing the data format is crucial for selecting appropriate analysis tools and pipelines and ensuring compatibility with downstream analysis workflows.
genomeAssembly: This variable denotes the reference genome assembly used for aligning and interpreting the individual’s genomic data. It ensures consistency and accuracy in genomic analyses by specifying the genomic reference against which genetic variants are annotated and interpreted.
By understanding these key variables in the Phenopacket schema, researchers can effectively interpret and analyze the genomic profile of the individual described, facilitating insights into genetic variations and their potential implications for health and disease.
Import data into Beacon MongoDB
Now that the data are in the Beacon proper format and with creating the Beacon MongoDB server, we are ready to import the data we have into Beacon.
We will use the Beacon2 import tool to import the data into the created Beacon database.
Comment: Use Credentials to Access Specific Beacon
- Make sure you are logged in to Galaxy.
- Go to User > Preferences in the top menu bar.
- To add beacon database credentials, click on Manage Information and fill in the Beacon2 Account empty fields
db_auth_source,db_useranddb_password.- Make the changes and click the Save button at the bottom.
Hands On: Import data into Beacon MongoDB
- Use Beacon2 Import ( Galaxy version 2.1.1+galaxy0) to import genomic variant file Beacon database
- param-file “INPUT JSON FILE”:
Output dataset 'HG00096'from CNV VCF2JSON ( Galaxy version 1.1.o+galaxy0.1)- “DATABASE HOST”:
The Hostname/IP of the Beacon databasefor example20.108.51.167- “DATABASE PORT”:
27017- “DATABASE”:
beacon- “COLLECTION”:
genomicVariations
- When you run the tool for the first time, it will create a new database named Beacon and a collection named genomicVariations on MongoDB. It will then upload the data from the HG00096 JSON file into the genomicVariations collection.
- If you use the same database name and collection name again, it will append the data to the collection. There is an option to clear all or specific collections before uploading the data, but be careful, as deleting is permanent.
- Always remember to back up important data before making any deletions.
- Use Beacon2 Import ( Galaxy version 2.1.1+galaxy0) to import phenopacket file into the created Beacon database
- param-file “INPUT JSON FILE”:
Output dataset 'Phenopacket'from CNV Phenopacket ( Galaxy version 1.0.2+galaxy0)- “DATABASE HOST”:
The Hostname/IP of the Beacon databasefor example20.108.51.167- “DATABASE PORT”:
27017- “DATABASE”:
beacon- “COLLECTION”:
individuals
Search Beacon MongoDB for CNVs
In the last step, we imported the data into the Beacon. Now, we will query the database to look for the samples that match our query.
We are looking to see if there is a deletion mutation in the gene located in chromosome 1, which starts at 58278107 and ends at 58279217.
Hands On: Query the Beacon MongoDB
- Use Beacon2 CNV ( Galaxy version 2.1.1+galaxy0) to perform a range query on Beacon genomicVariations collection
- “DATABASE HOST”:
The Hostname/IP of the Beacon databasefor example20.108.51.167- “DATABASE PORT”:
27017- “DATABASE”:
beacon- “COLLECTION”:
genomicVariations- “CHROMOSOME”:
1- “START”:
243618689- “END”:
243620819- “VARIANT STATE ID”:
EFO:0030068The srarch function will queiry the Beacon database and print out the resutls that matches our quiery specifications. In this case it will print something like this.{'_id': ObjectId('6690160a3a936e8e0a7828e2'), 'assemblyId': 'GRCh38', 'biosampleId': 'HG00096', 'definitions': {'Location': {'chromosome': '1', 'end': 243620819, 'start': 243618689}}, 'id': 'refvar-6690160a3a936e8e0a7828e2', 'info': {'cnCount': 1, 'cnValue': 0.422353, 'legacyId': 'DRAGEN:LOSS:chr1:243618690-243620819'}, 'updated': '2024-07-11T17:26:27.265115', 'variantInternalId': 'chr1:243618689-243620819:EFO:0030068', 'variantState': {'id': 'EFO:0030068', 'label': 'low-level loss'}}When sharing a Beacon protocol, it is important to provide users with read-only access to query the Beacon database. Creating read-only users for Beacon-providing institutions helps prevent unwanted data overwrites that can occur by mistake.
QuestionWhat dose variantId “EFO:0030068” means?
EFO:0030069 is a term used to describe the low-level loss. The term was set by the CNV community. For more information go to the CNV annotation formats
Conclusion
Now, you have a general knowledge of Beacon and MongoDB and how to create your own Beacon and upload your data.
You can apply what you learned in this tutorial to create a Beacon query for your institution’s genomic variant data.
For more information about how to query Beacon databases, please look into pymongo documentation.
We hope you find this tutorial helpful!
You've Finished the Tutorial
Key points
Understanding Beacons involves grasping their definition and concept, recognizing their significance in efficient data management, and exploring diverse use cases for these essential data structures.
Mastering MongoDB for Beacon Creation entails familiarizing yourself with the MongoDB database system, acquiring the skills to construct Beacons for advancing institutional data management, and exploring tailored MongoDB features for efficient Beacon development.
Effective Data Preparation for Beacons entails mastering techniques for organizing variant data, ensuring proper formatting of metadata to meet Beacon requirements, and acknowledging the crucial role of well-prepared data in optimizing Beacon functionality.
Achieve seamless data importation into Beacons by following a comprehensive step-by-step guide, prioritizing data integrity throughout the process, and acquiring skills in effective troubleshooting and error handling.
Efficiently querying Beacons for variants involves mastering diverse querying methods, leveraging MongoDB’s capabilities to enhance search precision, and emphasizing the necessity for precise and efficient queries within Beacon structures.
Frequently Asked Questions
Have questions about this tutorial? Have a look at the available FAQ pages and support channelsUseful literature
Further information, including links to documentation and original publications, regarding the tools, analysis techniques and the interpretation of results described in this tutorial can be found here.
References
- Rambla, J., M. Baudis, R. Ariosa, T. Beck, L. A. Fromont et al., 2022 Beacon v2 and Beacon networks: A “lingua franca” for federated data discovery in biomedical genomics, and beyond. Human Mutation. 10.1002/humu.24369
- Rueda, M., R. Ariosa, M. Moldes, and J. Rambla, 2022 Beacon v2 Reference Implementation: a toolkit to enable federated sharing of genomic and phenotypic data (P. Robinson, Ed.). Bioinformatics 38: 4656–4657. 10.1093/bioinformatics/btac568
Feedback
Did you use this material as an instructor? Feel free to give us feedback on how it went.
Did you use this material as a learner or student? Click the form below to leave feedback.

Citing this Tutorial
- Khaled Jum'ah, Katarzyna Kamieniecka, Krzysztof Poterlowicz, Working with Beacon V2: A Comprehensive Guide to Creating, Uploading, and Searching for Variants with Beacons (Galaxy Training Materials). https://training.galaxyproject.org/training-material/topics/variant-analysis/tutorials/beaconise_1000hg/tutorial.html Online; accessed TODAY
- Hiltemann, Saskia, Rasche, Helena et al., 2023 Galaxy Training: A Powerful Framework for Teaching! PLOS Computational Biology 10.1371/journal.pcbi.1010752
- Batut et al., 2018 Community-Driven Data Analysis Training for Biology Cell Systems 10.1016/j.cels.2018.05.012
Congratulations on successfully completing this tutorial!@misc{variant-analysis-beaconise_1000hg, author = "Khaled Jum'ah and Katarzyna Kamieniecka and Krzysztof Poterlowicz", title = "Working with Beacon V2: A Comprehensive Guide to Creating, Uploading, and Searching for Variants with Beacons (Galaxy Training Materials)", year = "", month = "", day = "", url = "\url{https://training.galaxyproject.org/training-material/topics/variant-analysis/tutorials/beaconise_1000hg/tutorial.html}", note = "[Online; accessed TODAY]" } @article{Hiltemann_2023, doi = {10.1371/journal.pcbi.1010752}, url = {https://doi.org/10.1371%2Fjournal.pcbi.1010752}, year = 2023, month = {jan}, publisher = {Public Library of Science ({PLoS})}, volume = {19}, number = {1}, pages = {e1010752}, author = {Saskia Hiltemann and Helena Rasche and Simon Gladman and Hans-Rudolf Hotz and Delphine Larivi{\`{e}}re and Daniel Blankenberg and Pratik D. Jagtap and Thomas Wollmann and Anthony Bretaudeau and Nadia Gou{\'{e}} and Timothy J. Griffin and Coline Royaux and Yvan Le Bras and Subina Mehta and Anna Syme and Frederik Coppens and Bert Droesbeke and Nicola Soranzo and Wendi Bacon and Fotis Psomopoulos and Crist{\'{o}}bal Gallardo-Alba and John Davis and Melanie Christine Föll and Matthias Fahrner and Maria A. Doyle and Beatriz Serrano-Solano and Anne Claire Fouilloux and Peter van Heusden and Wolfgang Maier and Dave Clements and Florian Heyl and Björn Grüning and B{\'{e}}r{\'{e}}nice Batut and}, editor = {Francis Ouellette}, title = {Galaxy Training: A powerful framework for teaching!}, journal = {PLoS Comput Biol} }
You can use Ephemeris's
shed-tools installcommand to install the tools used in this tutorial.shed-tools install [-g GALAXY] [-a API_KEY] -t <(curl https://training.galaxyproject.org/training-material/api/topics/variant-analysis/tutorials/beaconise_1000hg/tutorial.json | jq .admin_install_yaml -r)Alternatively you can copy and paste the following YAML
---
install_tool_dependencies: true
install_repository_dependencies: true
install_resolver_dependencies: true
tools:
- name: cnv_phenopacket
  owner: iuc
  revisions: 61aad58c7b2d
  tool_panel_section_label: Variant Calling
  tool_shed_url: https://toolshed.g2.bx.psu.edu/
- name: cnv_vcf2json
  owner: iuc
  revisions: 7d2d2e3b9891
  tool_panel_section_label: Variant Calling
  tool_shed_url: https://toolshed.g2.bx.psu.edu/